


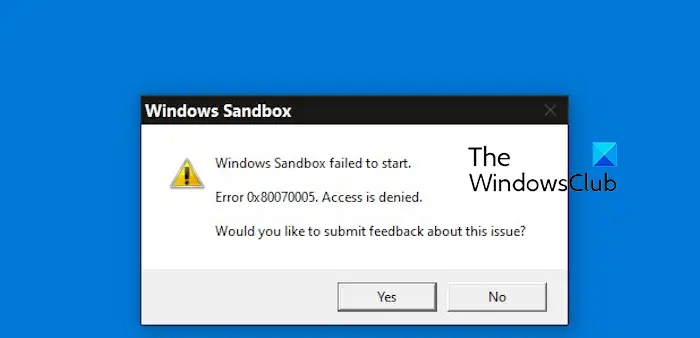
Does Windows Sandbox terminate with Windows Sandbox Unable to Start, Error 0x80070005, Access Denied message? Some users reported that Windows Sandbox cannot be opened. If you also encounter this error, you can follow this guide to fix it.
Windows Sandbox startup failed - Access Denied
If Windows Sandbox terminates with Windows Sandbox Unable to Start, Error 0x80070005, Access Denied message, make sure you are logged in as an administrator. This type of error is usually caused by insufficient permissions. So try logging in as an administrator and see if that resolves the issue. If the problem persists, you can try the following solutions:
1]Run Windows Sandbox as Administrator
Open Windows search, enter "sandbox", find the Windows Sandbox application, right-click and select the "Run as administrator" option to check whether the error is fixed.
2]Disable and then re-enable Windows Sandbox
Some users reported that disabling and re-enabling the Windows Sandbox feature resolved the issue. You can try the same thing and see if you can get rid of this error.
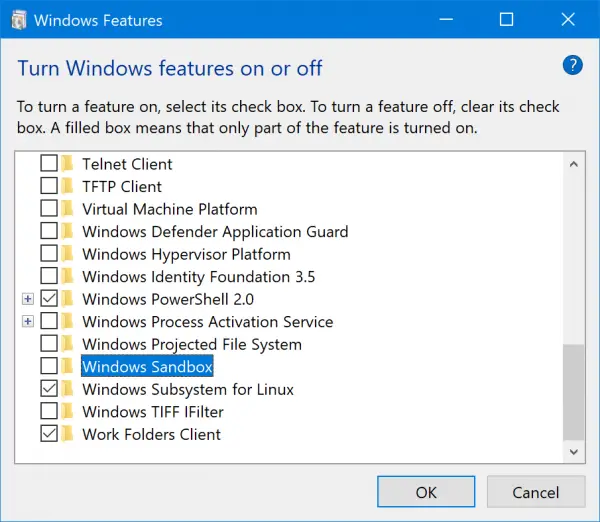
First, use Win R to open the Run command box, and then type optionalFeature in the Open box. Then, press the Enter button to open the Windows Features window.
Next, look for the Windows Sandbox feature and uncheck the checkbox associated with it to disable the feature. Then, press the OK button.
After that, restart your computer and open the Windows Functions window again.
Now, tick the Windows Sandbox checkbox to re-enable the feature and click the OK button. Check that the error has now stopped.
3] Make sure the relevant services are running
If the related service is not running or is idle, an error may pop up. So, if the scenario applies, you can start or restart the necessary services to fix the error. Here are the steps to achieve this:
First, use Win R to open the run command box and enter services.exe in its open box to quickly start the service application.
Now, scroll down to Hyper-V Remote Desktop Virtualization Service and double-click on it to open its properties.
In the properties window, press the Start button or click the Stop>Start button to restart the service.
Next, set the startup type to automatic.
Now, go to the Recovery tab and set the First Failure and Second Failure options to restart the service.
Afterwards, press the Apply&>OK button to save the changes.
Repeat the above steps for the following services as well:
- Hyper-V host.
- Hyper-V time synchronization.
- Virtual disk.
Hopefully you won't get the same error now.
The above is the detailed content of Windows Sandbox startup failed - Access Denied. For more information, please follow other related articles on the PHP Chinese website!

Hot AI Tools

Undress AI Tool
Undress images for free

Undresser.AI Undress
AI-powered app for creating realistic nude photos

AI Clothes Remover
Online AI tool for removing clothes from photos.

Clothoff.io
AI clothes remover

Video Face Swap
Swap faces in any video effortlessly with our completely free AI face swap tool!

Hot Article
Hot Tools

Notepad++7.3.1
Easy-to-use and free code editor

SublimeText3 Chinese version
Chinese version, very easy to use

Zend Studio 13.0.1
Powerful PHP integrated development environment

Dreamweaver CS6
Visual web development tools

SublimeText3 Mac version
God-level code editing software (SublimeText3)


 How to change the system display language for all users in Windows
Jul 31, 2025 am 08:18 AM
How to change the system display language for all users in Windows
Jul 31, 2025 am 08:18 AM
InstallthedesiredlanguagepackviaSettings→Time&Language→Language®ion,ensuring"SetasmyWindowsdisplaylanguage"isselected.2.Changethesystemdisplaylanguageinthesamemenuandrestart.3.OpenControlPanel→Region→Administrativetab,click"
 How to reset the Microsoft Store in Windows
Jul 31, 2025 am 08:23 AM
How to reset the Microsoft Store in Windows
Jul 31, 2025 am 08:23 AM
ResettheMicrosoftStoreviaSettingsbygoingtoApps>Installedapps,selectingMicrosoftStore,clickingAdvancedoptions,thenRepairandResetifneeded.2.Ifthatfails,re-registertheStoreusingPowerShellasadminwiththecommand:Get-AppXPackage-NameMicrosoft.WindowsStor
 How to reset the TCP/IP stack in Windows
Aug 02, 2025 pm 01:25 PM
How to reset the TCP/IP stack in Windows
Aug 02, 2025 pm 01:25 PM
ToresolvenetworkconnectivityissuesinWindows,resettheTCP/IPstackbyfirstopeningCommandPromptasAdministrator,thenrunningthecommandnetshintipreset,andfinallyrestartingyourcomputertoapplychanges;ifissuespersist,optionallyrunnetshwinsockresetandrebootagain
 How to install Windows on a Mac without Boot Camp
Jul 31, 2025 am 11:58 AM
How to install Windows on a Mac without Boot Camp
Jul 31, 2025 am 11:58 AM
Without BootCamp, installing Windows on Mac is feasible and works for different chips and needs. 1. First check compatibility: The M1/M2 chip Mac cannot use BootCamp, it is recommended to use virtualization tools; the Intel chip Mac can manually create a boot USB disk and install it in partition. 2. Recommended to use virtual machines (VMs) for M1 and above chip users: Windows ISO files, virtualization software (such as ParallelsDesktop or UTM), at least 64GB of free space, and reasonably allocate resources. 3. IntelMac users can manually install it by booting the USB drive: USB drive, WindowsISO, DiskU is required
 A guide to custom Windows installation options
Aug 01, 2025 am 04:48 AM
A guide to custom Windows installation options
Aug 01, 2025 am 04:48 AM
Choose"Custom:InstallWindowsonly(advanced)"forfullcontrol,asitallowsacleaninstallthatremovesoldissuesandoptimizesperformance.2.Duringsetup,managepartitionsbydeletingoldones(afterbackingupdata),creatingnewpartitions,formatting(usingNTFS),ors
 Step-by-step guide to installing Windows from an ISO file
Aug 01, 2025 am 01:10 AM
Step-by-step guide to installing Windows from an ISO file
Aug 01, 2025 am 01:10 AM
DownloadtheWindowsISOfromMicrosoft’sofficialsite.2.CreateabootableUSBusingMediaCreationToolorRufuswithaUSBdriveofatleast8GB.3.BootfromtheUSBbyaccessingthebootmenuoradjustingBIOS/UEFIsettings.4.InstallWindowsbyselectingcustominstallation,choosingtheco
 How to manage AppLocker policies in Windows
Aug 02, 2025 am 12:13 AM
How to manage AppLocker policies in Windows
Aug 02, 2025 am 12:13 AM
EnableAppLockerviaGroupPolicybyopeninggpedit.msc,navigatingtoApplicationControlPolicies,creatingdefaultrules,andconfiguringruletypes;2.Createcustomrulesusingpublisher,path,orhashconditions,preferringpublisherrulesforsecurityandflexibility;3.Testrules
 How to install Windows on a Mac
Jul 31, 2025 am 10:07 AM
How to install Windows on a Mac
Jul 31, 2025 am 10:07 AM
ForIntel-basedMacs,useBootCampAssistanttocreateadual-bootsystemwithWindowsbypreparingaUSBdrive,downloadingaWindowsISO,partitioningthedisk,andinstallingWindowsalongsidemacOSwithsupportdrivers.2.ForAppleSiliconMacs(M1/M2/M3),usevirtualizationsoftwareli
