

This is how to fix Windows 11 review license terms error
Apr 27, 2023 pm 11:46 PM
Windows 11 is Microsoft’s first major operating system upgrade in six years, and it’s seeing widespread adoption that users don’t want to miss.
Microsoft is making it even easier to get on the fast train by offering a free upgrade to Windows 10 users.
However, since Windows 11 is still relatively new and there are still many improvements expected, users have encountered some issues when upgrading from Windows 10.
One such issue is the Windows review license terms error, which is why you are reading this article here.
Don't worry, because you're about to find out how to solve this problem in three ways that actually work. All you need to do is follow the instructions in the letter and you'll be fine.
What are the requirements for Windows 11?
Before proceeding with the repair, you must know whether the system you want to upgrade meets Windows 11 requirements.
The following are the basic requirements specified by Microsoft:
- Processor: 1GHz speed or faster, 64-bit compatibility, 2 or more cores
- TPM : TPM 2.0
- System Memory: 4GB minimum
- Display: HD (720p), 9 inches minimum diagonal, 8 bits per color channel
- Storage Space: Minimum 64GB
- Graphics: Direct What can stop it from upgrading from Windows 10 to Windows 11.
- View the linked article to learn more about Windows 11 requirements, specifications, and supported devices.
1. Using Windows Troubleshooter Settings
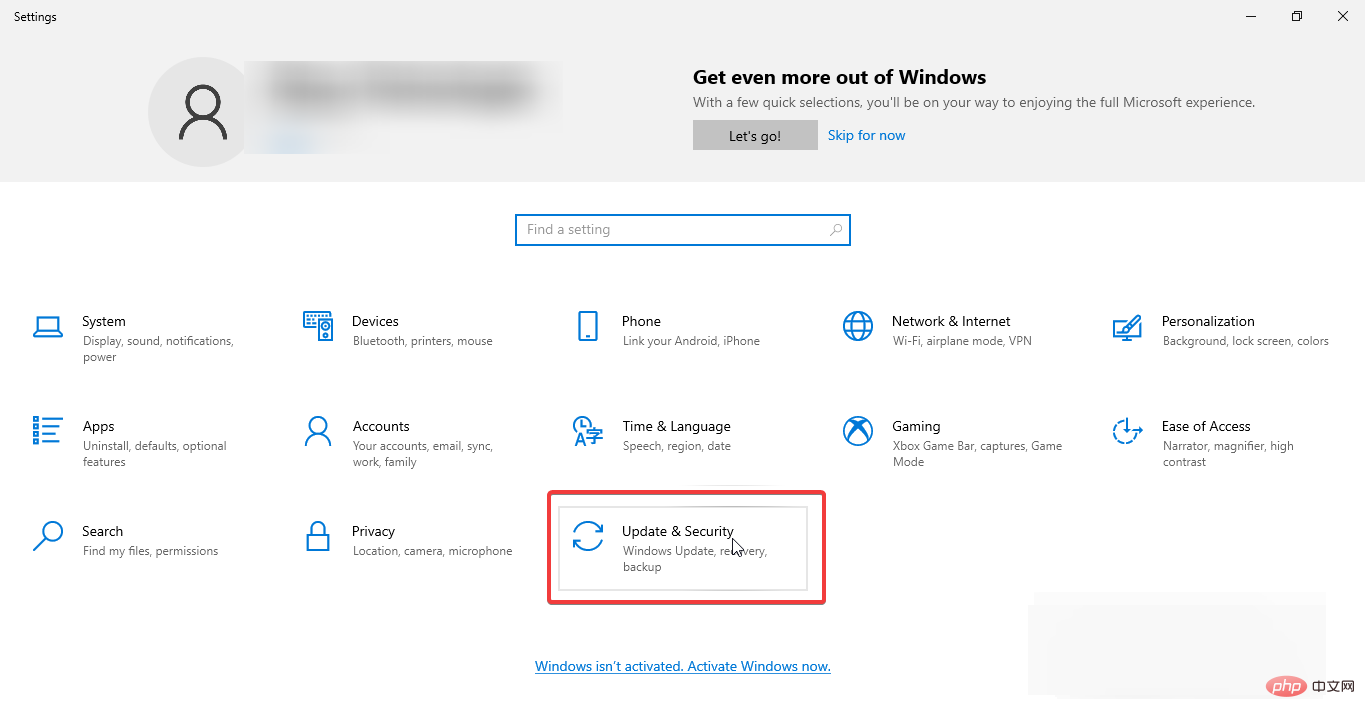
Press the Windows button and click the Settings icon.
- Select the Update & Security option.

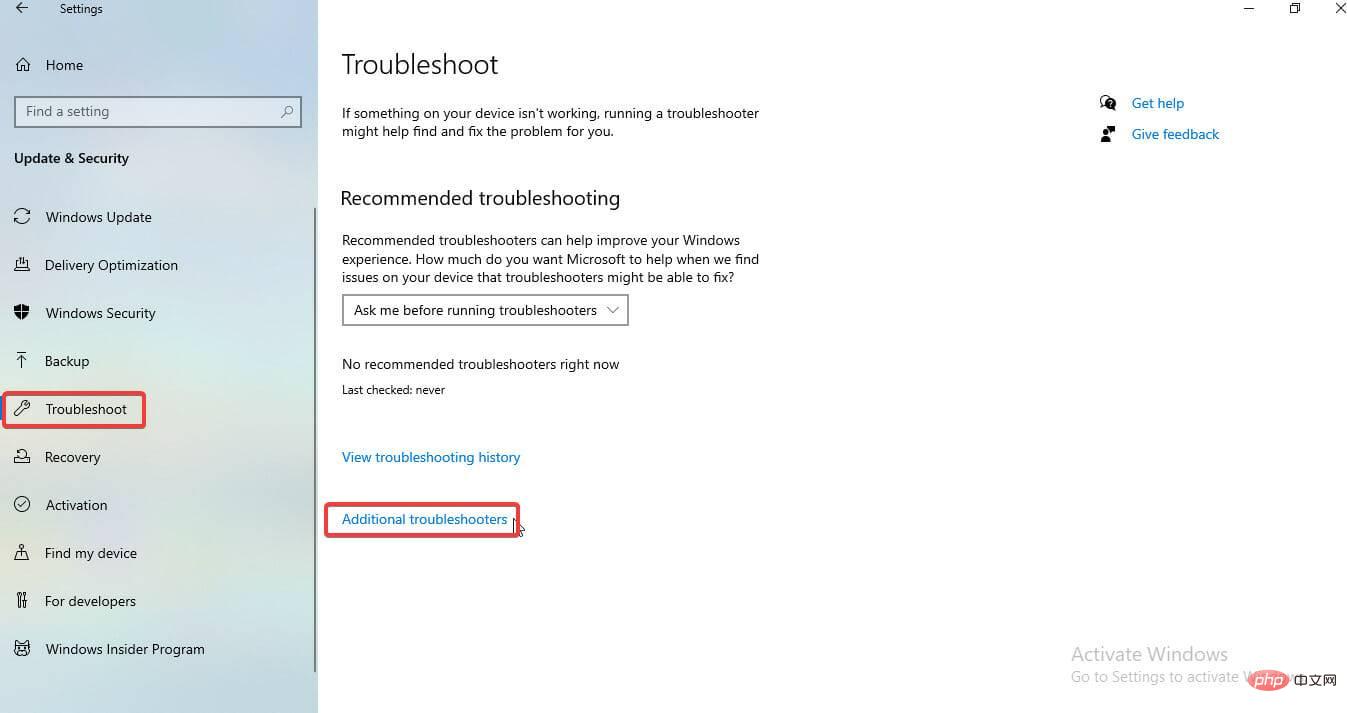
- Click the Troubleshooting option on the left plane, then click Additional Troubleshooting options.
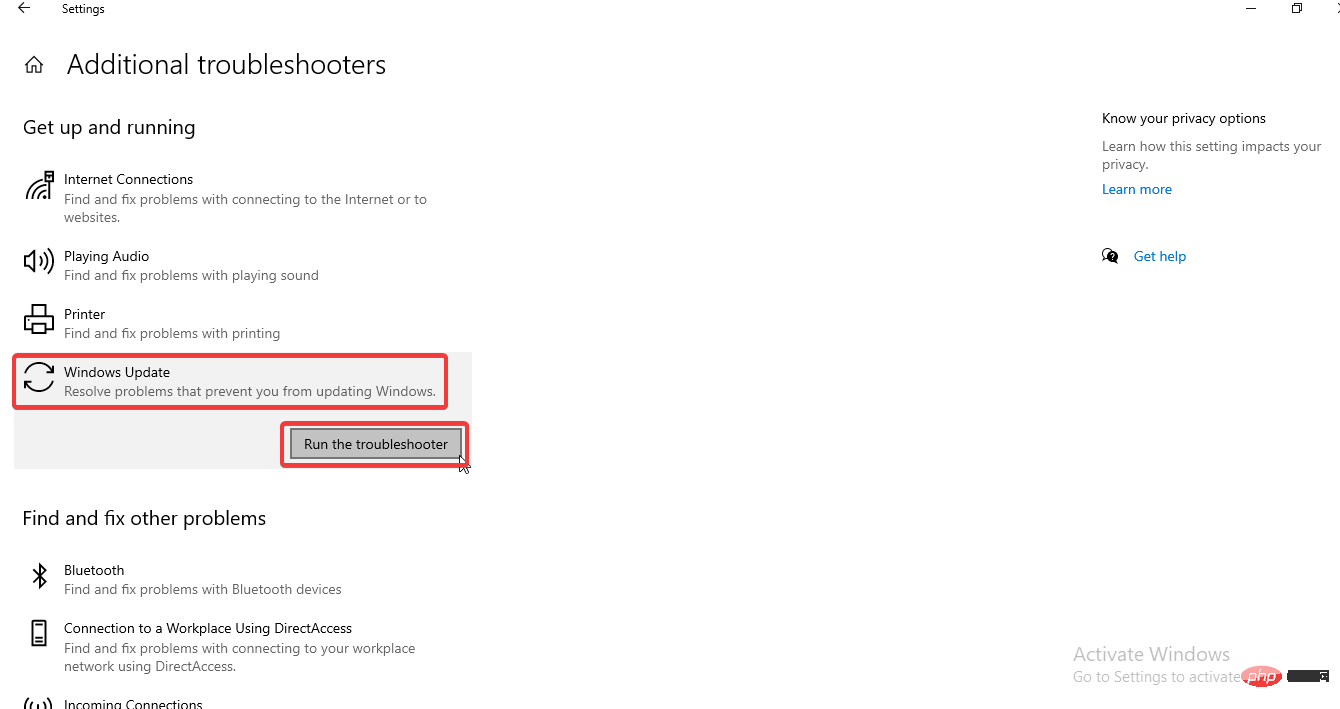
- Now, click on the Windows Update option and select Run the troubleshooter in the next window.
- Wait until the troubleshooting process is complete, restart your computer, and try the upgrade again. 2. Use dedicated repair tools
- Expert Tip:

 2. Use dedicated repair tools
Click here to download and start repairing.
Then, click on the "Start Repair" button and the repair process will begin and you will forget all these types of errors.?Get Recovery
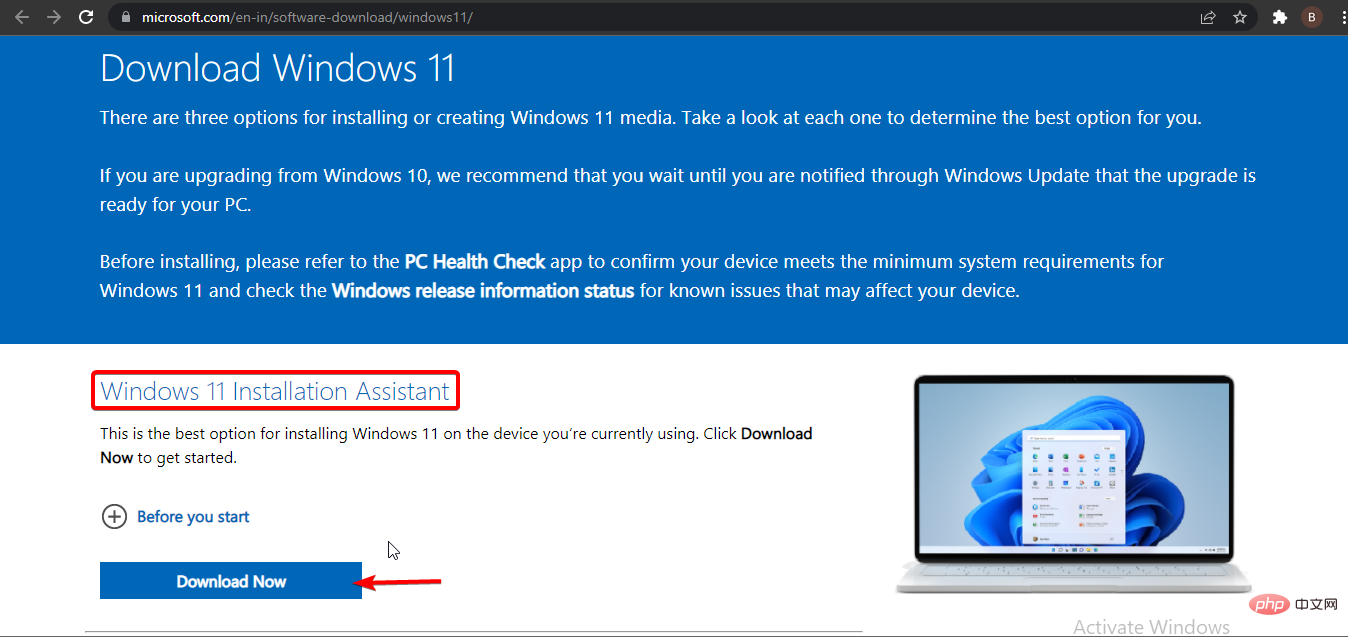
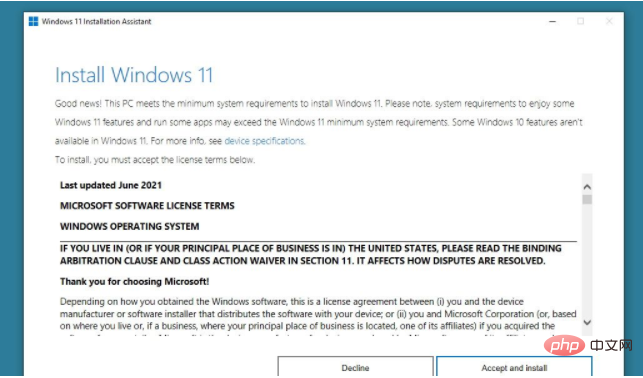
3. Use the Windows 11 Installation Assistant
- Go to the Windows 11 download page on Chrome or any browser.
- Find the Windows 11 Installation Assistant section and click the Download Now button.
- Once the download is complete, run the exe file and click "Yes" to allow it to make changes to your PC.
- If you have installed the PC Health Check application (an application that checks whether your system meets Windows 11 requirements) on your system, click the Accept and Install button. If not, download the app, check your system requirements, and then go back and refresh.
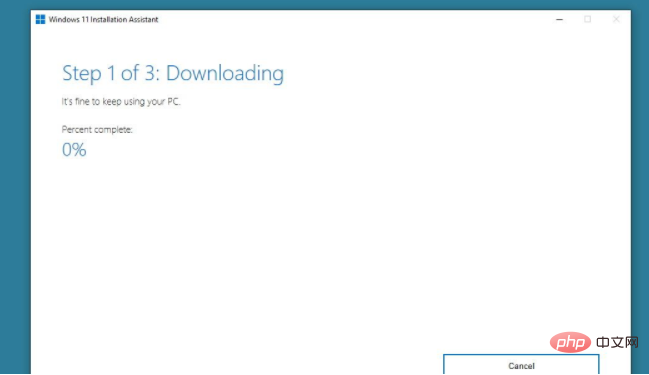
- From here, the Windows 11 Setup Assistant will begin downloading updates automatically.
- After the update is verified, it will start installing Windows 11 on your PC. Please note that you must save the project you are working on as your PC will automatically restart after the installation is complete.
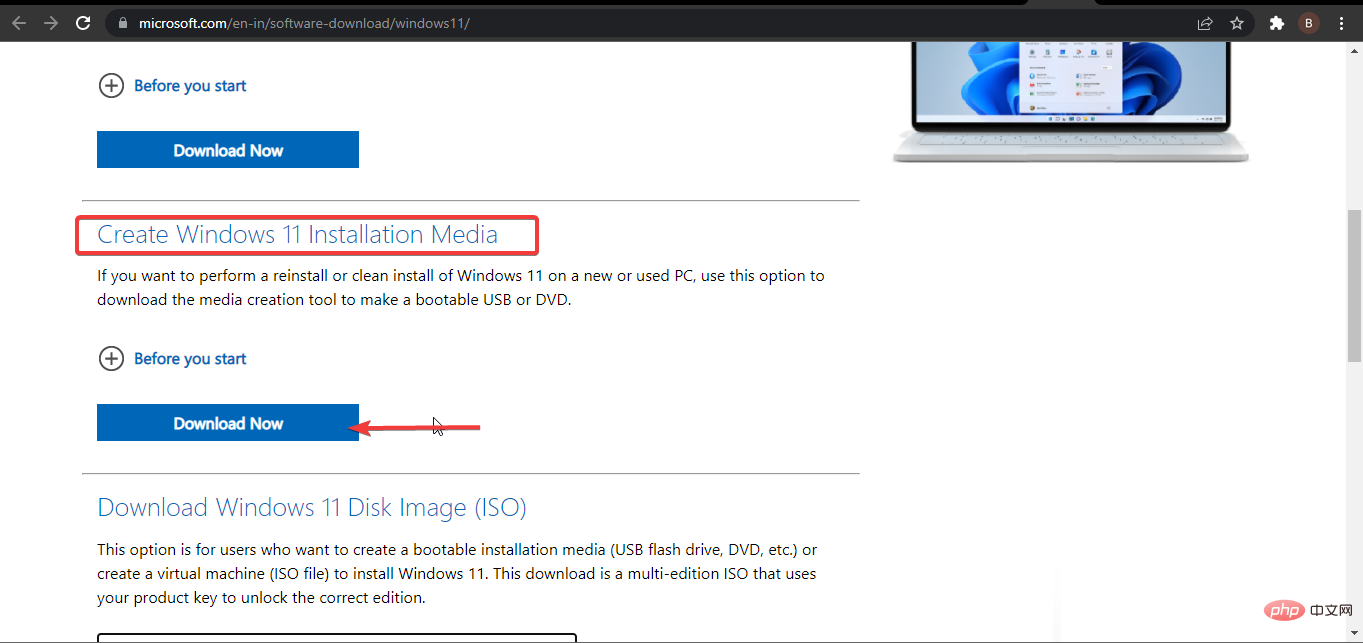
4. Using the Media Creation Tool
- On the Windows 11 download page, find the Windows Installation Media section and click the Download Now button.
- After the download is complete, run the exe file and accept the applicable notice and license terms in the next window.
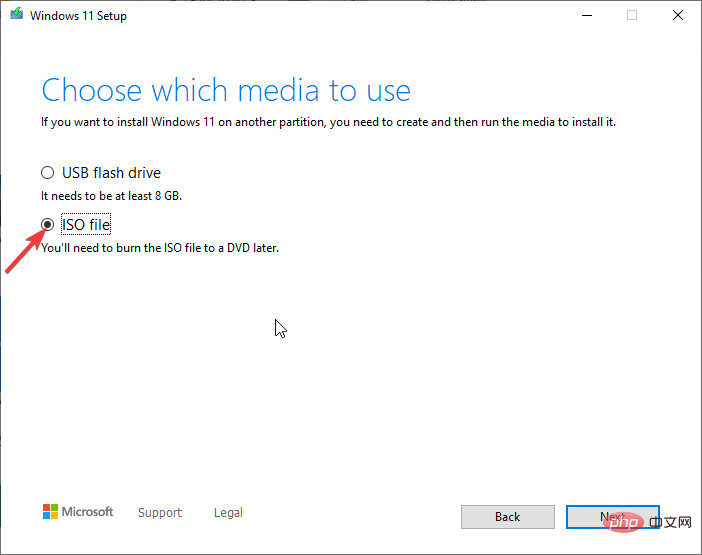
- Windows 11 should automatically be the title in the "Version" field on the next page. Do not change anything here and click the "Next" button.
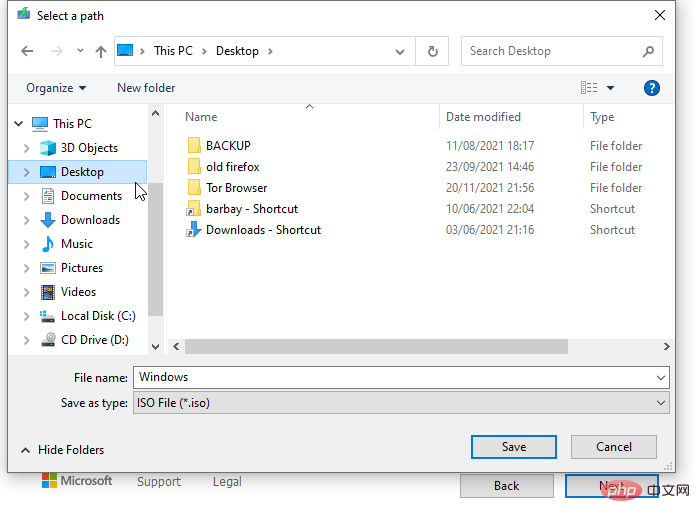
- Select the ISO file when prompted to select the media to use.
-
When prompted, save the ISO to your desktop or any folder of your choice.
- Wait for the download to complete and double-click the ISO file to open it.
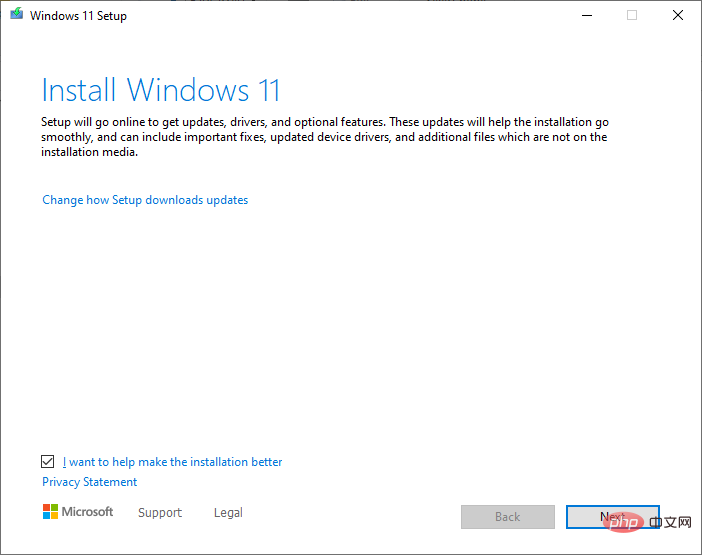
- Click "Yes" to allow it to make changes. This will load the Windows 11 page.
- When prompted to install Windows 11, click Next. This will start checking for updates that will take some time to complete.
- Accept the applicable Notice and License Terms again and wait for it to get available updates.
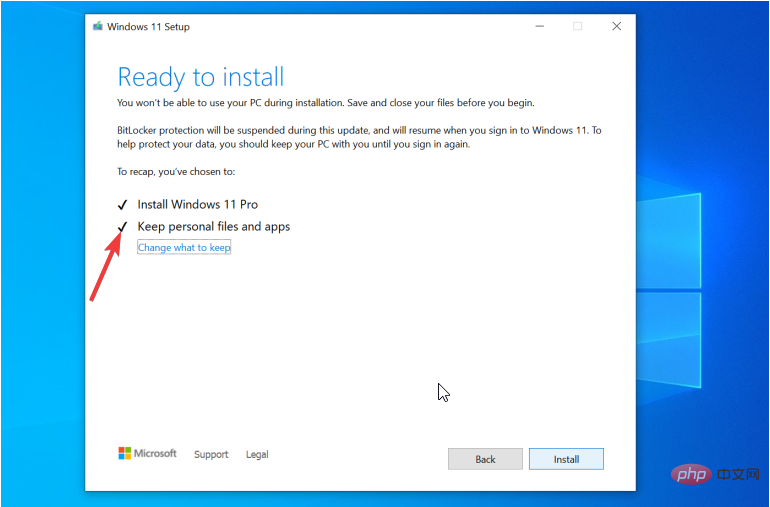
- Before installation, the Prepare to install window will pop up. Make sure the Keep personal files and apps box is checked . This is important to prevent data loss after an upgrade.
- Finally, click the "Install" button to complete the process and Windows 11 will be installed on your computer.

There you have it: Three working fixes for the Windows 11 review license terms error when trying to upgrade from Windows 10.
This article introduces the basic requirements that the computer needs to meet the upgrade conditions. It also breaks down three immediate fixes to the threatening issue.
With this tutorial, the Windows 11 Review License Terms error will never stop anyone from enjoying the latest features of the new operating system again.
The above is the detailed content of This is how to fix Windows 11 review license terms error. For more information, please follow other related articles on the PHP Chinese website!

Hot AI Tools

Undress AI Tool
Undress images for free

Undresser.AI Undress
AI-powered app for creating realistic nude photos

AI Clothes Remover
Online AI tool for removing clothes from photos.

Clothoff.io
AI clothes remover

Video Face Swap
Swap faces in any video effortlessly with our completely free AI face swap tool!

Hot Article
Hot Tools

Notepad++7.3.1
Easy-to-use and free code editor

SublimeText3 Chinese version
Chinese version, very easy to use

Zend Studio 13.0.1
Powerful PHP integrated development environment

Dreamweaver CS6
Visual web development tools

SublimeText3 Mac version
God-level code editing software (SublimeText3)
Hot Topics


 This Apple ID is not yet in use in the iTunes Store: Fix
Jun 10, 2024 pm 05:42 PM
This Apple ID is not yet in use in the iTunes Store: Fix
Jun 10, 2024 pm 05:42 PM
When logging into iTunesStore using AppleID, this error saying "This AppleID has not been used in iTunesStore" may be thrown on the screen. There are no error messages to worry about, you can fix them by following these solution sets. Fix 1 – Change Shipping Address The main reason why this prompt appears in iTunes Store is that you don’t have the correct address in your AppleID profile. Step 1 – First, open iPhone Settings on your iPhone. Step 2 – AppleID should be on top of all other settings. So, open it. Step 3 – Once there, open the “Payment & Shipping” option. Step 4 – Verify your access using Face ID. step
 How to fix red-eye on iPhone
Feb 23, 2024 pm 04:31 PM
How to fix red-eye on iPhone
Feb 23, 2024 pm 04:31 PM
So, you took some great photos at your last party, but unfortunately, most of the photos you took were of red eyes. The photo itself is great, but the red eyes in it kind of ruin the image. Not to mention, some of those party photos might be from your friends’ phones. Today we'll look at how to remove red eye from photos. What causes the red eyes in the photo? Red-eye often occurs when taking photos with flash. This is because the light from the flash shines directly into the back of the eye, causing the blood vessels under the eye to reflect the light, giving the effect of red eyes in the photo. Fortunately, with the continuous advancement of technology, some cameras are now equipped with red-eye correction functions that can effectively solve this problem. By using this feature, the camera takes pictures
 Comprehensive Guide to PHP 500 Errors: Causes, Diagnosis and Fixes
Mar 22, 2024 pm 12:45 PM
Comprehensive Guide to PHP 500 Errors: Causes, Diagnosis and Fixes
Mar 22, 2024 pm 12:45 PM
A Comprehensive Guide to PHP 500 Errors: Causes, Diagnosis, and Fixes During PHP development, we often encounter errors with HTTP status code 500. This error is usually called "500InternalServerError", which means that some unknown errors occurred while processing the request on the server side. In this article, we will explore the common causes of PHP500 errors, how to diagnose them, and how to fix them, and provide specific code examples for reference. Common causes of 1.500 errors 1.
 How to fix the volume cannot be adjusted in WIN10
Mar 27, 2024 pm 05:16 PM
How to fix the volume cannot be adjusted in WIN10
Mar 27, 2024 pm 05:16 PM
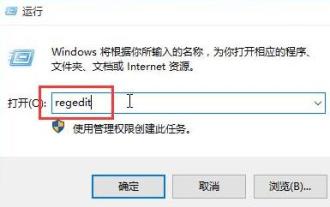
1. Press win+r to open the run window, enter [regedit] and press Enter to open the registry editor. 2. In the opened registry editor, click to expand [HKEY_LOCAL_MACHINESOFTWAREMicrosoftWindowsCurrentVersionRun]. In the blank space on the right, right-click and select [New - String Value], and rename it to [systray.exe]. 3. Double-click to open systray.exe, modify its numerical data to [C:WindowsSystem32systray.exe], and click [OK] to save the settings.
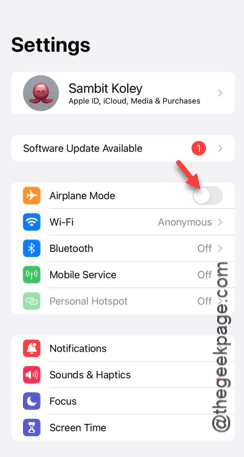 iPhone stuck in airplane mode: How to fix it
Jun 15, 2024 pm 02:16 PM
iPhone stuck in airplane mode: How to fix it
Jun 15, 2024 pm 02:16 PM
Airplane mode is very convenient in some situations. However, the same airplane mode may give you a headache if your iPhone suddenly gets stuck on it. In this article, we have designed this set of solutions to get your iPhone out of airplane mode. Quick fix – 1. Try disabling Airplane Mode directly from Control Center. 2. If you are unable to disable Airplane Mode from Control Center, you can disable Airplane Mode directly from the Settings tab – If these tips don’t work, follow the fixes below to resolve the issue. Fix 1 – Force Restart Your Device The process of force restarting your device is very simple. All you have to do is follow these step-by-step instructions. Step 1 – You can start the process by pressing and releasing the Volume Up button. step
 How to Fix 0x00000024 Blue Screen Error
Feb 25, 2024 pm 08:30 PM
How to Fix 0x00000024 Blue Screen Error
Feb 25, 2024 pm 08:30 PM
How to fix the 0x00000024 blue screen error is one of the common errors in the Microsoft Windows operating system. The 0x00000024 error code represents NTFS_FILE_SYSTEM, which means that the operating system cannot correctly access a file in the NTFS file system. When the 0x00000024 blue screen error occurs, there are some methods we can take to fix it. This article will explore some solutions. First, we can try to restart the computer. Sometimes, the error is only temporary
 How to fix unresponsive edge browser
Mar 13, 2024 pm 01:10 PM
How to fix unresponsive edge browser
Mar 13, 2024 pm 01:10 PM
Recently, some Win11 users have reported to the editor that when opening the edge browser, there will always be no response, making the browser unusable. What should I do? How to fix this problem? The editor below will bring you the solution to the problem that the edge browser is unresponsive and cannot be used. Come and try it. The method is as follows: 1. Click Start in the lower left corner of Windows 11 and open "Settings". 2. After entering Windows settings, click "Apply". 3. Then click "Apps and Features" in the left taskbar. 4. Find the browser in the open list and click "Advanced Options"
 How to deal with computer blue screen code 0x000007b
Feb 18, 2024 pm 06:28 PM
How to deal with computer blue screen code 0x000007b
Feb 18, 2024 pm 06:28 PM
What to do with computer blue screen code 0x000007b. The blue screen error code is one of the problems that computer users often encounter. When we are using a computer and a blue screen suddenly appears with error code 0x000007b, we may feel confused and at a loss. So, how to deal with this situation? This article will introduce some common solutions to help you solve the blue screen problem on your computer. First, we need to understand the meaning of blue screen code 0x000007b. This code is usually associated with problems when the computer starts up. It may indicate a hardware failure