


Determine your budget and use case—$600 for basic, $1,000–$1,500 for gaming, $2,000 for high-end work; prioritize GPU for gaming, CPU and RAM for content creation, and multi-core CPUs for streaming. 2. Choose compatible components: match CPU socket (AM5 or LGA1700) with motherboard, select DDR4 or DDR5 RAM based on motherboard, ensure PSU wattage (650W–850W ) and case size fit GPU and motherboard form factor (ATX, micro-ATX, mini-ITX), and use NVMe SSD (500GB–1TB minimum) for OS. 3. Prepare tools: Phillips #2 screwdriver, anti-static wrist strap, clean hard surface, and cable management aids. 4. Assemble step by step: install CPU, RAM, and M.2 on motherboard first; mount I/O shield and motherboard in case; install PSU with fan down; apply thermal paste and mount CPU cooler; insert GPU into PCIe x16 slot and connect power; connect front panel headers (PWR_SW, RESET_SW, etc.) per motherboard manual; connect 24-pin, 8-pin CPU, PCIe, and SATA power/data cables; manage cables for airflow. 5. First boot: check all connections, ensure monitor is plugged into GPU, enter BIOS to verify temps, enable XMP/DOCP, and troubleshoot no power/display by reseating RAM/GPU or checking PSU switch and beep codes. 6. Install OS via USB using Windows Media Creation Tool, update OS and drivers (motherboard and GPU), enable security updates. Building a PC is methodical—follow compatibility rules, read manuals, and take your time to succeed.

So you want to build your own PC — great choice. Building a computer from scratch isn’t magic, but it does take planning, patience, and knowing what parts actually work together. This guide breaks it down step by step, so you can go from staring at a pile of components to booting up your brand-new machine — no guesswork needed.
1. Know Your Budget and Use Case
Before you buy a single screw, ask yourself: What am I using this PC for? Your answer shapes everything.
- Gaming? Prioritize GPU, CPU, and fast RAM.
- Video editing or 3D rendering? Focus on a strong CPU, lots of RAM, and fast storage.
- General use or office work? You don’t need top-tier parts — save money where you can.
- Streaming? Look at CPUs with more cores (like AMD Ryzen 7 or Intel i7/i9) to handle encoding.
Set a realistic budget — $600 for a basic build, $1,000–$1,500 for solid gaming, $2,000 for high-end workstations.
2. Choose Compatible Components
This is where most beginners get tripped up. Parts must be compatible. Here’s what you need and how they connect:
? CPU (Processor)
- Intel or AMD — pick one ecosystem and stick with it.
- Consider integrated graphics (like AMD APUs or Intel CPUs with UHD graphics) if you’re not using a GPU yet.
? Motherboard
- Must match your CPU socket (e.g., AM5 for Ryzen 7000, LGA1700 for 12th–14th Gen Intel).
- Form factor matters: ATX (standard), micro-ATX (smaller), mini-ITX (compact).
- Check features: Wi-Fi, Bluetooth, number of USB ports, M.2 slots.
? RAM
- DDR4 vs DDR5: Depends on your motherboard.
- 16GB is the sweet spot for gaming; 32GB for content creation.
- Match speed (MHz) and latency (CL) to what your motherboard supports.
? GPU (Graphics Card)
- If you’re gaming or doing GPU-heavy tasks, this is critical.
- NVIDIA (GeForce RTX) or AMD (Radeon RX) — both solid.
- Make sure your case and PSU can handle its size and power.
? Storage
- NVMe SSD (M.2) — fast, compact, ideal for OS and apps.
- SATA SSD or HDD — cheaper bulk storage.
- At minimum: 500GB–1TB NVMe SSD.
? PSU (Power Supply)
- Never cheap out here. Get 80 Bronze minimum, 80 Gold recommended.
- Wattage: Use a PSU calculator. 650W–750W covers most mid-range builds; 850W for high-end.
? Case
- Must fit your motherboard size.
- Consider airflow, cable management, and space for GPU/CPU cooler.
- Tempered glass, RGB fans — nice, but not essential.
? CPU Cooler
- Most CPUs come with a stock cooler, but they’re loud and weak.
- Aftermarket air coolers (like Thermalright Assassin X) or AIO liquid coolers for better performance and noise.
3. Tools and Workspace Setup
You don’t need much:
- Phillips #2 screwdriver
- Anti-static wrist strap (or touch metal frequently)
- Clean, well-lit workspace with plenty of room
- Zip ties or Velcro straps for cable management
Avoid carpeted floors. Work on a hard surface like a table or desk.
4. Step-by-Step Assembly
Step 1: Install CPU, RAM, and M.2 SSD (on motherboard)
- Open CPU socket lever, align CPU (match triangle), gently place, close lever.
- Snap RAM into DIMM slots (usually A2 and B2 for dual-channel).
- Insert M.2 SSD at a 30-degree angle, screw it down.
Pro tip: Do this before mounting the motherboard — it’s way easier.
Step 2: Mount the I/O shield and motherboard
- Pop the I/O shield into the case (comes with the motherboard).
- Place standoffs in the case (if not pre-installed).
- Carefully lower the motherboard in and screw it down — don’t overtighten.
Step 3: Install PSU
- Slide it into the back compartment, fan-down (usually).
- Secure with screws, then start routing power cables.
Step 4: Install CPU Cooler
- Apply a pea-sized drop of thermal paste (if not pre-applied).
- Align cooler, secure evenly (cross pattern for brackets).
- Plug the cooler’s fan into the CPU_FAN header.
Step 5: Install GPU
- Remove case PCIe slot covers.
- Insert GPU into top PCIe x16 slot, push until it clicks.
- Screw it in, then connect PCIe power cables from PSU.
Step 6: Connect Case Cables and Front Panel
- These go to the motherboard’s front panel header:
- Power switch (PWR_SW)
- Reset switch (RESET_SW)
- Power LED (PLED)
- HDD LED (HDD_LED)
- Refer to your motherboard manual — labeling varies.
Step 7: Connect Power Cables
- 24-pin to motherboard (main power)
- 8-pin (or 4 4) to CPU (EPS)
- PCIe 6 2 pin to GPU
- SATA power to drives (if any)
- Connect SATA data cables from drives to motherboard
Step 8: Cable Management
- Use case cutouts and Velcro straps.
- Tuck cables behind the motherboard tray.
- Good airflow = cooler, quieter PC.
5. First Boot (And Troubleshooting)
Double-check:
- All power cables connected
- RAM and GPU fully seated
- Front panel headers correct
- Monitor plugged into GPU, not motherboard
Plug in monitor, keyboard, and power cable. Hit the power button.
If it boots:
- Enter BIOS (usually Del or F2)
- Check temps, fan speeds, RAM speed
- Enable XMP/DOCP if using high-speed RAM
If it doesn’t boot:
- No lights? Check PSU switch and wall outlet.
- No display? Reseat GPU and RAM. Try one stick at a time.
- Beep codes or LED codes? Consult motherboard manual — they tell you exactly what’s wrong.
6. Install OS and Drivers
- Use a USB drive with Windows (create via Microsoft’s Media Creation Tool).
- Boot from USB, install on your SSD.
- After install:
- Update Windows
- Install motherboard drivers (from USB or online)
- Install GPU drivers (from NVIDIA/AMD website)
- Enable Windows updates and security
Final Thoughts
Building a PC isn’t hard — it’s just methodical. Take your time. Read the manuals. Don’t force anything. Once you’ve done it once, you’ll never look at prebuilts the same way.
And when you finally see that desktop load up, knowing you put every piece together? That’s the real win.
Basically, just follow the steps, respect compatibility, and don’t rush. You’ve got this.
The above is the detailed content of The Ultimate Guide to Building a PC from Scratch. For more information, please follow other related articles on the PHP Chinese website!

Hot AI Tools

Undress AI Tool
Undress images for free

Undresser.AI Undress
AI-powered app for creating realistic nude photos

AI Clothes Remover
Online AI tool for removing clothes from photos.

Clothoff.io
AI clothes remover

Video Face Swap
Swap faces in any video effortlessly with our completely free AI face swap tool!

Hot Article
Hot Tools

Notepad++7.3.1
Easy-to-use and free code editor

SublimeText3 Chinese version
Chinese version, very easy to use

Zend Studio 13.0.1
Powerful PHP integrated development environment

Dreamweaver CS6
Visual web development tools

SublimeText3 Mac version
God-level code editing software (SublimeText3)


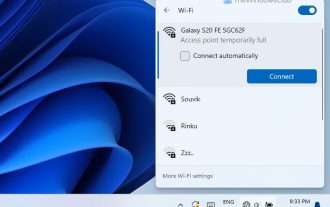 How to Fix Access Point Temporarily Full Error on Windows PC
Mar 16, 2024 pm 03:19 PM
How to Fix Access Point Temporarily Full Error on Windows PC
Mar 16, 2024 pm 03:19 PM
If you encounter the error "The access point is temporarily full" when connecting to a Wi-Fi router or mobile hotspot on your Windows 11/10 PC, this is usually caused by network overload or too many connected devices. In order to solve this problem and successfully connect to the Internet, you can try the following methods: 1. Wait for a while for other devices to disconnect before trying to connect again. 2. Restart your Wi-Fi router or mobile hotspot to clear the network cache and reassign the IP address. 3. Make sure your PC’s Wi-Fi adapter driver is up to date, check for updates through Device Manager. 4. Try to connect at different times. Avoiding peak hours may have better connection opportunities. 5. Consider adding AccessP
 What does pc mean in Internet terms?
Aug 10, 2023 pm 04:34 PM
What does pc mean in Internet terms?
Aug 10, 2023 pm 04:34 PM
PC is a common abbreviation that stands for "Personal Computer". A personal computer is a ubiquitous computing device that can be used to process and store data, run software programs, and connect to the Internet. In an era of digitization and informationization, the personal computer is not only a tool, but also a window to connect to the world. It is also an important tool for people to acquire knowledge, enrich their lives and achieve personal development.
![Windows PC keeps booting into BIOS [Fix]](https://img.php.cn/upload/article/000/887/227/171012121854600.jpg?x-oss-process=image/resize,m_fill,h_207,w_330) Windows PC keeps booting into BIOS [Fix]
Mar 11, 2024 am 09:40 AM
Windows PC keeps booting into BIOS [Fix]
Mar 11, 2024 am 09:40 AM
If your Windows PC frequently enters the BIOS interface, this may cause difficulty in use. I'm stuck with the BIOS screen every time I turn on my computer, and restarting doesn't help. If you are facing this problem, then the solutions provided in this article will help you. Why does my computer keep booting in BIOS? Your computer's frequent restarts in BIOS mode may be caused by a variety of reasons, such as improper boot sequence settings, damaged SATA cables, loose connections, BIOS configuration errors, or hard drive failures, etc. Fix Windows PC Keeps Booting into BIOS If your Windows PC keeps booting into BIOS, use the fix below. Check your boot order and re-plug the
 How to download all OneDrive files to PC at once
Feb 19, 2024 pm 06:51 PM
How to download all OneDrive files to PC at once
Feb 19, 2024 pm 06:51 PM
This article will teach you how to download all OneDrive files to your PC at once. OneDrive is a powerful cloud storage platform that allows users to access their files anytime, anywhere. Sometimes, users may need to back up files locally or access them offline. Read on to learn how to do this easily. How to download all OneDrive files to PC at once? Follow these steps to download all OneDrive files to your Windows PC at once: Launch Onedrive and navigate to My Files. All files uploaded on OneDrive will be available here. Press CTRL+A to select all files, or check the checkbox to toggle selection of all items. Click on the download option at the top,
 The new king of domestic FPS! 'Operation Delta' Battlefield Exceeds Expectations
Mar 07, 2024 am 09:37 AM
The new king of domestic FPS! 'Operation Delta' Battlefield Exceeds Expectations
Mar 07, 2024 am 09:37 AM
"Operation Delta" will launch a large-scale PC test called "Codename: ZERO" today (March 7). Last weekend, this game held an offline flash mob experience event in Shanghai, and 17173 was also fortunate to be invited to participate. This test is only more than four months away from the last time, which makes us curious, what new highlights and surprises will "Operation Delta" bring in such a short period of time? More than four months ago, I experienced "Operation Delta" in an offline tasting session and the first beta version. At that time, the game only opened the "Dangerous Action" mode. However, Operation Delta was already impressive for its time. In the context of major manufacturers flocking to the mobile game market, such an FPS that is comparable to international standards
 Windows 11 Lite: What it is and how to install it on your PC
Apr 14, 2023 pm 11:19 PM
Windows 11 Lite: What it is and how to install it on your PC
Apr 14, 2023 pm 11:19 PM
We know that Microsoft Windows 11 is a full-featured and attractively designed operating system. However, users have been asking for the Windows 11 Lite version. Although it offers significant improvements, Windows 11 is a resource-hungry operating system that can quickly clutter older machines to the point where they can no longer run smoothly. This article will address your most frequently asked questions about whether there is a Windows 11 Lite version and whether it is safe to download. Follow! Is there a Windows 11 Lite version? The Windows 11 Lite 21H2 version we are talking about was developed by Neelkalpa T
 How to use Samsung Flow on Windows PC
Feb 19, 2024 pm 07:54 PM
How to use Samsung Flow on Windows PC
Feb 19, 2024 pm 07:54 PM
SamsungFlow is a convenient and practical tool that allows you to easily connect your Galaxy phone to your Windows PC. With SamsungFlow, you can conveniently share content between devices, sync notifications, mirror smartphones, and more. This article will introduce how to use SamsungFlow on a Windows computer. How to use Smartphone Streaming on Windows PC To use SamsungFlow to connect your Windows PC and Galaxy Phone, you need to ensure that your Galaxy smartphones and tablets are running Android 7.0 or higher, and your Windows PC is running Windows 10 or higher.
 The computer I spent 300 yuan to assemble successfully ran through the local large model
Apr 12, 2024 am 08:07 AM
The computer I spent 300 yuan to assemble successfully ran through the local large model
Apr 12, 2024 am 08:07 AM
If 2023 is recognized as the first year of AI, then 2024 is likely to be a key year for the popularization of large AI models. In the past year, a large number of large AI models and a large number of AI applications have emerged. Manufacturers such as Meta and Google have also begun to launch their own online/local large models to the public, similar to "AI artificial intelligence" that is out of reach. The concept suddenly came to people. Nowadays, people are increasingly exposed to artificial intelligence in their lives. If you look carefully, you will find that almost all of the various AI applications you have access to are deployed on the "cloud". If you want to build a device that can run large models locally, then the hardware is a brand-new AIPC priced at more than 5,000 yuan. For ordinary people,
