
 CMS Tutorial
WordPress
How to build a blog with Docker and wordpress (steps with pictures and text)
CMS Tutorial
WordPress
How to build a blog with Docker and wordpress (steps with pictures and text)
How to build a blog with Docker and wordpress (steps with pictures and text)
Jan 06, 2022 pm 04:00 PM
The following column WordPresstutorial will introduce to you how to use Docker and wordpress to build a personal blog. I hope it will be helpful to friends in need!
Use Docker and wordpress to build a personal blog
1. Come first Explain two concepts
Docker is an open source application container engine that allows developers to package their applications and dependency packages into a portable image, and then publish it to any popular Linux or Windows machine , virtualization can also be achieved. Containers completely use the sandbox mechanism and will not have any interfaces with each other
Docker-Compose is an orchestration service of Docker. It is a tool for defining and running complex applications on Docker, which allows Users deploy distributed applications in clusters.
- Service (
service): An application container can actually include several container instances running the same image. - Project (
project): A complete business unit consisting of a set of associated application containers, defined in thedocker-compose.ymlfile.
Compose's default management object is the project, and subcommands are used to conveniently manage the life cycle of a group of containers in the project.
2. Install Docker
The specific installation method can be installed according to your own system.
For window system installation, please refer to the novice tutorial: https://www.runoob.com/docker/windows-docker-install.html
MacOC installation:
Use Homebrew to install
macOS We can use Homebrew to install Docker.
Homebrew Cask already supports Docker for Mac, so you can easily use Homebrew Cask for installation.
The command is:
$?brew?cask?install?docke
The specific screenshot of the installation is as follows:
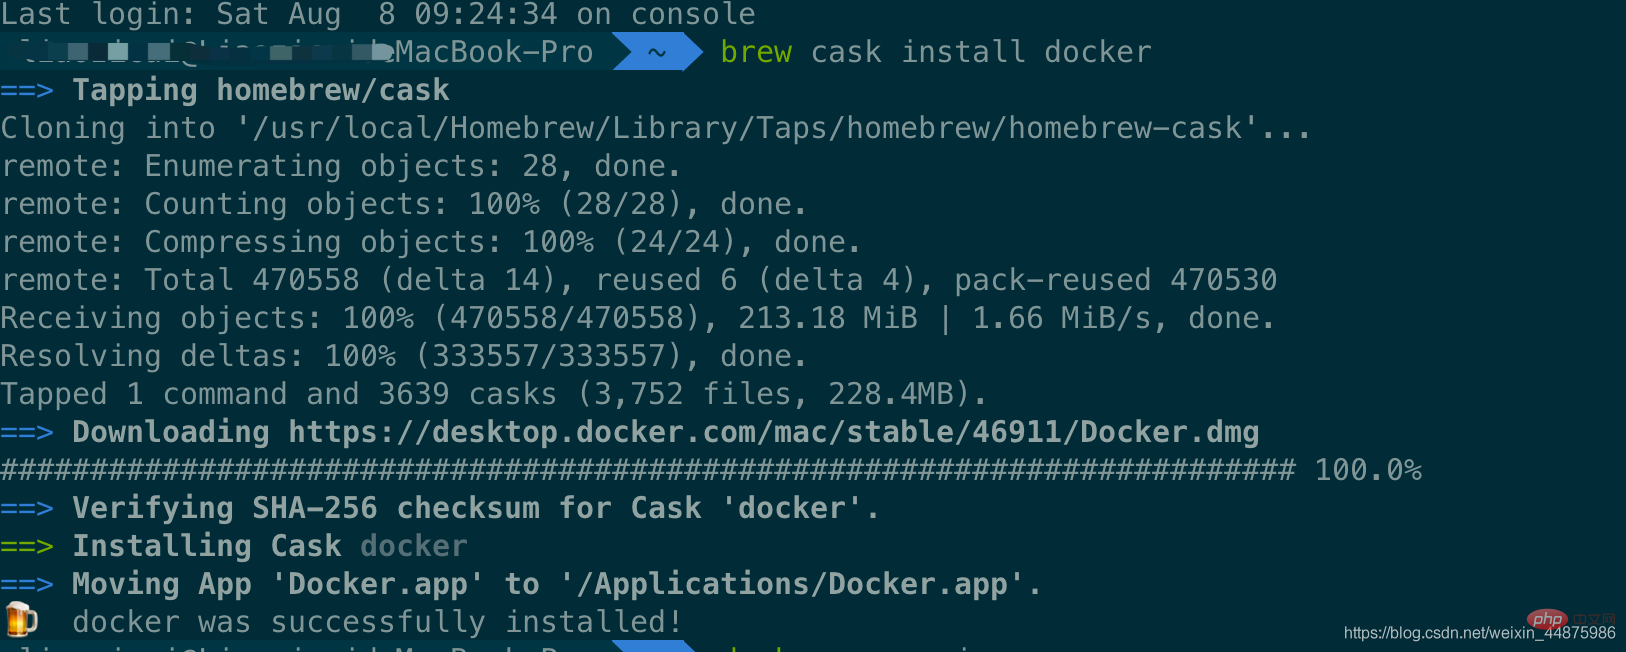
After loading the Docker app, click Next, you may be asked You can enter the macOS login password. Afterwards, a prompt window for Docker running will pop up, and there is also a small whale icon on the status bar 
After starting the terminal, you can check the installed Docker version through the command.
$?docker?--version
Docker?version?19.03.12,?build?48a66213fe
3. Image acceleration
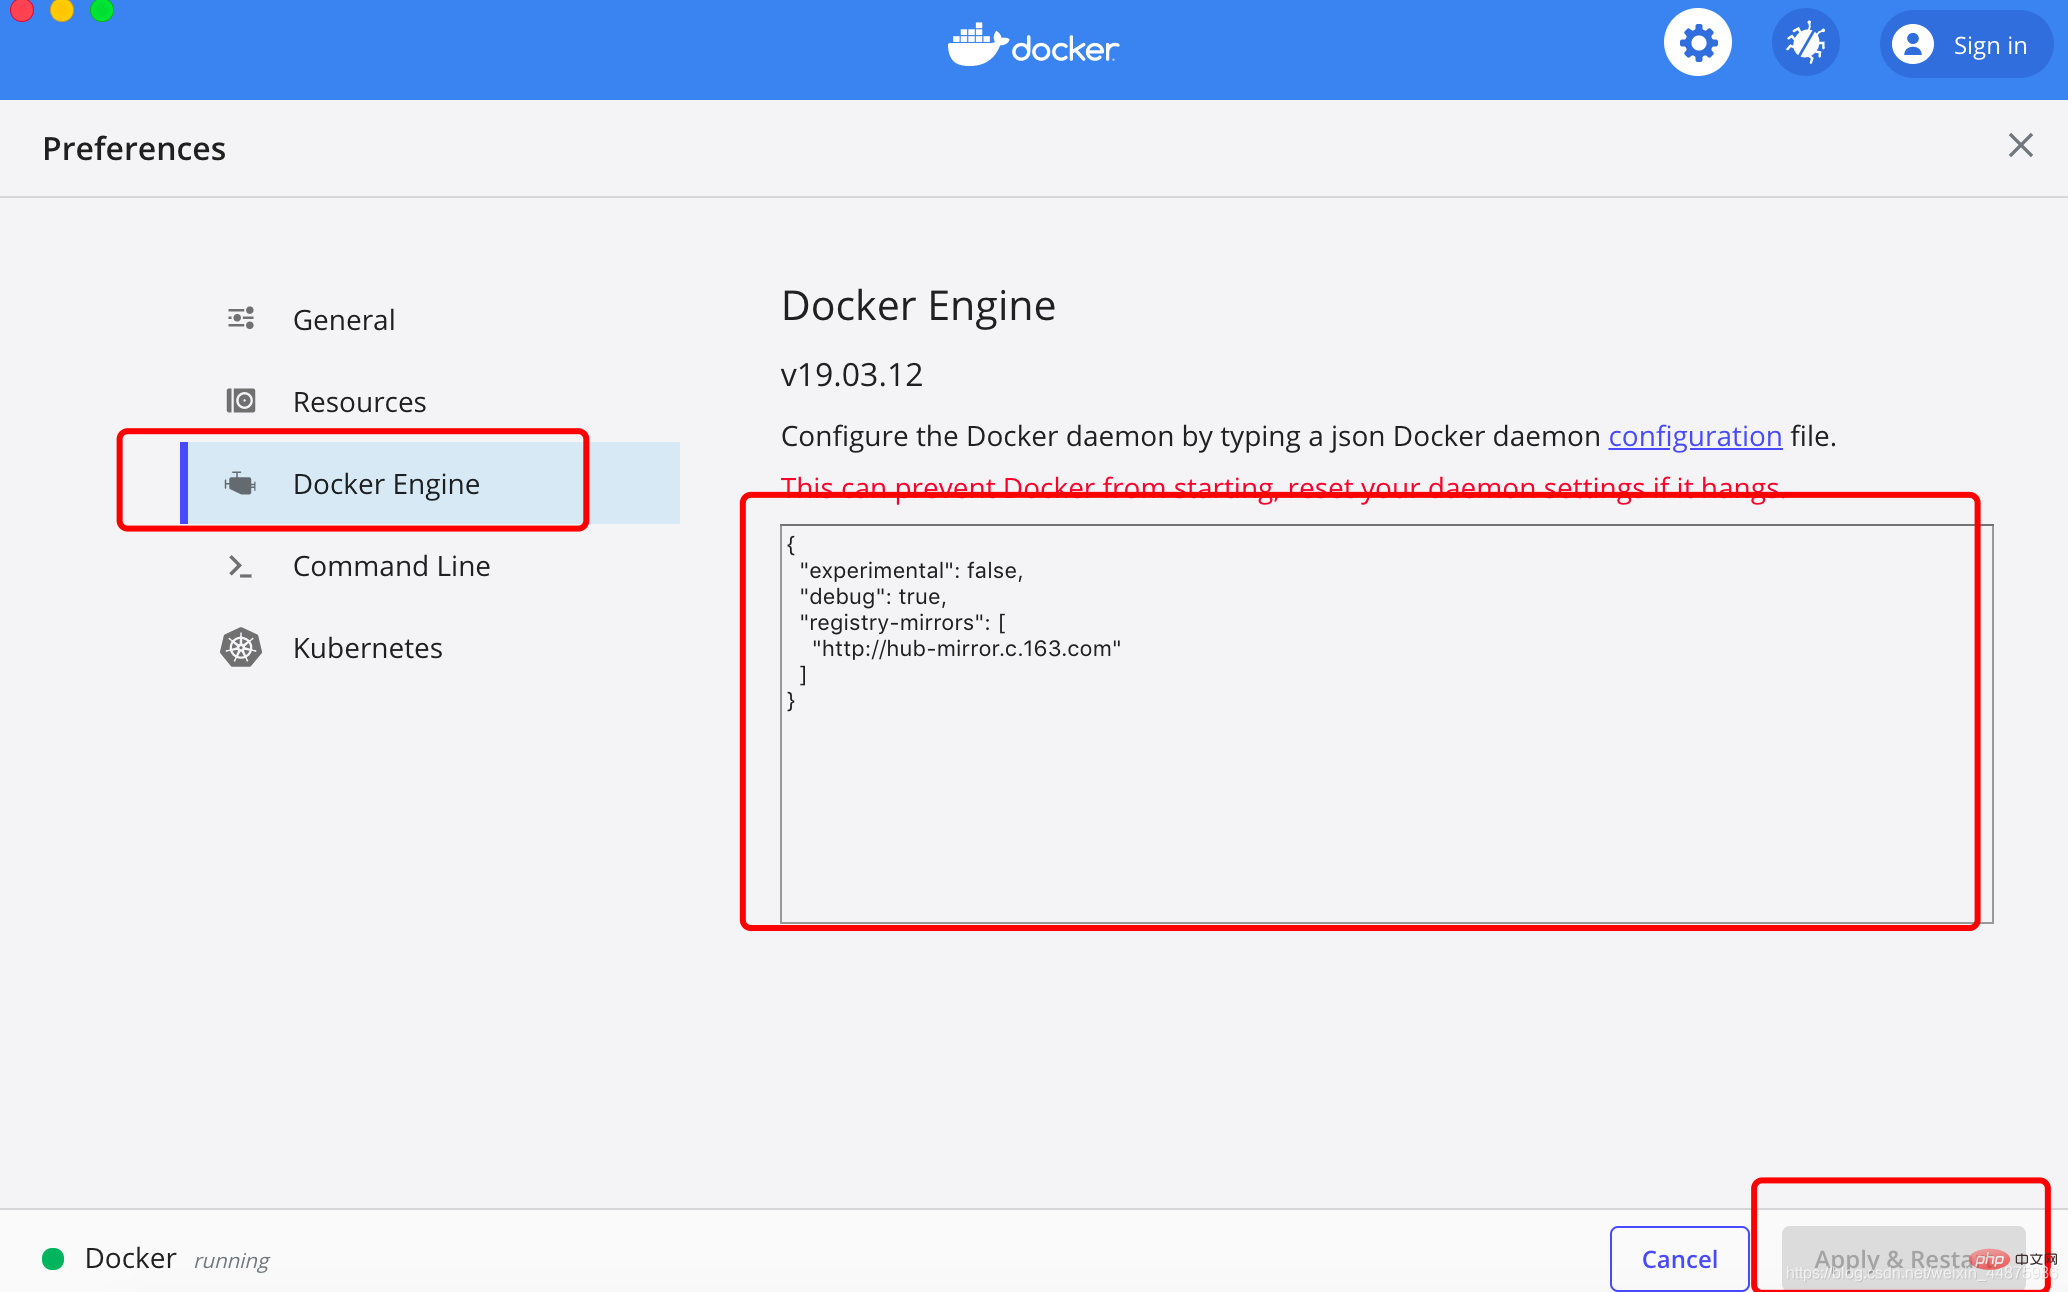
In view of domestic network problems, subsequent pulling of Docker images is very slow. We may need to configure an accelerator to solve the problem. I use NetEase’s image address: http://hub-mirror.c.163.com.
Click the Docker for mac application icon on the taskbar -> Perferences… -> Docker Engine. Just fill in the accelerator address in the list. After the modification is completed, click the Apply & Restart button, and Docker will restart and apply the configured image address.
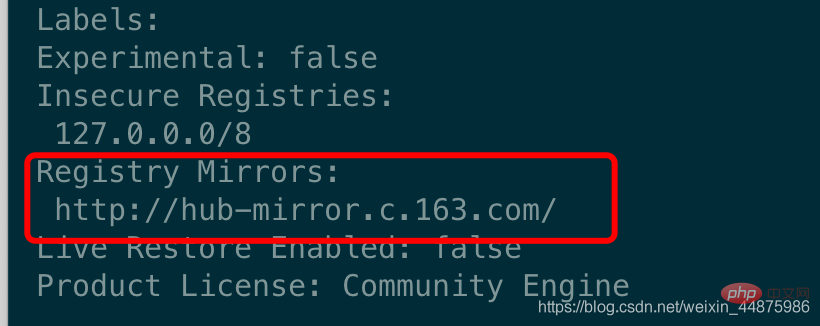
Then enter in the terminal:
$?docker?info
4. Install WordPress
Create a new folder , you can name it as you wish.
Then create the docker-compose.yml file and put it in the folder just now.
The content of docker-compose.yml is as follows:
version:?'3.3'services:
???db:
?????image:?mysql:5.7
?????volumes:
???????-?db_data:/var/lib/mysql?????restart:?always?????environment:
???????MYSQL_ROOT_PASSWORD:?somewordpress???????MYSQL_DATABASE:?wordpress???????MYSQL_USER:?wordpress???????MYSQL_PASSWORD:?wordpress???wordpress:
?????depends_on:
???????-?db?????image:?wordpress:latest?????ports:
???????-?"8000:80"
?????restart:?always?????environment:
???????WORDPRESS_DB_HOST:?db:3306
???????WORDPRESS_DB_USER:?wordpress???????WORDPRESS_DB_PASSWORD:?wordpress???????WORDPRESS_DB_NAME:?wordpressvolumes:
????db_data:?{}
Then enter the newly created folder directory in the terminal and use one line of commands to set up the blog:
$?docker-compose?up?-d
Problems may occur here, as shown below:
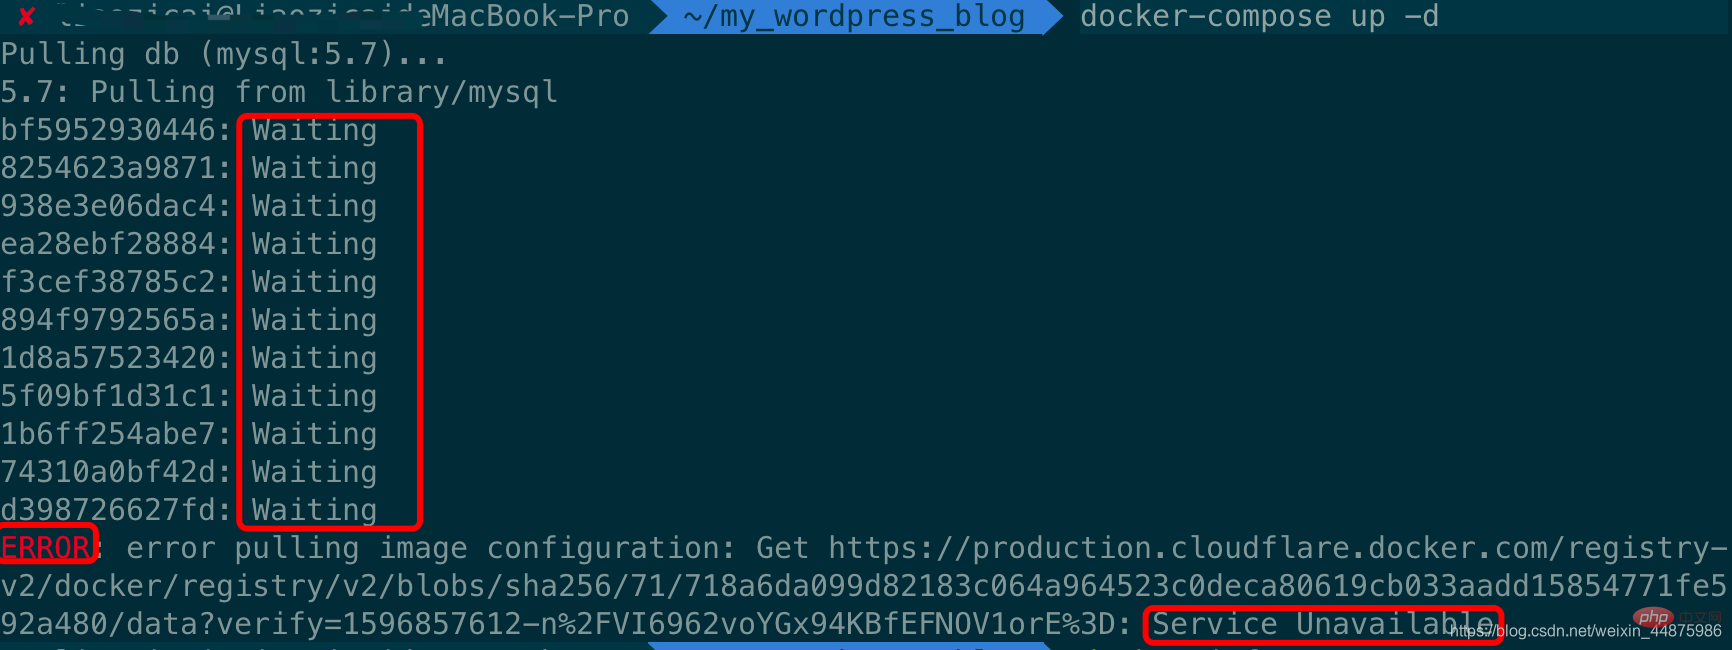
The reason for this problem is that image acceleration is not configured, because docker uses foreign images by default. Download The resource is relatively slow, so it needs to be modified to a domestic image for acceleration. For specific methods, please see the previous point 3, image acceleration.
The screenshot of the successful effect is as follows: 
5. Front-end management page
Front-end access address: IP:8000/: Because I have just set up a blog, the IP is localhost
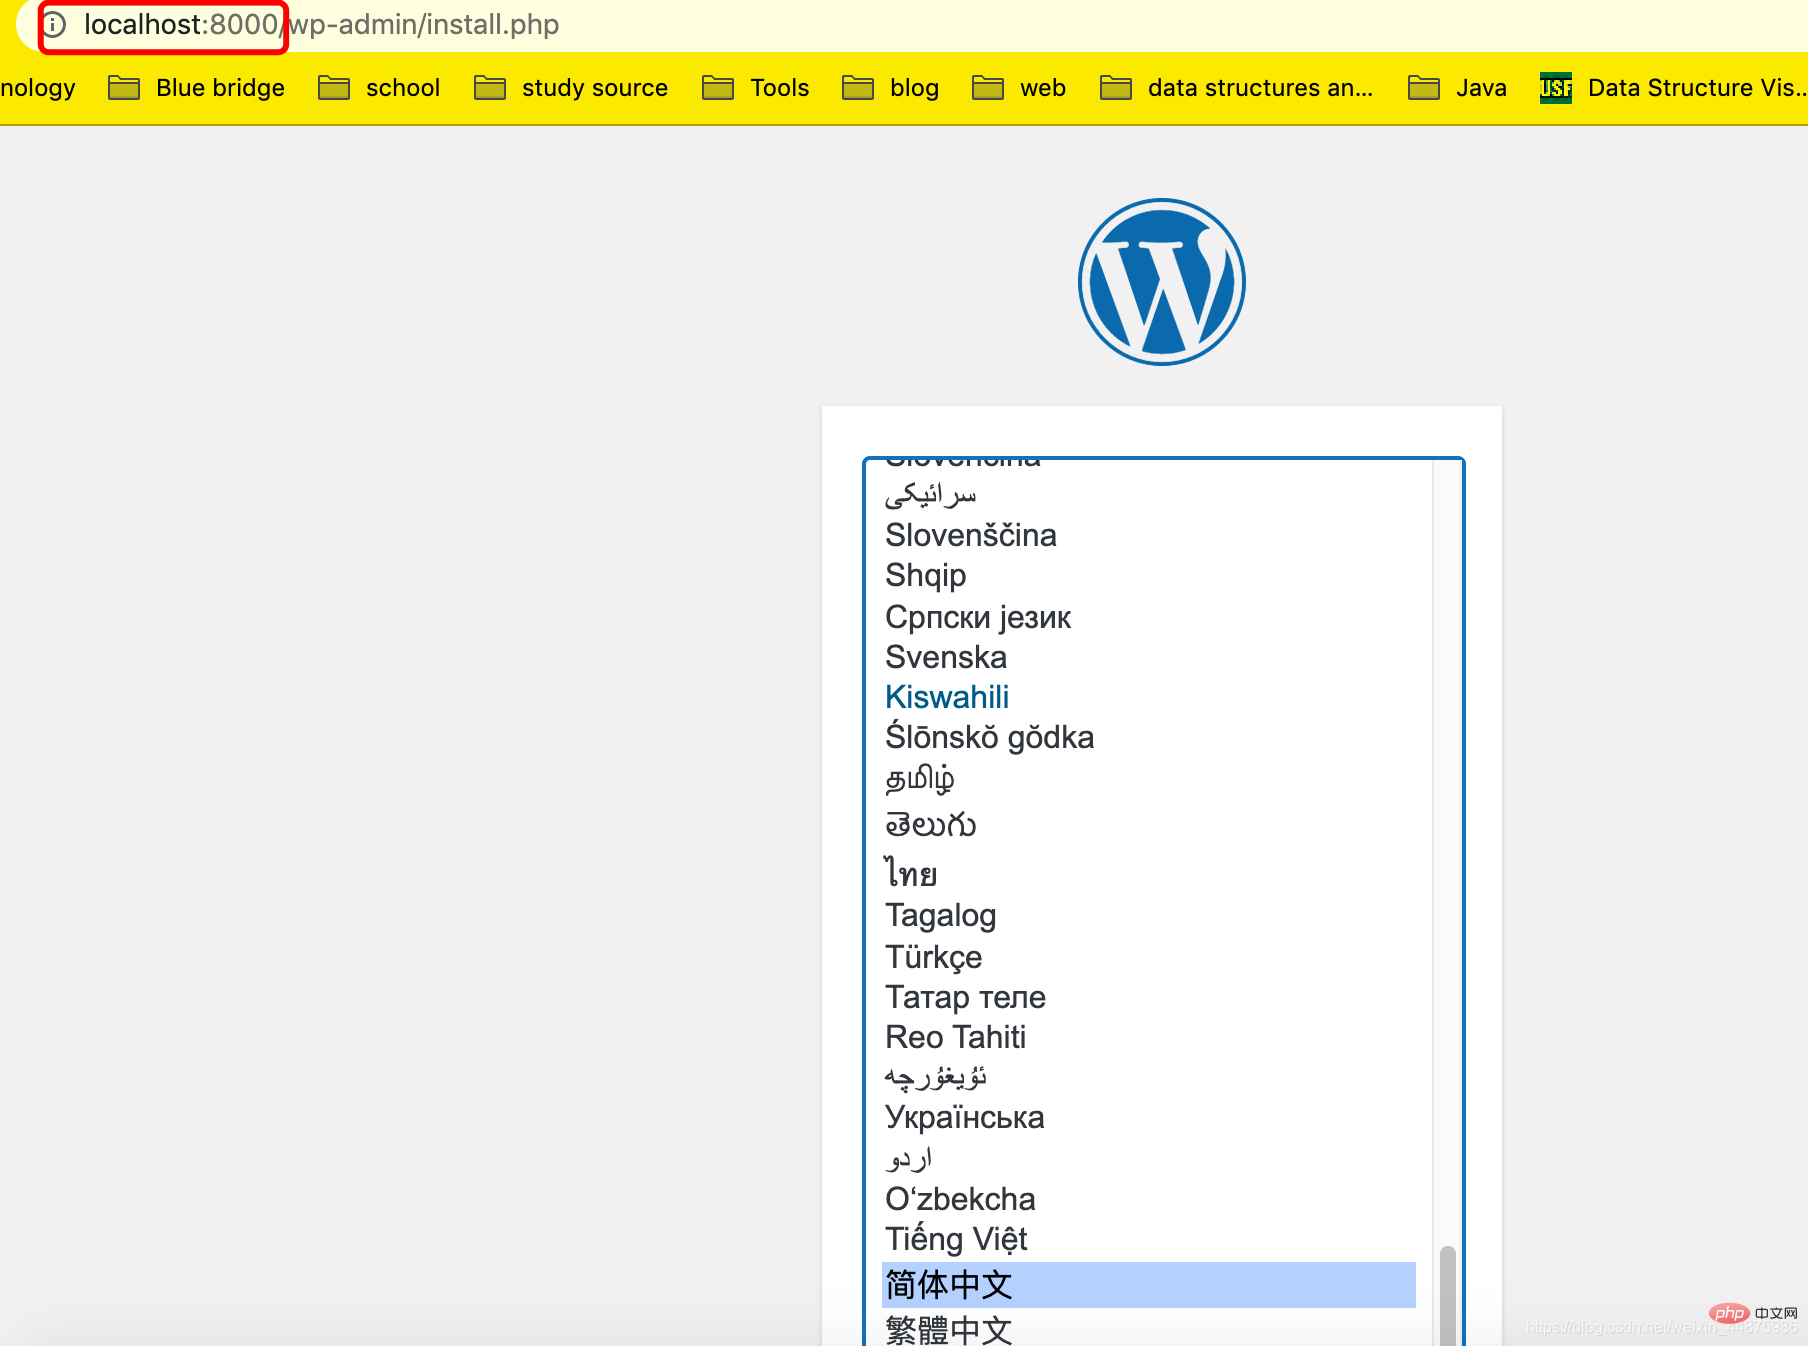
. Enter this page. You can choose the specific language according to your preference. Here I chose Chinese, click to continue.
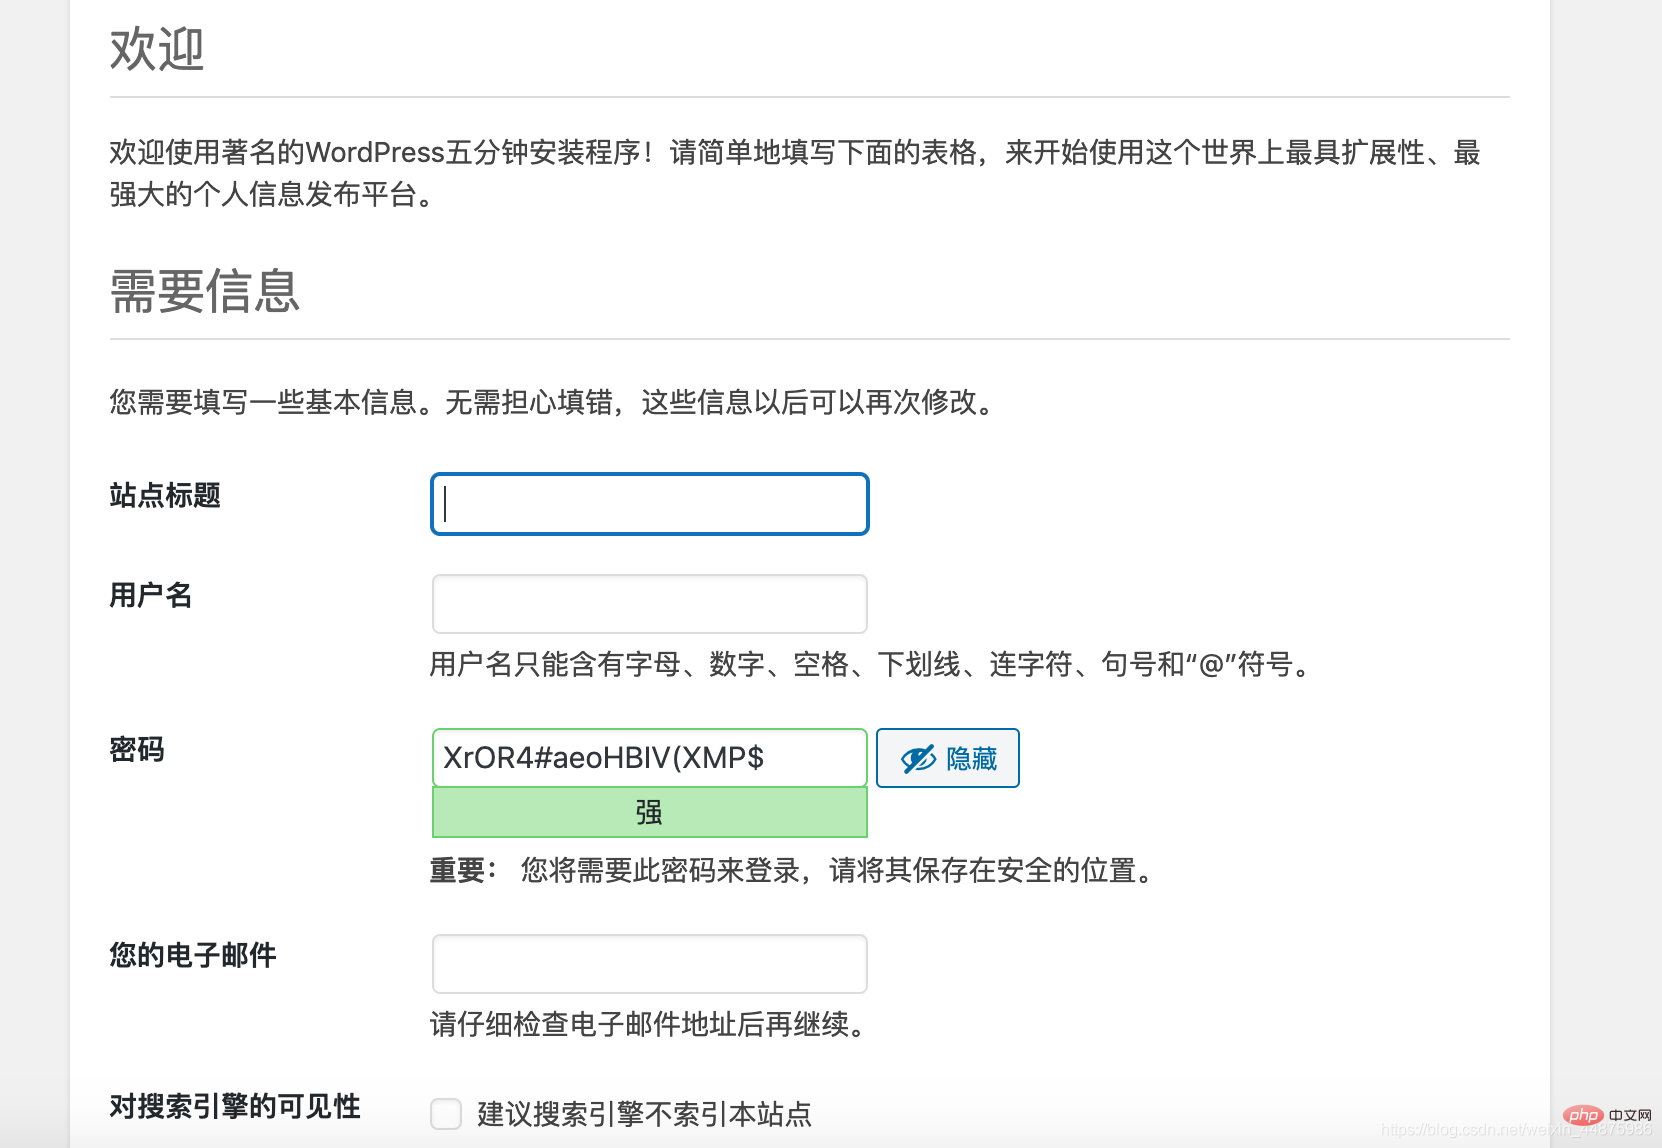
You can fill in this information according to your personal preference.
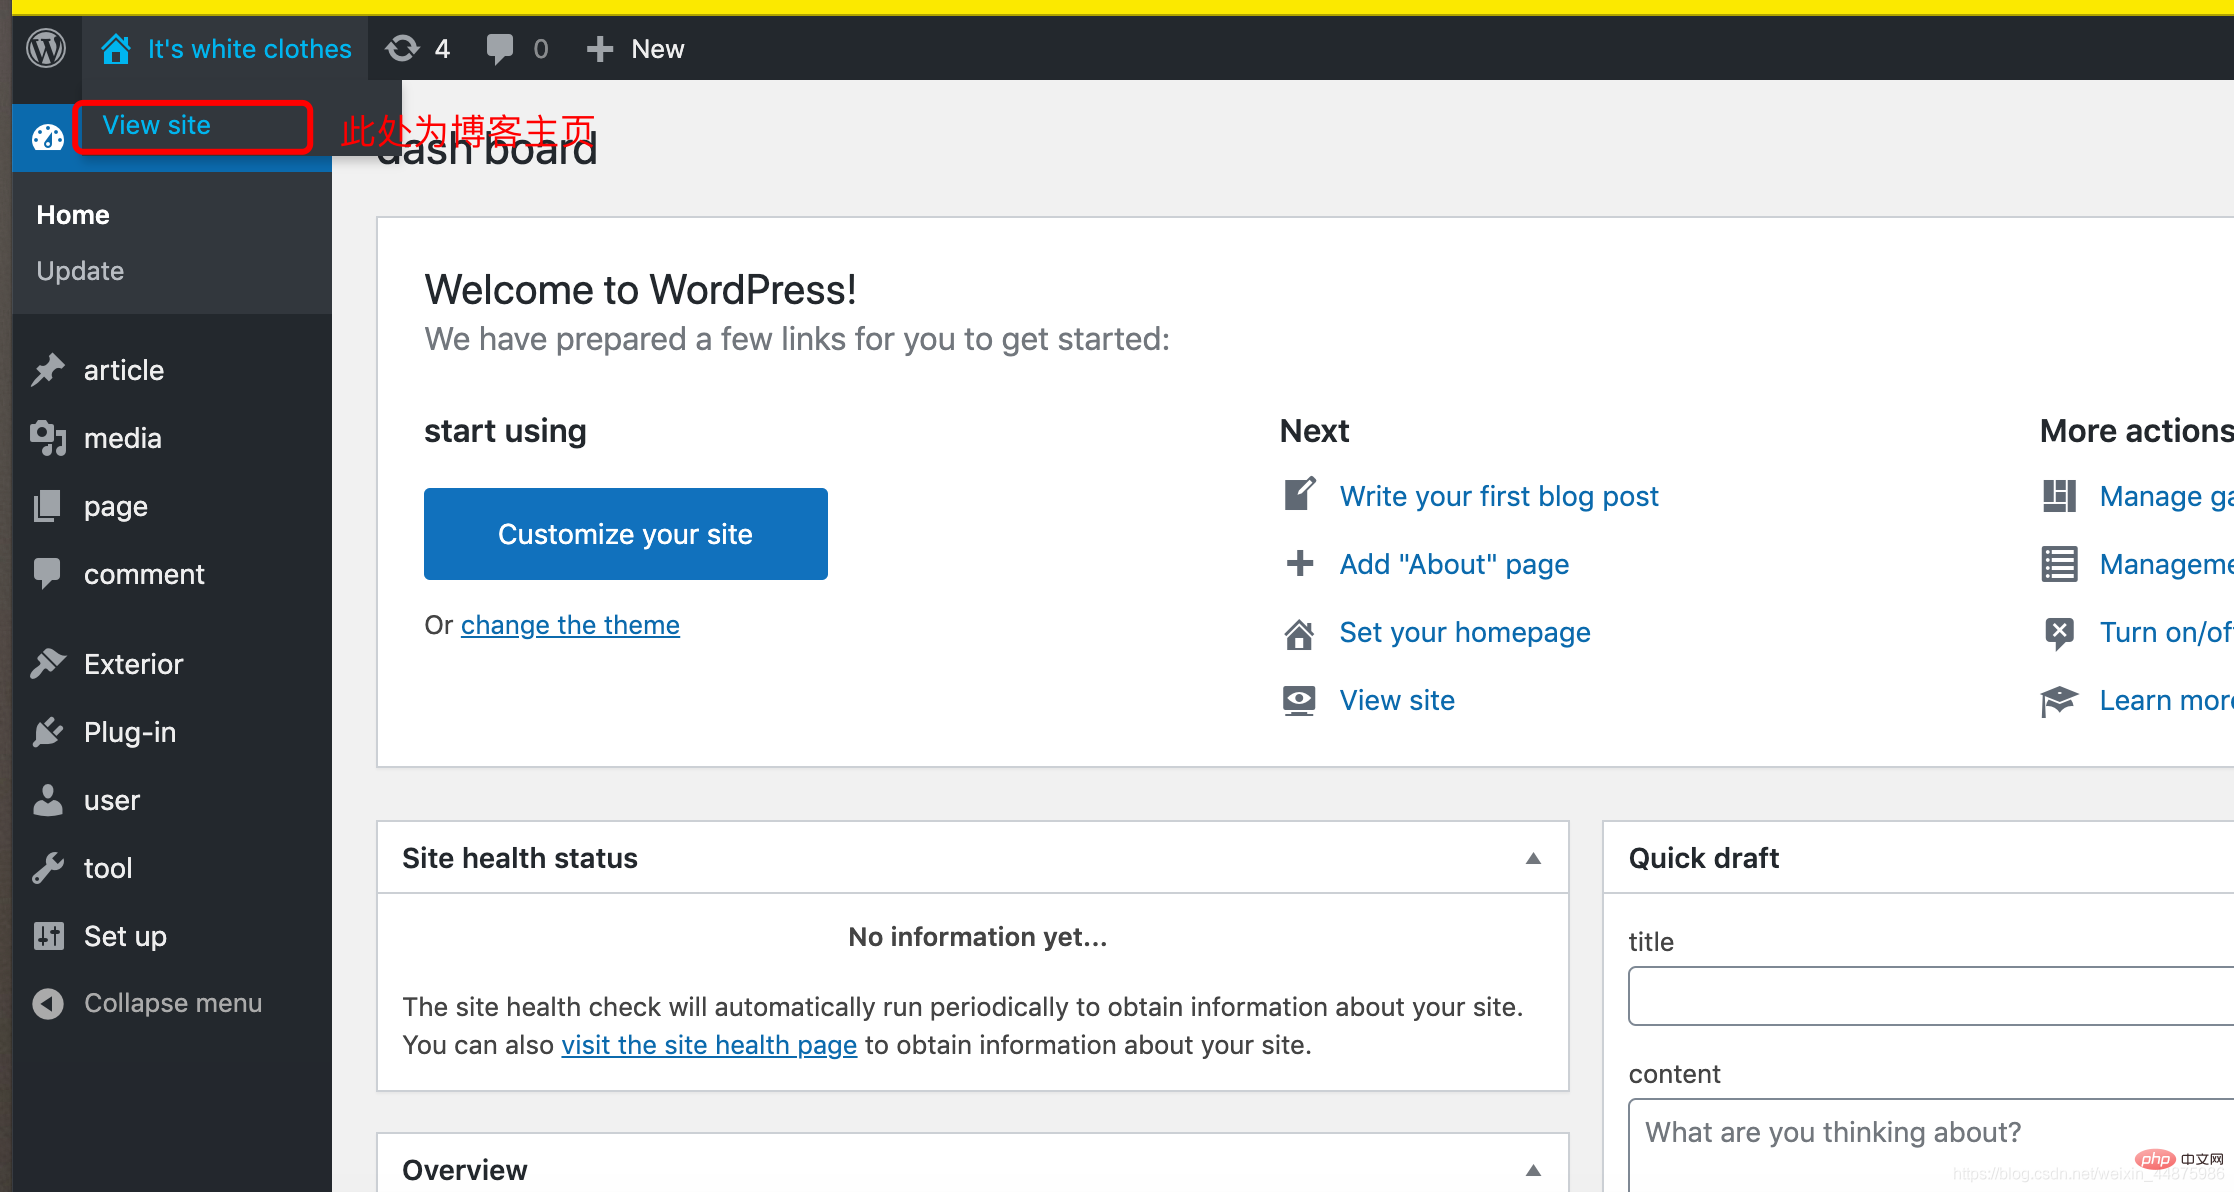
After logging in to your account and password, the blog backend page is as follows:
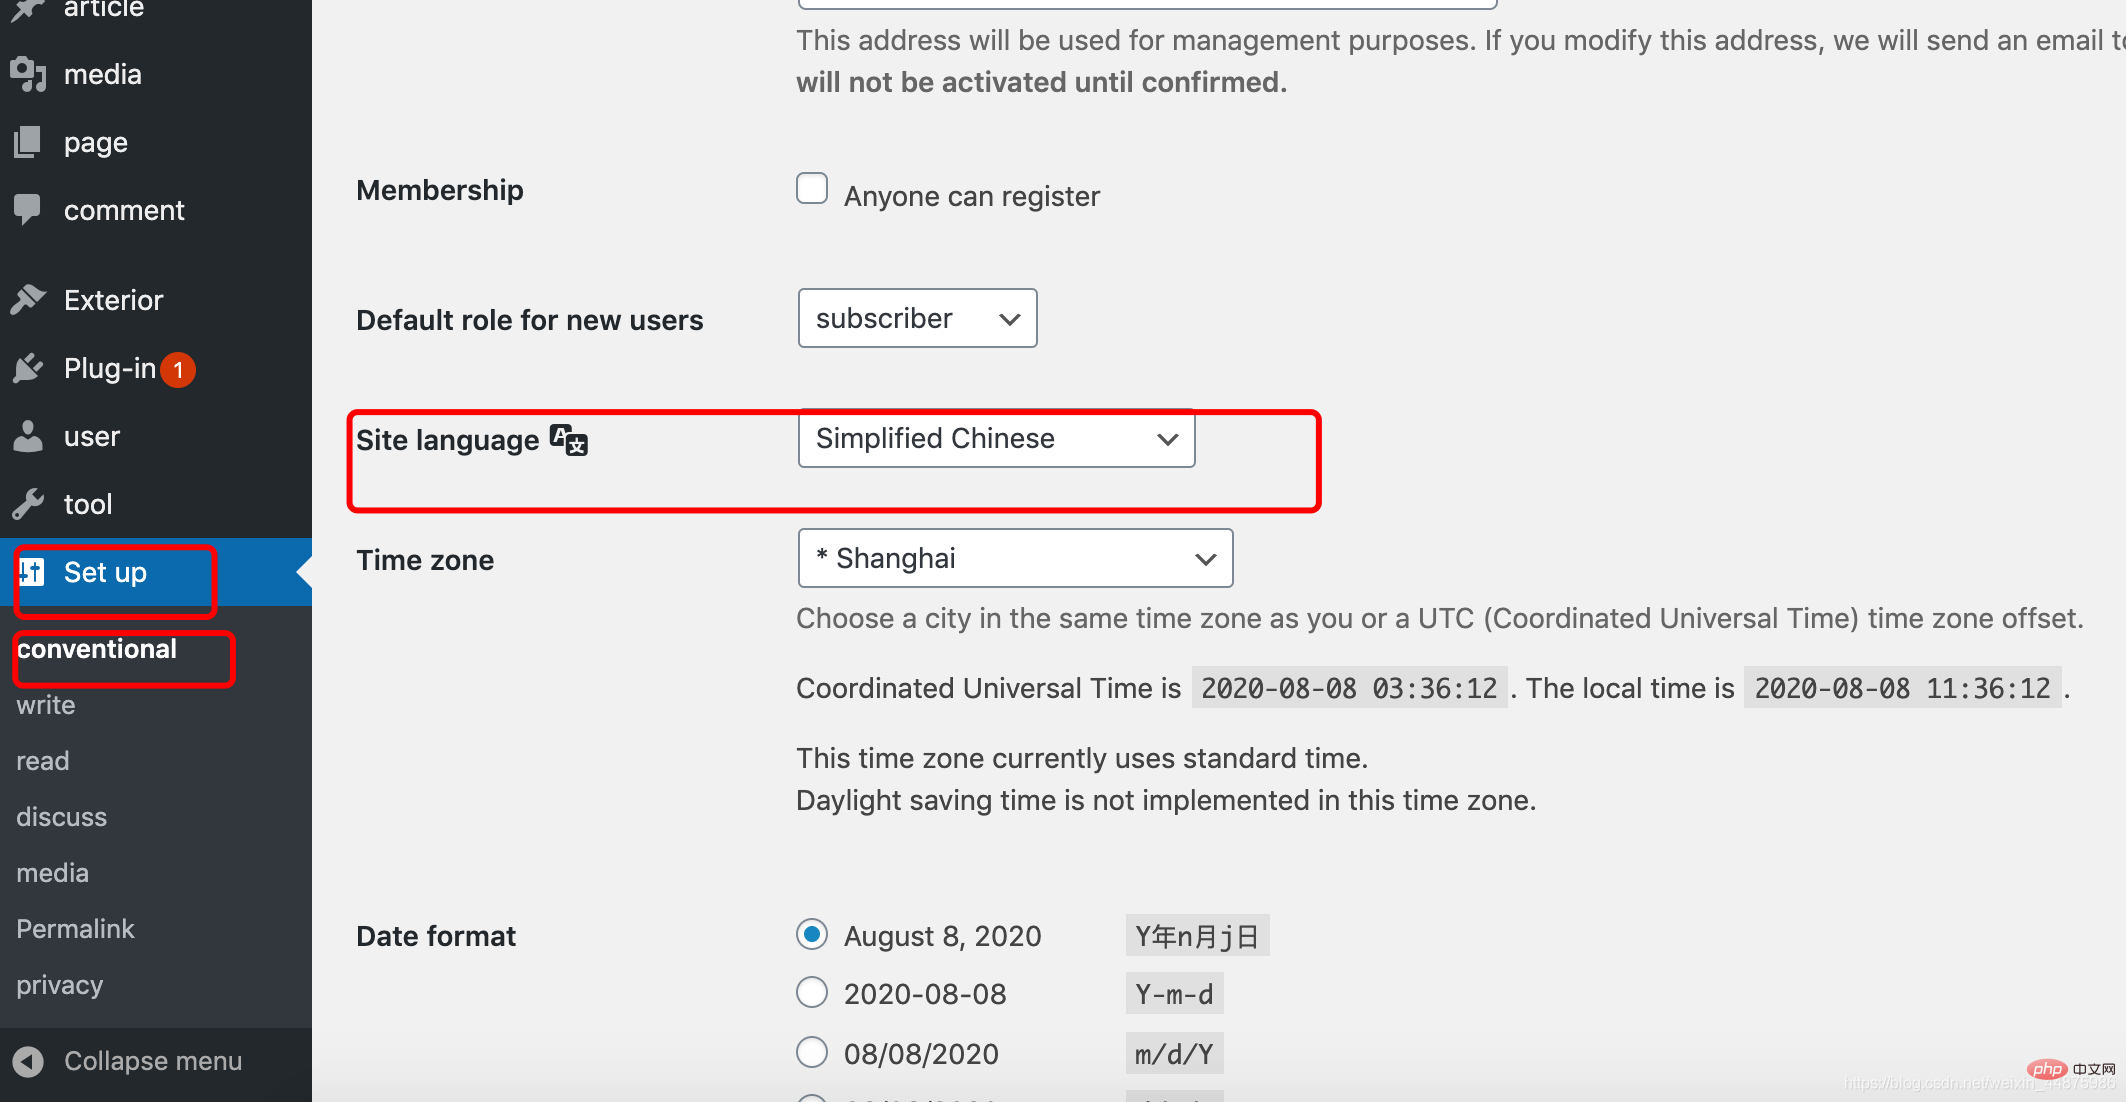
Modify language:
Modify Theme:
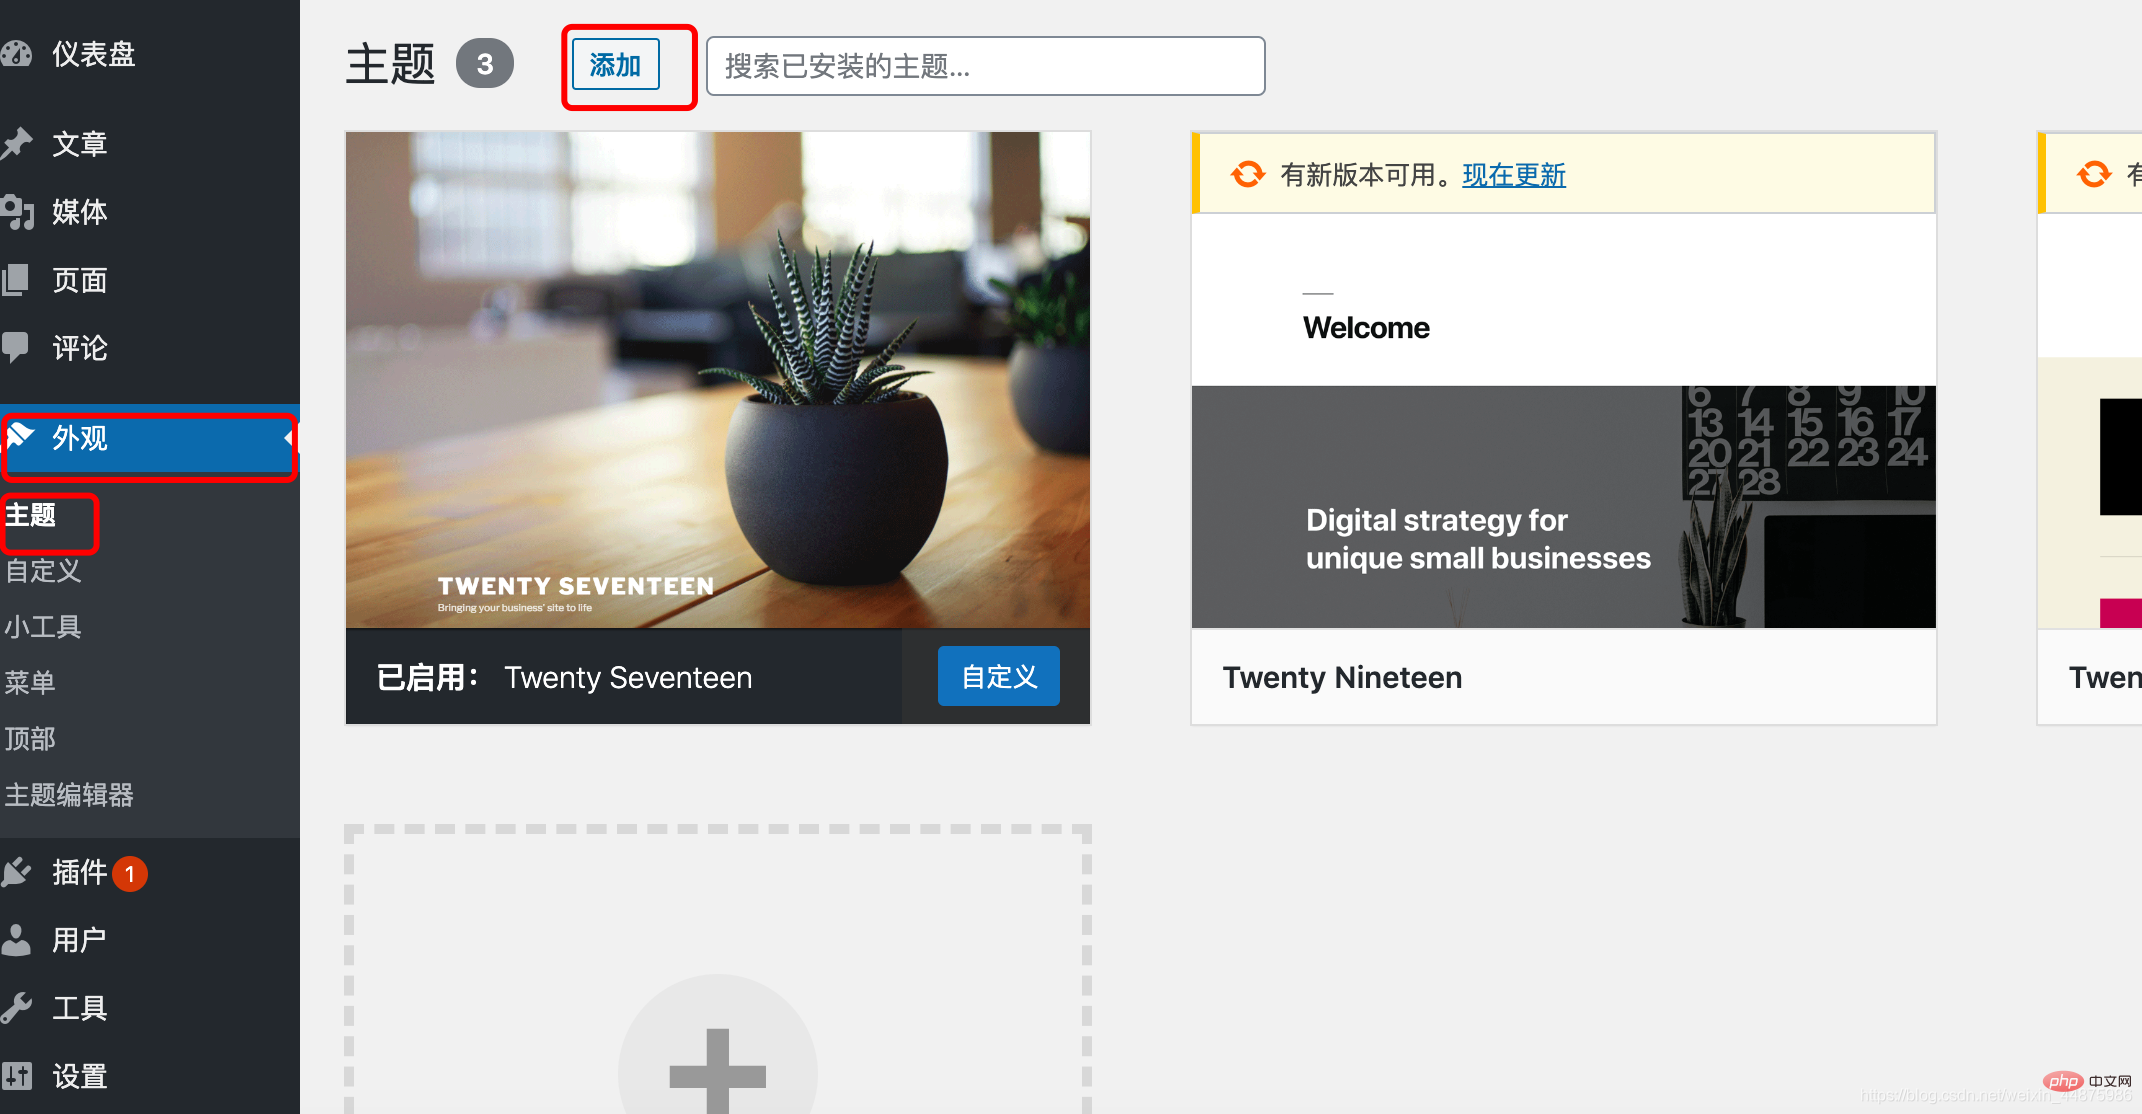
Now your personal blog is complete!
If it was helpful to you, please give it a like!
The above is the detailed content of How to build a blog with Docker and wordpress (steps with pictures and text). For more information, please follow other related articles on the PHP Chinese website!

Hot AI Tools

Undress AI Tool
Undress images for free

Undresser.AI Undress
AI-powered app for creating realistic nude photos

AI Clothes Remover
Online AI tool for removing clothes from photos.

Clothoff.io
AI clothes remover

Video Face Swap
Swap faces in any video effortlessly with our completely free AI face swap tool!

Hot Article
Hot Tools

Notepad++7.3.1
Easy-to-use and free code editor

SublimeText3 Chinese version
Chinese version, very easy to use

Zend Studio 13.0.1
Powerful PHP integrated development environment

Dreamweaver CS6
Visual web development tools

SublimeText3 Mac version
God-level code editing software (SublimeText3)


 How to add your WordPress site in Yandex Webmaster Tools
May 12, 2025 pm 09:06 PM
How to add your WordPress site in Yandex Webmaster Tools
May 12, 2025 pm 09:06 PM
Do you want to connect your website to Yandex Webmaster Tools? Webmaster tools such as Google Search Console, Bing and Yandex can help you optimize your website, monitor traffic, manage robots.txt, check for website errors, and more. In this article, we will share how to add your WordPress website to the Yandex Webmaster Tool to monitor your search engine traffic. What is Yandex? Yandex is a popular search engine based in Russia, similar to Google and Bing. You can excel in Yandex
 How to set, get and delete WordPress cookies (like a professional)
May 12, 2025 pm 08:57 PM
How to set, get and delete WordPress cookies (like a professional)
May 12, 2025 pm 08:57 PM
Do you want to know how to use cookies on your WordPress website? Cookies are useful tools for storing temporary information in users’ browsers. You can use this information to enhance the user experience through personalization and behavioral targeting. In this ultimate guide, we will show you how to set, get, and delete WordPresscookies like a professional. Note: This is an advanced tutorial. It requires you to be proficient in HTML, CSS, WordPress websites and PHP. What are cookies? Cookies are created and stored when users visit websites.
 How to fix HTTP image upload errors in WordPress (simple)
May 12, 2025 pm 09:03 PM
How to fix HTTP image upload errors in WordPress (simple)
May 12, 2025 pm 09:03 PM
Do you need to fix HTTP image upload errors in WordPress? This error can be particularly frustrating when you create content in WordPress. This usually happens when you upload images or other files to your CMS using the built-in WordPress media library. In this article, we will show you how to easily fix HTTP image upload errors in WordPress. What is the reason for HTTP errors during WordPress media uploading? When you try to upload files to Wo using WordPress media uploader
 How to develop a complete Python Web application?
May 23, 2025 pm 10:39 PM
How to develop a complete Python Web application?
May 23, 2025 pm 10:39 PM
To develop a complete Python Web application, follow these steps: 1. Choose the appropriate framework, such as Django or Flask. 2. Integrate databases and use ORMs such as SQLAlchemy. 3. Design the front-end and use Vue or React. 4. Perform the test, use pytest or unittest. 5. Deploy applications, use Docker and platforms such as Heroku or AWS. Through these steps, powerful and efficient web applications can be built.
 How to view process information inside Docker container
May 19, 2025 pm 09:06 PM
How to view process information inside Docker container
May 19, 2025 pm 09:06 PM
There are three ways to view the process information inside the Docker container: 1. Use the dockertop command to list all processes in the container and display PID, user, command and other information; 2. Use dockerexec to enter the container, and then use the ps or top command to view detailed process information; 3. Use the dockerstats command to display the usage of container resources in real time, and combine dockertop to fully understand the performance of the container.
 How to fix the issue where adding media buttons don't work in WordPress
May 12, 2025 pm 09:00 PM
How to fix the issue where adding media buttons don't work in WordPress
May 12, 2025 pm 09:00 PM
Recently, one of our readers reported that the Add Media button on their WordPress site suddenly stopped working. This classic editor problem does not show any errors or warnings, which makes the user unaware why their "Add Media" button does not work. In this article, we will show you how to easily fix the Add Media button in WordPress that doesn't work. What causes WordPress "Add Media" button to stop working? If you are still using the old classic WordPress editor, the Add Media button allows you to insert images, videos, and more into your blog post.
 How to deploy a PyTorch app on Ubuntu
May 29, 2025 pm 11:18 PM
How to deploy a PyTorch app on Ubuntu
May 29, 2025 pm 11:18 PM
Deploying a PyTorch application on Ubuntu can be done by following the steps: 1. Install Python and pip First, make sure that Python and pip are already installed on your system. You can install them using the following command: sudoaptupdatesudoaptinstallpython3python3-pip2. Create a virtual environment (optional) To isolate your project environment, it is recommended to create a virtual environment: python3-mvenvmyenvsourcemyenv/bin/activatet
 Performance Tuning of Jenkins Deployment on Debian
May 28, 2025 pm 04:51 PM
Performance Tuning of Jenkins Deployment on Debian
May 28, 2025 pm 04:51 PM
Deploying and tuning Jenkins on Debian is a process involving multiple steps, including installation, configuration, plug-in management, and performance optimization. Here is a detailed guide to help you achieve efficient Jenkins deployment. Installing Jenkins First, make sure your system has a Java environment installed. Jenkins requires a Java runtime environment (JRE) to run properly. sudoaptupdatesudoaptininstallopenjdk-11-jdk Verify that Java installation is successful: java-version Next, add J
