
 Computer Tutorials
Troubleshooting
Windows 11 tests 'shared audio' to play music via multiple devices, new taskbar animations
Computer Tutorials
Troubleshooting
Windows 11 tests 'shared audio' to play music via multiple devices, new taskbar animations
Windows 11 tests 'shared audio' to play music via multiple devices, new taskbar animations
Jul 23, 2025 am 09:49 AM
 Windows 11 is ushering in two compelling updates. First, when you hover over the open app icon in the taskbar, you will see a brand new animation effect. This new animation is similar to the effect in Windows 10. The second feature is "Share Audio", which will appear in the Quick Settings menu, allowing you to play music from both devices at the same time.
Let’s take a look at the new animation of the taskbar. As Phantom, a user on the X platform, discovered, Microsoft recently quietly added a hidden change to the preview version with version number 26120.4733, changing the way the taskbar icon thumbnails are displayed. The change was originally planned to be released when Microsoft launches a Windows 11 thumbnail revision.
If you are using Windows 11 24H2 version, the thumbnail will appear in "Fly In" form when the mouse is hovered over any open app icon. When you hover over different application icons in turn, the thumbnail will accurately reflect the actual layout size of the corresponding window. If the application window is not maximized, but runs at a smaller size, the thumbnails will also be resized accordingly.
Next, when you switch between thumbnails of different sizes, the system will add a transition animation of size changes. Although the current stable version can also recognize non-maximized windows and adjust the thumbnail size, it lacks animation effects. The added animation makes the entire preview experience more complete. Although it is not a major feature upgrade, it is a thoughtful experience optimization.
Windows Latest has tried to force enable this new thumbnail animation feature after upgrading to the latest beta version and activated successfully. Now the preview animations of different application window layouts can be displayed normally.

It should be noted that the test was conducted in a virtual machine without GPU, so the animation performance was slightly stuttering.
Connect multiple audio devices
Currently, Windows 11 does not support playing music over multiple Bluetooth or wired audio devices at the same time, and this new version is trying to solve this problem.
As noted by Phantom on X platform, an option called "Share Audio" will be added to the Quick Setup menu, allowing users to easily control and pair multiple audio devices.

This function prompts the user to select two devices to connect. After completion, the same audio can be played synchronously through multiple output devices.

As long as the Bluetooth device version is 4.0 or higher, there will be no problem with multi-device connection unless the device is too old. As shown in the above image, you can select multiple devices to play audio simultaneously, and it is not limited to two devices.
These two small but practical improvements are currently in preview testing, and Microsoft may officially announce more details in the coming weeks.
The above is the detailed content of Windows 11 tests 'shared audio' to play music via multiple devices, new taskbar animations. For more information, please follow other related articles on the PHP Chinese website!

Hot AI Tools

Undress AI Tool
Undress images for free

Undresser.AI Undress
AI-powered app for creating realistic nude photos

AI Clothes Remover
Online AI tool for removing clothes from photos.

Clothoff.io
AI clothes remover

Video Face Swap
Swap faces in any video effortlessly with our completely free AI face swap tool!

Hot Article
Hot Tools

Notepad++7.3.1
Easy-to-use and free code editor

SublimeText3 Chinese version
Chinese version, very easy to use

Zend Studio 13.0.1
Powerful PHP integrated development environment

Dreamweaver CS6
Visual web development tools

SublimeText3 Mac version
God-level code editing software (SublimeText3)


 Windows Security is blank or not showing options
Jul 07, 2025 am 02:40 AM
Windows Security is blank or not showing options
Jul 07, 2025 am 02:40 AM
When the Windows Security Center is blank or the function is missing, you can follow the following steps to check: 1. Confirm whether the system version supports full functions, some functions of the Home Edition are limited, and the Professional Edition and above are more complete; 2. Restart the SecurityHealthService service to ensure that its startup type is set to automatic; 3. Check and uninstall third-party security software that may conflict; 4. Run the sfc/scannow and DISM commands to repair system files; 5. Try to reset or reinstall the Windows Security Center application, and contact Microsoft support if necessary.
 Windows stuck on 'undoing changes made to your computer'
Jul 05, 2025 am 02:51 AM
Windows stuck on 'undoing changes made to your computer'
Jul 05, 2025 am 02:51 AM
The computer is stuck in the "Undo Changes made to the computer" interface, which is a common problem after the Windows update fails. It is usually caused by the stuck rollback process and cannot enter the system normally. 1. First of all, you should wait patiently for a long enough time, especially after restarting, it may take more than 30 minutes to complete the rollback, and observe the hard disk light to determine whether it is still running. 2. If there is no progress for a long time, you can force shut down and enter the recovery environment (WinRE) multiple times, and try to start repair or system restore. 3. After entering safe mode, you can uninstall the most recent update records through the control panel. 4. Use the command prompt to execute the bootrec command in the recovery environment to repair the boot file, or run sfc/scannow to check the system file. 5. The last method is to use the "Reset this computer" function
 Proven Ways for Microsoft Teams Error 657rx in Windows 11/10
Jul 07, 2025 pm 12:25 PM
Proven Ways for Microsoft Teams Error 657rx in Windows 11/10
Jul 07, 2025 pm 12:25 PM
Encountering something went wrong 657rx can be frustrating when you log in to Microsoft Teams or Outlook. In this article on MiniTool, we will explore how to fix the Outlook/Microsoft Teams error 657rx so you can get your workflow back on track.Quick
 The RPC server is unavailable Windows
Jul 06, 2025 am 12:07 AM
The RPC server is unavailable Windows
Jul 06, 2025 am 12:07 AM
When encountering the "RPCserverisunavailable" problem, first confirm whether it is a local service exception or a network configuration problem. 1. Check and start the RPC service to ensure that its startup type is automatic. If it cannot be started, check the event log; 2. Check the network connection and firewall settings, test the firewall to turn off the firewall, check DNS resolution and network connectivity; 3. Run the sfc/scannow and DISM commands to repair the system files; 4. Check the group policy and domain controller status in the domain environment, and contact the IT department to assist in the processing. Gradually check it in sequence to locate and solve the problem.
 the default gateway is not available Windows
Jul 08, 2025 am 02:21 AM
the default gateway is not available Windows
Jul 08, 2025 am 02:21 AM
When you encounter the "DefaultGatewayisNotAvailable" prompt, it means that the computer cannot connect to the router or does not obtain the network address correctly. 1. First, restart the router and computer, wait for the router to fully start before trying to connect; 2. Check whether the IP address is set to automatically obtain, enter the network attribute to ensure that "Automatically obtain IP address" and "Automatically obtain DNS server address" are selected; 3. Run ipconfig/release and ipconfig/renew through the command prompt to release and re-acquire the IP address, and execute the netsh command to reset the network components if necessary; 4. Check the wireless network card driver, update or reinstall the driver to ensure that it works normally.
 How to fix 'SYSTEM_SERVICE_EXCEPTION' stop code in Windows
Jul 09, 2025 am 02:56 AM
How to fix 'SYSTEM_SERVICE_EXCEPTION' stop code in Windows
Jul 09, 2025 am 02:56 AM
When encountering the "SYSTEM_SERVICE_EXCEPTION" blue screen error, you do not need to reinstall the system or replace the hardware immediately. You can follow the following steps to check: 1. Update or roll back hardware drivers such as graphics cards, especially recently updated drivers; 2. Uninstall third-party antivirus software or system tools, and use WindowsDefender or well-known brand products to replace them; 3. Run sfc/scannow and DISM commands as administrator to repair system files; 4. Check memory problems, restore the default frequency and re-plug and unplug the memory stick, and use Windows memory diagnostic tools to detect. In most cases, the driver and software problems can be solved first.
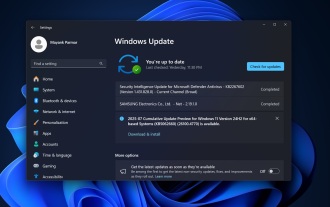 Windows 11 KB5062660 24H2 out with features, direct download links for offline installer (.msu)
Jul 23, 2025 am 09:43 AM
Windows 11 KB5062660 24H2 out with features, direct download links for offline installer (.msu)
Jul 23, 2025 am 09:43 AM
Windows 11 KB5062660 is now rolling out as an optional update for Windows 11 24H2 with a few new features, including Recall AI in Europe. This patch is available via Windows Update, but Microsoft has also posted direct download l
 How to repair Windows 11 using command prompt
Jul 05, 2025 am 02:59 AM
How to repair Windows 11 using command prompt
Jul 05, 2025 am 02:59 AM
How to use command prompt to repair Windows 11? 1. Enter the command prompt through the recovery environment: enter the recovery environment through USB boot or three consecutive interrupts, and then select Troubleshooting > Advanced Options > Command Prompt; 2. Use DISM to repair the system image: Run DISM/Online/Cleanup-Image/CheckHealth to check for corruption, DISM/Online/Cleanup-Image/ScanHealth scanning problem, DISM/Online/Cleanup-Image/RestoreHealth to repair the problem, and specify an external source if necessary; 3. Run SF
