
 System Tutorial
Windows Series
Best 'Do Not Disturb' Setup to Eliminate Distractions in Windows - Make Tech Easier
System Tutorial
Windows Series
Best 'Do Not Disturb' Setup to Eliminate Distractions in Windows - Make Tech Easier
Best 'Do Not Disturb' Setup to Eliminate Distractions in Windows - Make Tech Easier
May 23, 2025 am 12:40 AM
In this world of attractive content and constant pop-up notifications, staying focused can be a challenge. If you find your focus unfocused while using your PC, learn how I created the ultimate Do Not Disturb setting in Windows with a few simple tweaks.
Table of contents
- Management Notification
- Take advantage of the focus assistant in Windows
- Configure the taskbar to eliminate interference
- Disable system sound
- Online content that stops distracting
Management Notification
I don't recommend disabling notifications altogether to set Windows' Do Not Disturb mode, as many notifications are necessary to keep information updated. However, you should adjust them to avoid unnecessary notifications. In Windows settings, go to System -> Notifications and you can find all notification-related settings.
First, disable notifications for any non-critical applications. I usually disable applications that only notify you from the system tray they are still working or notify you that they are using a feature, such as screenshots.

You can further configure notifications separately to remove banners and sounds, or manage their priorities in the Notification Center. I prefer to disable banners for non-emergency notifications. The sound alarm is enough to notify me and I can check them later in the Notification Center.

Do Not Disturb mode is another feature that is very useful when you don't want to receive any notifications at all. When enabled, it sends all notifications directly to the Notification Center, allowing you to view when you have time. You can also automatically enable Do Not Disturb mode depending on different triggers, such as time, full screen apps or games.

Take advantage of the focus assistant in Windows
Windows' Focus Assistant feature takes notification blocking to the next level when you don't want to be disturbed at all. When enabled, it turns on Windows' Do Not Disturb mode for a specific time period and disables notification badges and application flashing on the taskbar.
Enter System- > Focus in Windows settings and open the Focus Assistant settings. To easily open a focus session, click the Notification Center icon in the taskbar and switch to focus .

It uses Pomodoro timing technology, with 30 minutes of sessions, including 25 minutes of working time and 5 minutes of rest time. You can create sessions up to 240 minutes and automatically add rest time.
Configure the taskbar to eliminate interference
Aside from the apps you are using, the taskbar is where all activities occur, such as notifications, minor open applications, searches and even news. If you want to eliminate distractions, adjusting the taskbar is necessary.
Right-click on the taskbar, select Taskbar Settings , and open all the options related to the taskbar.
Disable widgets because even accidentally hovering over them will open news and other distracting content. I also like to keep the Task View disabled because I use Win Tab shortcuts, but this is optional.

Scroll down and open the taskbar behavior section, permanently disable the application badge and flashing. More importantly, enable the automatic hidden taskbar option. This will hide the taskbar and will only show up when you hover over it, minimizing distractions (also freeing up some screen space).

Disable system sound
I found Windows' system sounds very distracting, especially when they don't have visual cues, forcing me to look for reasons. If you're like me, you might want to disable some system sounds that are distracting but don't provide much value.
In Windows settings, go to System -> Sound and click More Sound Settings .
Open the Sounds tab to view all default Windows sounds and their corresponding action lists.

To disable the sound of an action, select the action and select None in the list at the bottom. I like to disable sounds include calendar reminders, exclamation marks, and instant messaging notifications.

If you find Windows sounds more annoying than distracting, you may want to install a new Windows sound scheme.
Online content that stops distracting
Most of the big disruptions come from fascinating online content such as social media sites and streaming services. If you often spend hours on these sites when you should focus on your work, you may need some Do Not Disturb help on Windows.
The best way I found is to limit the time spent on these sites every day. With time limits, if I visit a website while working, I have less time on the break. The StayFocusd Chrome extension is very reliable in this regard. It is highly customizable and suitable for any Chromium-based browser such as Chrome, Opera, Edge and Brave.
After installation, the extension opens its options page for the first configuration. You can add websites in the blocked site section and set a timer for them. The website uses the same timer. If you want to set a separate timer for different types of websites, click Add Group .

Use the Active Days , Active Times , and Daily Reset Time tabs to decide when to track and block the website.
More interesting features are the challenges and core options required . The Required Challenge option will force you to complete a difficult challenge when you try to change the extension settings to cheat.

The kernel option blocks the website for a specific time and cannot be revoked, including specific content such as multimedia, images, forms, and logins. Overall, this extension will help you limit or block distracting online content while making undoing restrictions difficult.
Combining these adjustments will eliminate all common distractions that may interfere with your focus. Apart from these tweaks, using Windows keyboard shortcuts also helped me with the Do Not Disturb setting. As a writer, I can focus on typing without worrying about interacting with user interface elements or even reaching for a mouse.
Image source: Freepik. All screenshots are courtesy of Karrar Haider.
The above is the detailed content of Best 'Do Not Disturb' Setup to Eliminate Distractions in Windows - Make Tech Easier. For more information, please follow other related articles on the PHP Chinese website!

Hot AI Tools

Undress AI Tool
Undress images for free

Undresser.AI Undress
AI-powered app for creating realistic nude photos

AI Clothes Remover
Online AI tool for removing clothes from photos.

Clothoff.io
AI clothes remover

Video Face Swap
Swap faces in any video effortlessly with our completely free AI face swap tool!

Hot Article
Hot Tools

Notepad++7.3.1
Easy-to-use and free code editor

SublimeText3 Chinese version
Chinese version, very easy to use

Zend Studio 13.0.1
Powerful PHP integrated development environment

Dreamweaver CS6
Visual web development tools

SublimeText3 Mac version
God-level code editing software (SublimeText3)


 How to Change Font Color on Desktop Icons (Windows 11)
Jul 07, 2025 pm 12:07 PM
How to Change Font Color on Desktop Icons (Windows 11)
Jul 07, 2025 pm 12:07 PM
If you're having trouble reading your desktop icons' text or simply want to personalize your desktop look, you may be looking for a way to change the font color on desktop icons in Windows 11. Unfortunately, Windows 11 doesn't offer an easy built-in
 Fixed Windows 11 Google Chrome not opening
Jul 08, 2025 pm 02:36 PM
Fixed Windows 11 Google Chrome not opening
Jul 08, 2025 pm 02:36 PM
Fixed Windows 11 Google Chrome not opening Google Chrome is the most popular browser right now, but even it sometimes requires help to open on Windows. Then follow the on-screen instructions to complete the process. After completing the above steps, launch Google Chrome again to see if it works properly now. 5. Delete Chrome User Profile If you are still having problems, it may be time to delete Chrome User Profile. This will delete all your personal information, so be sure to back up all relevant data. Typically, you delete the Chrome user profile through the browser itself. But given that you can't open it, here's another way: Turn on Windo
 How to fix second monitor not detected in Windows?
Jul 12, 2025 am 02:27 AM
How to fix second monitor not detected in Windows?
Jul 12, 2025 am 02:27 AM
When Windows cannot detect a second monitor, first check whether the physical connection is normal, including power supply, cable plug-in and interface compatibility, and try to replace the cable or adapter; secondly, update or reinstall the graphics card driver through the Device Manager, and roll back the driver version if necessary; then manually click "Detection" in the display settings to identify the monitor to confirm whether it is correctly identified by the system; finally check whether the monitor input source is switched to the corresponding interface, and confirm whether the graphics card output port connected to the cable is correct. Following the above steps to check in turn, most dual-screen recognition problems can usually be solved.
 Want to Build an Everyday Work Desktop? Get a Mini PC Instead
Jul 08, 2025 am 06:03 AM
Want to Build an Everyday Work Desktop? Get a Mini PC Instead
Jul 08, 2025 am 06:03 AM
Mini PCs have undergone
 Fixed the failure to upload files in Windows Google Chrome
Jul 08, 2025 pm 02:33 PM
Fixed the failure to upload files in Windows Google Chrome
Jul 08, 2025 pm 02:33 PM
Have problems uploading files in Google Chrome? This may be annoying, right? Whether you are attaching documents to emails, sharing images on social media, or submitting important files for work or school, a smooth file upload process is crucial. So, it can be frustrating if your file uploads continue to fail in Chrome on Windows PC. If you're not ready to give up your favorite browser, here are some tips for fixes that can't upload files on Windows Google Chrome 1. Start with Universal Repair Before we learn about any advanced troubleshooting tips, it's best to try some of the basic solutions mentioned below. Troubleshooting Internet connection issues: Internet connection
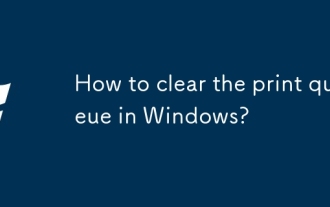 How to clear the print queue in Windows?
Jul 11, 2025 am 02:19 AM
How to clear the print queue in Windows?
Jul 11, 2025 am 02:19 AM
When encountering the problem of printing task stuck, clearing the print queue and restarting the PrintSpooler service is an effective solution. First, open the "Device and Printer" interface to find the corresponding printer, right-click the task and select "Cancel" to clear a single task, or click "Cancel all documents" to clear the queue at one time; if the queue is inaccessible, press Win R to enter services.msc to open the service list, find "PrintSpooler" and stop it before starting the service. If necessary, you can manually delete the residual files under the C:\Windows\System32\spool\PRINTERS path to completely solve the problem.

 How to show file extensions in Windows 11 File Explorer?
Jul 08, 2025 am 02:40 AM
How to show file extensions in Windows 11 File Explorer?
Jul 08, 2025 am 02:40 AM
To display file extensions in Windows 11 File Explorer, you can follow the following steps: 1. Open any folder; 2. Click the "View" tab in the top menu bar; 3. Click the "Options" button in the upper right corner; 4. Switch to the "View" tab; 5. Uncheck "Hide extensions for known file types"; 6. Click "OK" to save settings. This setting helps identify file types, improve development efficiency, and troubleshoot problems. If you just want to view the extension temporarily, you can right-click the file and select "Rename" and press the Esc key to exit, and the system settings will not be changed.
