


Project Introduction
iptables is a free packet filtering firewall software under Linux system, which can realize packet filtering, packet redirection and network address translation and other functions. It is an efficient and flexible solution that replaces expensive commercial firewalls. iptables has powerful configuration options and rule settings, allowing users to finely control network traffic according to their own needs and improve network security and performance.
The rules of iptables actually refer to the conditions predefined by the network administrator. The rules are generally defined as "If the data packet header meets such conditions, process the data packet in this way." Rules are stored in the packet filtering table in the kernel space. These rules specify the source address, destination address, transmission protocol (such as TCP, UDP, ICMP) and service type (such as HTTP, FTP and SMTP). When data packets match the rules, iptables processes these data packets according to the methods defined by the rules, such as accept, reject, drop, etc. The main task of configuring the firewall is to add, modify and delete these rules.
iptables has four built-in tables, namely filter table, nat table, mangle table and raw table, which are used to implement packet filtering, network address translation, packet reconstruction (modification) and data tracking processing respectively. Each chain is actually just a checklist among many rules. Each chain can have one or several rules. When a packet arrives at a chain, iptables will check starting from the first rule in the chain to see if the packet meets the conditions defined by the rule. If satisfied, the system will process the packet according to the method defined by the rule; otherwise iptables will continue to check the next rule. If the packet does not comply with any rule in the chain, iptables will process the packet according to the predefined default policy of the chain.
In general, iptables is a powerful tool for configuring firewall and network address translation functions on Linux systems.

Replace the system firewall: The default firewall management tool in Centos7 system is not iptables. When you need to use it, you need to install and replace it yourself.
[root@localhost ~]# systemctl stop firewalld
[root@localhost ~]# systemctl disable firewalld

[root@localhost ~]# yum install -y iptables iptables-services

[root@localhost ~]# systemctl restart iptables
[root@localhost ~]# systemctl enable iptables
Query the complete firewall rules: Use the -L -n –line-numbers parameter to view the default firewall configuration rules.
[root@localhost ~]# iptables -L -n --line-numbers
[root@localhost ~]# iptables -F # 臨時(shí)清空規(guī)則
Chain INPUT (policy ACCEPT)
numtarget prot opt source destination
1ACCEPT all--0.0.0.0/00.0.0.0/0state RELATED,ESTABLISHED
2ACCEPT icmp --0.0.0.0/00.0.0.0/0
3ACCEPT all--0.0.0.0/00.0.0.0/0
4ACCEPT tcp--0.0.0.0/00.0.0.0/0state NEW tcp dpt:22
5REJECT all--0.0.0.0/00.0.0.0/0reject-with icmp-host-prohibited

Chain FORWARD (policy ACCEPT)
numtarget prot opt source destination
1REJECT all--0.0.0.0/00.0.0.0/0reject-with icmp-host-prohibited

Chain OUTPUT (policy ACCEPT)
numtarget prot opt source destination
Set the firewall to deny by default: Set the default deny rule and set the INPUT chain to deny by default, which means rejecting all connection requests.
[root@localhost ~]# iptables -P INPUT DROP
[root@localhost ~]# iptables -L -n --line-numbers

Chain INPUT (policy DROP) #這里可以看出INPUT鏈已變成DROP
numtarget prot opt source destination

Chain FORWARD (policy ACCEPT)
numtarget prot opt source destination

Chain OUTPUT (policy ACCEPT)
numtarget prot opt source destination
Enable firewall ICMP echo: When the default rule denies it, set it to enable ICMP test and allow the host to ping.
[root@localhost ~]# iptables -I INPUT -p icmp -j ACCEPT
[root@localhost ~]# iptables -L -n --line-numbers

Chain INPUT (policy DROP)
numtarget prot opt source destination
1ACCEPT icmp --0.0.0.0/00.0.0.0/0

Chain FORWARD (policy ACCEPT)
numtarget prot opt source destination

Chain OUTPUT (policy ACCEPT)
numtarget prot opt source destination
Allow customer SSH remote connection: In the case of denial by default, set up port 22 to allow remote SSH connection to the machine.
[root@localhost ~]# iptables -I INPUT -p tcp --dport 22 -j ACCEPT
[root@localhost ~]# iptables -I OUTPUT -p tcp --sport 22 -j ACCEPT

[root@localhost ~]# iptables -L -n --line-numbers
Chain INPUT (policy ACCEPT)
numtarget prot opt source destination
1ACCEPT tcp--0.0.0.0/00.0.0.0/0tcp dpt:22
Chain OUTPUT (policy ACCEPT)
numtarget prot opt source destination
1ACCEPT tcp--0.0.0.0/00.0.0.0/0tcp spt:22
Delete specified rules: In the case of default rejection, delete the INPUT chain, the second data, and delete the ICMP rule.
[root@localhost ~]# iptables -L -n --line-numbers
Chain INPUT (policy DROP)
numtarget prot opt source destination
1ACCEPT tcp--0.0.0.0/00.0.0.0/0tcp dpt:22
2ACCEPT icmp --0.0.0.0/00.0.0.0/0

[root@localhost ~]# iptables -D INPUT 2
[root@localhost ~]# iptables -L -n --line-numbers
Chain INPUT (policy DROP)
numtarget prot opt source destination
1ACCEPT tcp--0.0.0.0/00.0.0.0/0tcp dpt:22
Specify the allowed network segment access: In the case of denial by default, set up to only allow hosts in the 192.168.1.0/24 network segment to access port 22 of the machine.
[root@localhost ~]# iptables -I INPUT -s 192.168.1.0/24 -p tcp --dport 22 -j ACCEPT
[root@localhost ~]# iptables -I OUTPUT -s 192.168.1.0/24 -p tcp --sport 22 -j ACCEPT
[root@localhost ~]# iptables -L -n --line-numbers

Chain INPUT (policy DROP)
numtarget prot opt source destination
1ACCEPT tcp--192.168.1.0/24 0.0.0.0/0tcp dpt:22

Chain OUTPUT (policy ACCEPT)
numtarget prot opt source destination
1ACCEPT tcp--192.168.1.0/24 0.0.0.0/0tcp spt:22
Deny access to the specified port: In the INPUT rule chain, add port 8888 that denies everyone access to the machine.
[root@localhost ~]# iptables -I INPUT -p tcp --dport 8888 -j REJECT
[root@localhost ~]# iptables -L -n --line-numbers
Chain INPUT (policy DROP)
numtarget prot opt source destination
1REJECT tcp--0.0.0.0/00.0.0.0/0tcp dpt:8888 reject-with icmp-port-unreachable
2ACCEPT tcp--192.168.1.0/24 0.0.0.0/0tcp dpt:22
Deny access to the port of the specified host network segment: In the INPUT rule chain, add the 192.168.1.20 host to deny access to the local port 80.
[root@localhost ~]# iptables -I INPUT -p tcp -s 192.168.1.20 --dport 80 -j REJECT
[root@localhost ~]# iptables -L -n --line-numbers

Chain INPUT (policy DROP)
numtarget prot opt source destination
1REJECT tcp--192.168.1.20 0.0.0.0/0tcp dpt:80 reject-with icmp-port-unreachable
2REJECT tcp--0.0.0.0/00.0.0.0/0tcp dpt:8888 reject-with icmp-port-unreachable
3ACCEPT tcp--192.168.1.0/24 0.0.0.0/0tcp dpt:22
Deny access to the specified port range: In the INPUT rule chain, add a deny for all hosts to access the local port 1000-2000.
[root@localhost ~]# iptables -A INPUT -p tcp --dport 1000:2000 -j REJECT
[root@localhost ~]# iptables -A INPUT -p udp --dport 1000:2000 -j REJECT
[root@localhost ~]# iptables -L -n --line-numbers

Chain INPUT (policy DROP)
numtarget prot opt source destination
1REJECT tcp--192.168.1.20 0.0.0.0/0tcp dpt:80 reject-with icmp-port-unreachable
2REJECT tcp--0.0.0.0/00.0.0.0/0tcp dpt:8888 reject-with icmp-port-unreachable
3ACCEPT tcp--192.168.1.0/24 0.0.0.0/0tcp dpt:22
4REJECT tcp--0.0.0.0/00.0.0.0/0tcp dpts:1000:2000 reject-with icmp-port-unreachable
5REJECT udp--0.0.0.0/00.0.0.0/0udp dpts:1000:2000 reject-with icmp-port-unreachable
SNAT-Source Address Translation
#例:將本地 192.168.1.1 的請(qǐng)求自動(dòng)偽裝成外網(wǎng)地址 59.110.167.234
[root@localhost ~]# iptables -t nat -A POSTROUTING -o ens32 -s 192.168.1.1 -j SNAT --to-source 59.110.167.234

-o#指定外網(wǎng)接口,此處為ens32
-s#指定內(nèi)網(wǎng)口地址,此處為192.168.1.1
--to-source #外網(wǎng)口的地址
DNAT-Destination Address Translation
#例:將請(qǐng)求 59.110.167.234 且端口為 80 的數(shù)據(jù)包,自動(dòng)映射到內(nèi)網(wǎng) 192.168.1.10
[root@localhost ~]# iptables -t nat -A PREROUTING -i ens32 -d 59.110.167.234 -p tcp --dport 80 -j DNAT --to-destination 192.168.1.10

--to-destination #內(nèi)網(wǎng)口地址,此處為192.168.1.1
-i #綁定外網(wǎng)接口,此處為ens32
-d #外網(wǎng)地址,此處為8.8.8.8
-dport #內(nèi)網(wǎng)端口,此處為80
Limit the number of physical request connections: iptables can use the connlimit module to limit the number of connections of the same IP for a certain port. It allows limiting the number of concurrent connections for each client IP, that is, the number of simultaneous connections to a server for each IP. You can also limit the network usage of intranet users, and for the server, you can limit the number of connections initiated by each IP.
# 限制同一IP同時(shí)最多100個(gè)http連接
[root@localhost ~]# iptables -I INPUT -p tcp --syn --dport 80 -m connlimit --connlimit-above 100 -j REJECT
[root@localhost ~]# iptables -I INPUT -p tcp --syn --dport 80 -m connlimit ! --connlimit-above 100 -j ACCEPT

# 只允許每組C類IP同時(shí)100個(gè)http連接
[root@localhost ~]# iptables -p tcp --syn --dport 80 -m connlimit --connlimit-above 100 --connlimit-mask 24 -j REJECT

# 只允許每個(gè)IP同時(shí)5個(gè)80端口轉(zhuǎn)發(fā),超過(guò)的丟棄
[root@localhost ~]# iptables -I FORWARD -p tcp --syn --dport 80 -m connlimit --connlimit-above 5 -j DROP

# 限制某IP最多同時(shí)100個(gè)http連接
[root@localhost ~]# iptables -A INPUT -s 192.168.1.100 -p tcp --syn --dport 80 -m connlimit --connlimit-above 100 -j REJECT

# 限制每IP在一定的時(shí)間(比如60秒)內(nèi)允許新建立最多100個(gè)http連接數(shù)
[root@localhost ~]# iptables -A INPUT -p tcp --dport 80 -m recent --name BAD_HTTP_ACCESS --update --seconds 60 --hitcount 100 -j REJECT
[root@localhost ~]# iptables -A INPUT -p tcp --dport 80 -m recent --name BAD_HTTP_ACCESS --set -j ACCEPT
Configure basic firewall rules: We can execute the following codes in sequence in the newly installed system to configure a basic firewall rule.
# 刪除已有規(guī)則
iptables --delete-chain
iptables --flush

# 默認(rèn)禁止進(jìn),允許出,允許回環(huán)網(wǎng)卡
iptables -P INPUT DROP
iptables -P FORWARD DROP
iptables -P OUTPUT ACCEPT
iptables -A INPUT -i lo -j ACCEPT

# 允許已建立的或相關(guān)連接的通行
iptables -A INPUT -m state --state RELATED,ESTABLISHED -j ACCEPT
iptables -A OUTPUT -m state --state RELATED,ESTABLISHED -j ACCEPT

# 限制80端口443端口的單個(gè)IP的最大連接數(shù)為10
iptables -I INPUT -p tcp --dport 80 -m connlimit --connlimit-above 10 -j DROP
iptables -I INPUT -p tcp --dport 443 -m connlimit --connlimit-above 10 -j DROP

# 允許80(HTTP)/873(RSYNC)/443(HTTPS)/20,21(FTP)/25(SMTP)端口的連接
iptables -A INPUT -p tcp -m tcp --dport 80 -j ACCEPT
iptables -A INPUT -p tcp -m tcp --dport 20 -j ACCEPT
iptables -A INPUT -p tcp -m tcp --dport 21 -j ACCEPT
iptables -A INPUT -p tcp -m tcp --dport 25 -j ACCEPT
iptables -A INPUT -p tcp -m tcp --dport 443 -j ACCEPT
iptables -A INPUT -p tcp -m tcp --dport 873 -j ACCEPT

# 允許SSH端口的連接,放行SSH端口
iptables -A INPUT -p tcp -m tcp --dport 22 -j ACCEPT
iptables -A OUTPUT -p tcp -m tcp --dport 22 -j ACCEPT

# 允許ping
iptables -A INPUT -p icmp -m icmp --icmp-type 8 -j ACCEPT
iptables -A INPUT -p icmp -m icmp --icmp-type 11 -j ACCEPT

# 放行允許DNS解析端口
iptables -A OUTPUT -p udp -m udp -d 8.8.8.8 --dport 53 -j ACCEPT
iptables -A OUTPUT -p udp -m udp -d 114.114.114.114 --dport 53 -j ACCEPT

# 保存規(guī)則
iptables-save
Commonly used configuration rules for production: The following are the configurations of some commonly used rules in the production environment. Generally, configuring these rules is enough.
 filter -P INPUT DROP #設(shè)置默認(rèn)規(guī)則,拒絕所有
iptables -t filter -A INPUT -p tcp --dport 80 -j ACCEPT#放行80口
iptables -t filter -A INPUT -p tcp --dport 443 -j ACCEPT #放行22口
iptables -t filter -A INPUT -p tcp --dport 22 -j ACCEPT#放行22口

iptables -t filter -A INPUT -p tcp --dport 80 -j ACCEPT#放行80端口
iptables -t filter -I INPUT -p tcp --dport 443-j ACCEPT#插入在頂端一條放行443端口的規(guī)則
iptables -t filter -I INPUT 2 -p tcp --dport 443 -j ACCEPT #在第二列插入一條443放行規(guī)則
iptables -t filter -A INPUT -p tcp --dport 80 -j DROP#丟棄80端口的請(qǐng)求
iptables -I INPUT 2 -p icmp -j DROP#丟棄ICMP請(qǐng)求
iptables -t filter -D INPUT 3#刪除第三條規(guī)則

iptables -A FORWARD -s 192.168.1.10 -j REJECT#拒絕IP的轉(zhuǎn)發(fā)請(qǐng)求
iptables -I INPUT -s 10.20.30.0/24 -j DROP #丟棄IP網(wǎng)段的入站請(qǐng)求
iptables -A INPUT -i eth1 -s 192.168.0.0/16 -j DROP#丟棄從eth1網(wǎng)卡流入,且地址匹配的數(shù)據(jù)包
iptables -A INPUT -o eth0 -s 192.168.1.0/24 -j DROP#丟棄從eth0網(wǎng)卡流出,且地址匹配的數(shù)據(jù)包
iptables -A INPUT -p tcp --dport 20:21 -j ACCEPT #放行20-21端口的數(shù)據(jù)包

iptables -I INPUT -p tcp -m multiport --dport 80-90,85 -j ACCEPT
iptables -A FORWARD -p tcp -m iprange --src-range 192.168.1.10-192.168.1.100 -j ACCEPT
The above is the detailed content of Linux firewall-iptables detailed explanation. For more information, please follow other related articles on the PHP Chinese website!

Hot AI Tools

Undress AI Tool
Undress images for free

Undresser.AI Undress
AI-powered app for creating realistic nude photos

AI Clothes Remover
Online AI tool for removing clothes from photos.

Clothoff.io
AI clothes remover

Video Face Swap
Swap faces in any video effortlessly with our completely free AI face swap tool!

Hot Article
Hot Tools

Notepad++7.3.1
Easy-to-use and free code editor

SublimeText3 Chinese version
Chinese version, very easy to use

Zend Studio 13.0.1
Powerful PHP integrated development environment

Dreamweaver CS6
Visual web development tools

SublimeText3 Mac version
God-level code editing software (SublimeText3)


 How to solve if Edge browser is blocked by firewall?
Mar 13, 2024 pm 07:10 PM
How to solve if Edge browser is blocked by firewall?
Mar 13, 2024 pm 07:10 PM
How to solve the problem that the Edge browser is blocked by the firewall? Edge browser is Microsoft's own browser. Some users found that this browser was blocked by the firewall during use. So what's going on? Let this site give users a detailed introduction on how to recover the Edge browser if it is blocked by the firewall. How to restore the Edge browser if it is blocked by the firewall? 1. Check the firewall settings: - Click the "Start" button on the Windows taskbar, and then open "Settings". -In the Settings window, select Update & Security. -exist
 Win11 firewall advanced settings gray solution
Dec 24, 2023 pm 07:53 PM
Win11 firewall advanced settings gray solution
Dec 24, 2023 pm 07:53 PM
When setting up the firewall, many friends found that their win11 firewall advanced settings were grayed out and unable to be clicked. This may be caused by not adding a control unit, or by not opening the advanced settings in the correct way. Let’s take a look at how to solve it. Win11 firewall advanced settings gray method one: 1. First, click the start menu below, search and open "Control Panel" at the top 2. Then open "Windows Defender Firewall" 3. After entering, you can open "Advanced Settings" in the left column . Method 2: 1. If the above method cannot be opened, you can right-click "Start Menu" and open "Run" 2. Then enter "mmc" and press Enter to confirm opening. 3. After opening, click on the upper left
 How to enable or disable firewall on Alpine Linux?
Feb 21, 2024 pm 12:45 PM
How to enable or disable firewall on Alpine Linux?
Feb 21, 2024 pm 12:45 PM
On AlpineLinux, you can use the iptables tool to configure and manage firewall rules. Here are the basic steps to enable or disable the firewall on AlpineLinux: Check the firewall status: sudoiptables -L If the output shows rules (for example, there are some INPUT, OUTPUT, or FORWARD rules), the firewall is enabled. If the output is empty, the firewall is currently disabled. Enable firewall: sudoiptables-PINPUTACCEPTsudoiptables-POUTPUTACCEPTsudoiptables-PFORWARDAC
 How to remove the firewall logo on the Win10 desktop icon?
Jan 01, 2024 pm 12:21 PM
How to remove the firewall logo on the Win10 desktop icon?
Jan 01, 2024 pm 12:21 PM
Many friends who use win10 system find that there is a firewall logo on the icon on the computer desktop. What is going on? This makes many friends with obsessive-compulsive disorder particularly uncomfortable. In fact, we only need to open the control panel and click " It can be solved by changing "Change User Account Control Settings". Let's take a look at the specific tutorial. How to cancel the firewall logo on the desktop icon in Windows 10 1. First, right-click the Start menu button next to the computer startup screen, and then select the Control Panel function from the pop-up menu. 2. Then select the "User Account" option and select the "Change User Account Control Settings" item from the new interface that appears. 3. After adjusting the slider in the window to the bottom, click Confirm to exit.
 How to fix UFW status showing as inactive in Linux
Mar 20, 2024 pm 01:50 PM
How to fix UFW status showing as inactive in Linux
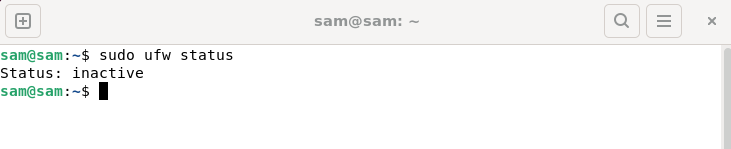
Mar 20, 2024 pm 01:50 PM
UFW, also known as Uncomplex Firewall, is adopted by many Linux distributions as their firewall system. UFW is designed to make it easy for novice users to manage firewall settings through both the command line interface and the graphical user interface. A UFW firewall is a system that monitors network traffic according to set rules to protect the network from network sniffing and other attacks. If you have UFW installed on your Linux system but its status shows as inactive, there could be several reasons. In this guide, I will share how to resolve the UFW firewall inactive issue on Linux systems. Why UFW Shows Inactive Status on Linux Why UFW Is Inactive by Default on Linux How to Inactive on Linux
 How to avoid Web Shell attacks in Nginx firewall
Jun 10, 2023 pm 09:07 PM
How to avoid Web Shell attacks in Nginx firewall
Jun 10, 2023 pm 09:07 PM
With the increase of Web applications, security has become an increasingly important issue. In these applications, WebShell is a common security threat. A WebShell is an executable web script that can be uploaded and executed via HTTP or other web protocols. For attackers, WebShell is an important way to access web servers and obtain sensitive information. Nginx firewall is a popular web server software that can be used to protect web applications from attacks.
 What is nftables? How is it different from iptables?
Jun 09, 2023 pm 09:34 PM
What is nftables? How is it different from iptables?
Jun 09, 2023 pm 09:34 PM
What is nftables? How is it different from iptables? Almost every Linux administrator has used iptables, which is a firewall for Linux systems. But you may not be familiar with nftables, which is a new firewall that provides us with some necessary upgrades and may replace iptables. Why use nftables? nftables was developed by Netfilter, the organization that currently maintains iptables. nftables was created to solve some performance and scaling issues with iptables. In addition to the new syntax and some upgrades, nftables has the same functionality as iptab
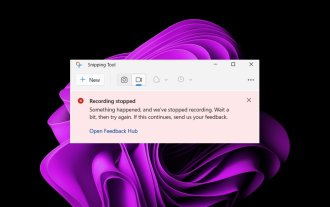 Fix: Recording video in Snipping Tool does not work
Sep 17, 2023 pm 08:09 PM
Fix: Recording video in Snipping Tool does not work
Sep 17, 2023 pm 08:09 PM
While the concept behind the Snipping Tool in Windows 11 is great, one of its main features, recording video, is really disappointing. The screen recording feature is still relatively new, so it can be hard to get by with glitches. Nonetheless, let's take a look at the problem and try to find a solution. So why doesn’t the screenshot tool’s video recording function work? You may not have the latest version of Windows 11 installed. The snipping tool may be corrupted or corrupted. Third-party software such as antivirus software may prevent it from recording your screen. Your computer does not have enough RAM or hard drive space to store the screen recording. Viruses or malware on your computer interfere with the way programs work. How to get Snipping Tool to record my screen in Windows 11
