


When you store photos on your Mac, there may be some you want to keep private. To make sure they aren't visible to others, you can lock those photos on your Mac so they're protected from prying eyes. This article will guide you on how to lock photos on your Mac so you can view them when you need them.
How to Lock Photos on Mac [2 Methods]
You can lock photos on Mac in two ways – using the Photos app or the Disk Utility app.
Method 1: Using the Photos app
If you store your photos in this app, you can use the Photos app to lock them. If the photos are stored elsewhere, they need to be moved to the Photos app to lock them.
Step 1: Add pictures to the Photos app
If you store pictures in your Mac’s storage, you can add them to the Photos app.
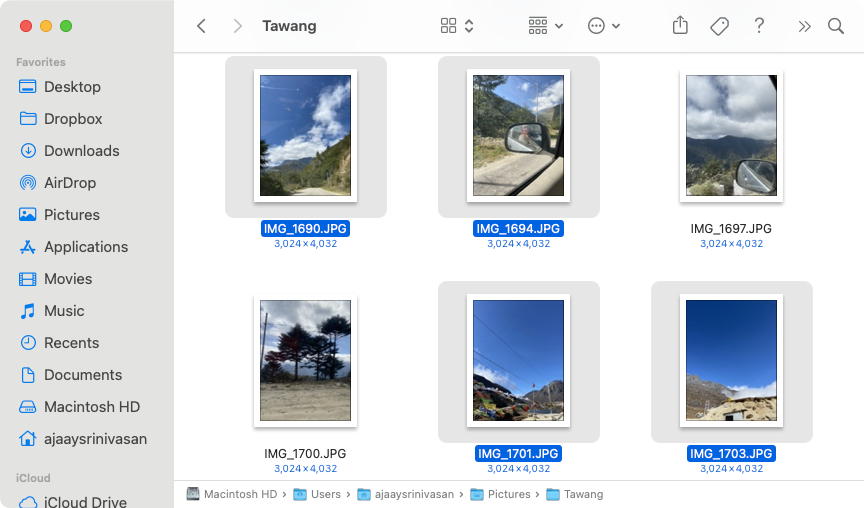
- Open the Finder app and find the picture you want to lock.

- Once you find these images, hold down the Command (?) key and click on the image you want to select.
- Once selected, right-click or Control-click any of the selected files and go to Share >Add to Photos from the menu that appears.
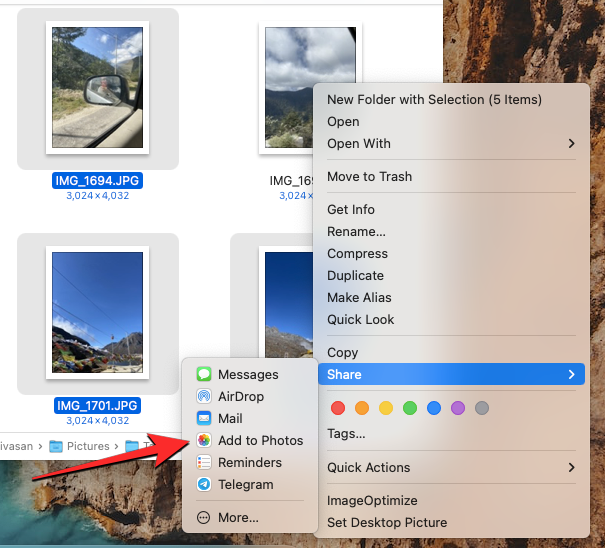
The selected picture will now be sent to the Photos app.
Step 2: Hide pictures on Photos
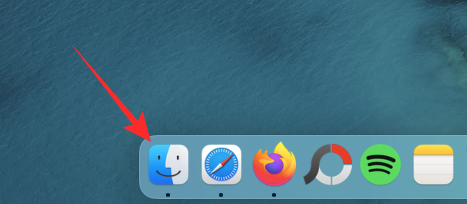
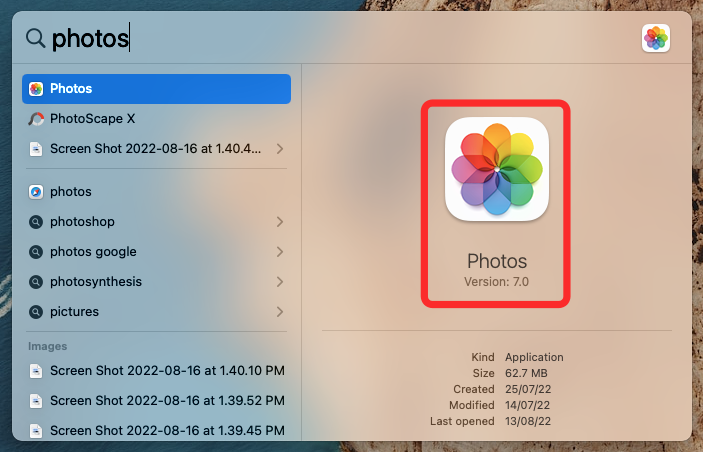
- To lock pictures, open Photos on Mac from the Finder, Launchpad, or Spotlight "App."
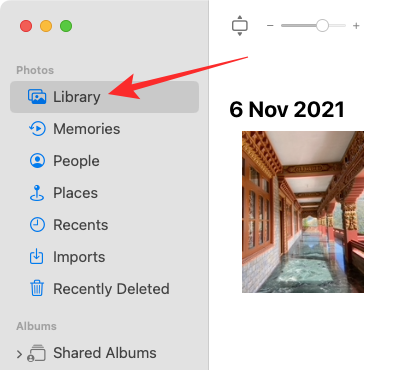
- In Photos, click the Library tab on the left sidebar.
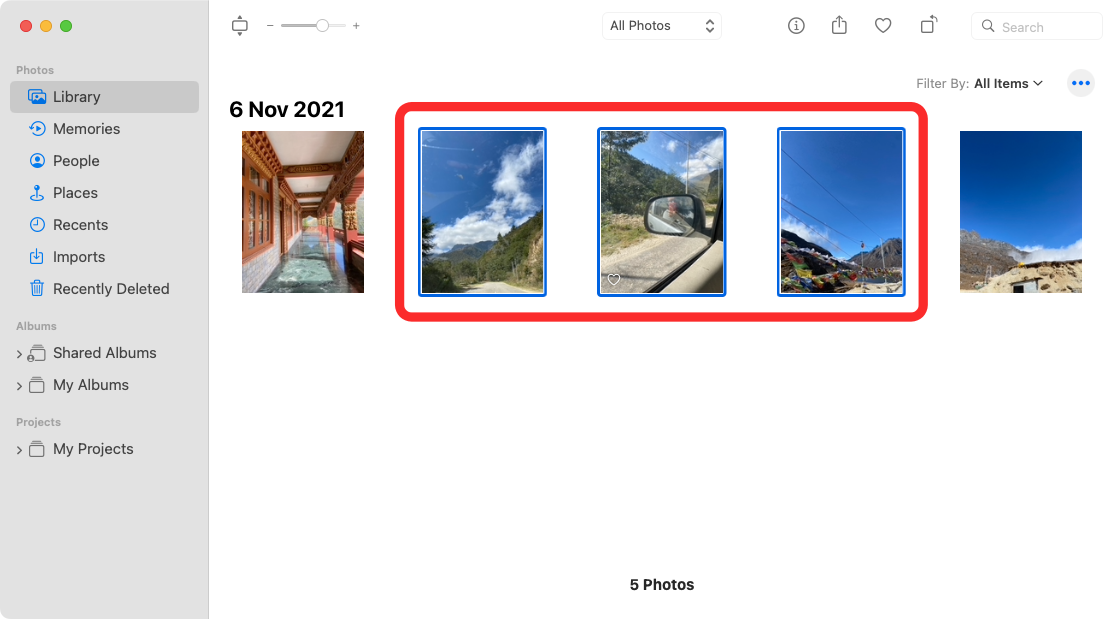
- Now you will see all the pictures you have ever added to the Photos app. To select a photo to lock, hold down the Command (?) key on your keyboard and click the picture you want to select.
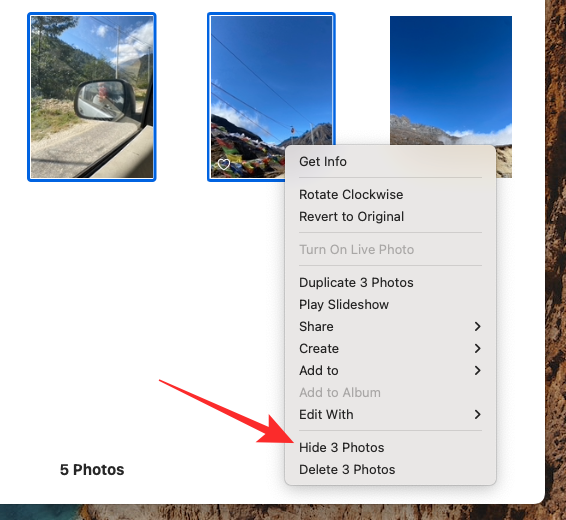
- Once selected, right-click or Control-click any selected picture and select Hide
Photos, where n is the number of photos selected.
- To confirm your action, click Hide in the prompt that appears.
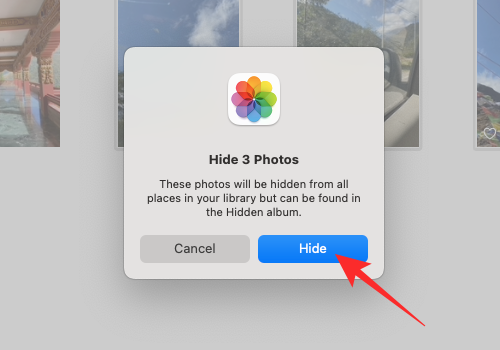
#The pictures you selected will now be locked in the Hidden folder on the Photos app. Anyone who opens the Photos app won't be able to access the photos because they will be hidden.
Method 2: Use the Disk Utility application
If you have a bunch of pictures scattered in different folders on your Mac, then you can use the Disk Utility application to lock it with a password they. Until then, you can compile all the pictures you want to lock into separate folders on your Mac.
Step 1: Create the folder containing the pictures you want to lock
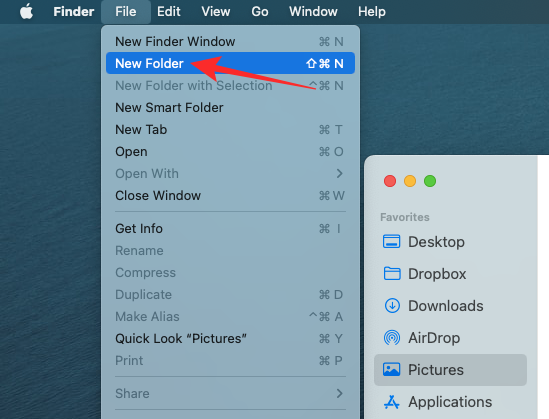
- First, open the Finder app and navigate to the location where you want to place the "Locked" folder.
- Within this location, click the File tab in the top menu bar and select New Folder.
- After creating the new folder, type the name of the folder and press the Return key on your keyboard when finished.
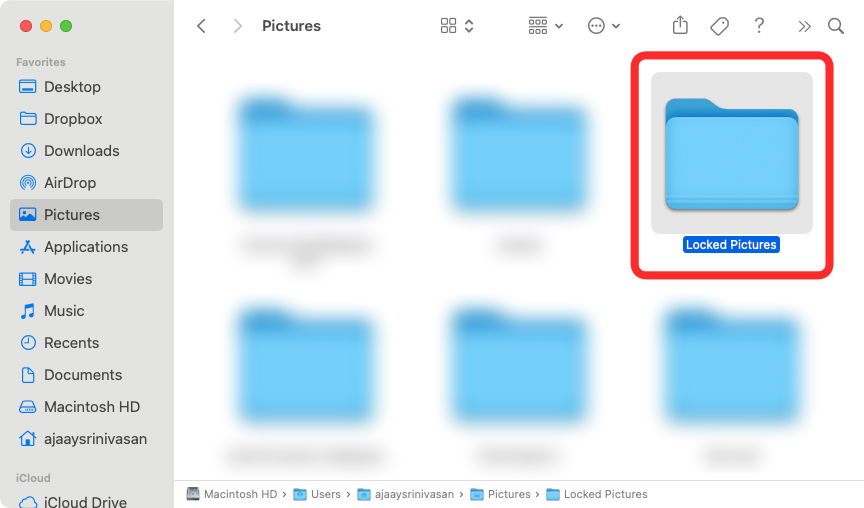
- When finished, move the pictures from your Mac to this newly created folder before locking them. To do this, you can use the following keyboard shortcuts to accomplish it: To select multiple files: Hold down Command (?) and click on the files you want to select.
To cut selected files: Use the Command (?) X shortcut on your keyboard.
To paste selected files: Use the Command (?) V shortcut key on your keyboard.
After you have moved all the pictures you want to hide, you can now lock them using the next step. -
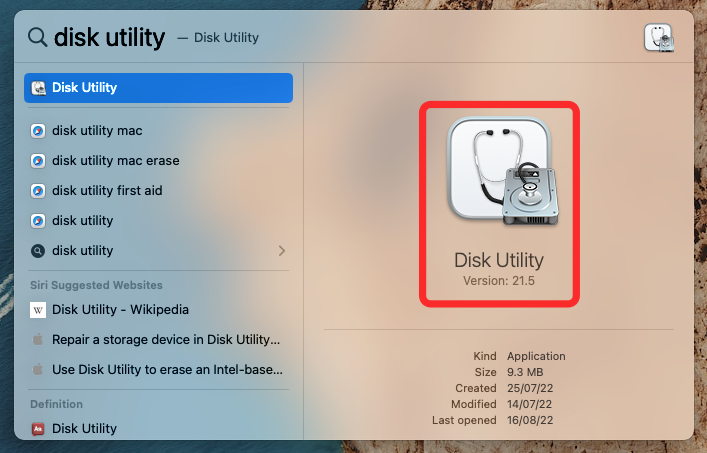
- To lock the folder with a password, open it from the Finder Open the Disk Utility app in , Launchpad or Spotlight.
-
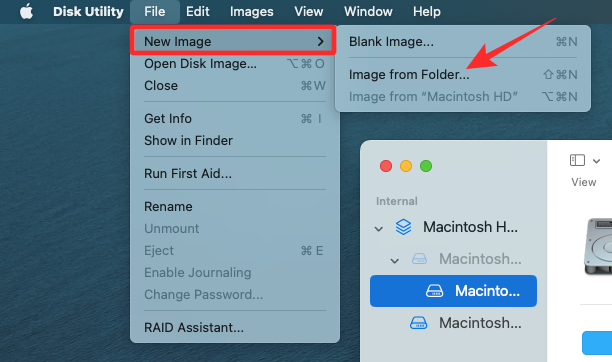
When the Disk Utility application opens, click the File tab in the top menu bar and go to New from Folder > Disk Image.
-
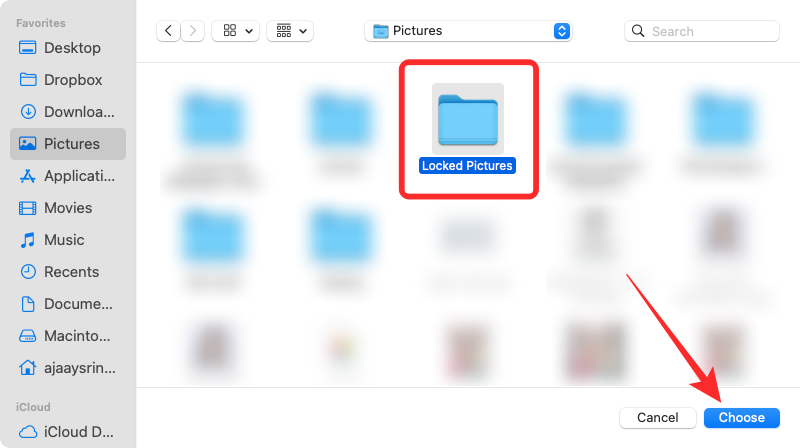
In the Finder window that appears on the screen, navigate to the folder you created in step #1, select it, and click Select.
-
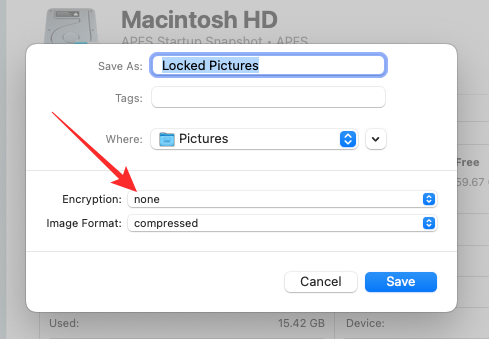
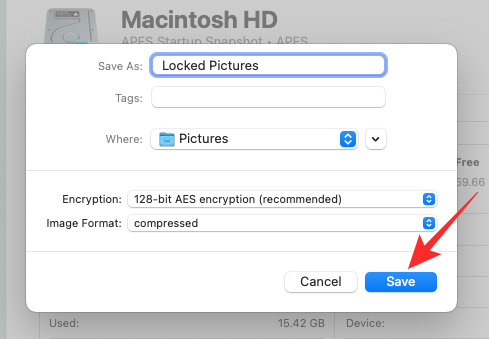
You will now see the "New Image from Folder" menu on your screen. To lock the selected folder, click the "Encrypt" drop-down box.
-
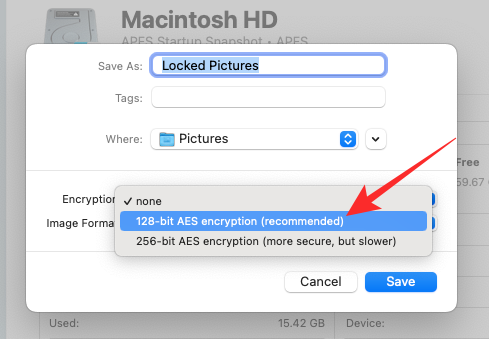
In the menu that appears, select 128-bit AES encryption (recommended).
-
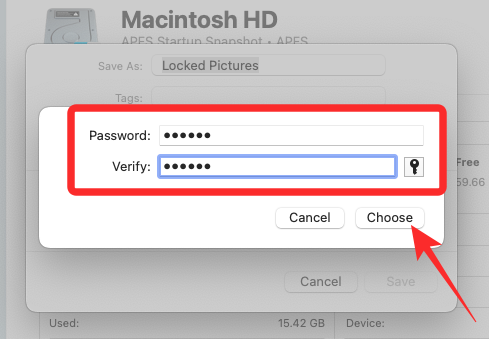
Now you will see a prompt asking you to create a password to lock the selected folder. Carefully type your preferred password in the Password and Verification boxes and click Select.
-
You will now return to the "New Images in Folder" menu. Here you can edit the locked image's name, where to save it, and add tags to it. When finished, click Save in the lower right corner.
-
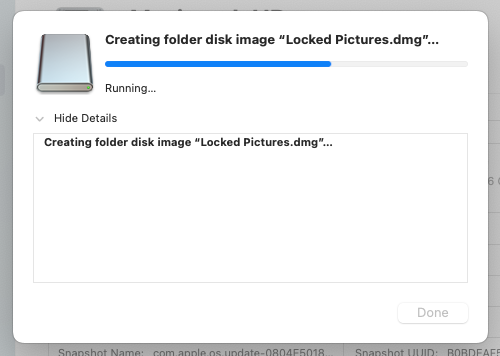
The Disk Utility application will now start creating a disk image of the locked folder.
-
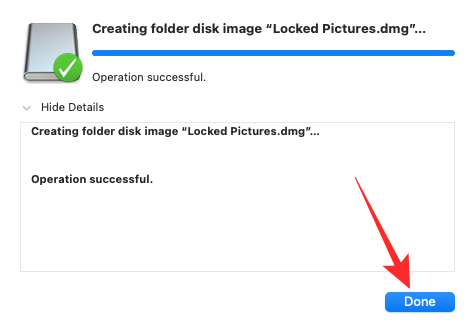
When ready, you will see the following message. To continue, click Finish.
-
The selected folder will now be locked and saved as a DMG file in your preferred location. You can open it to check if everything is there and then delete the original folder from your Mac.
-
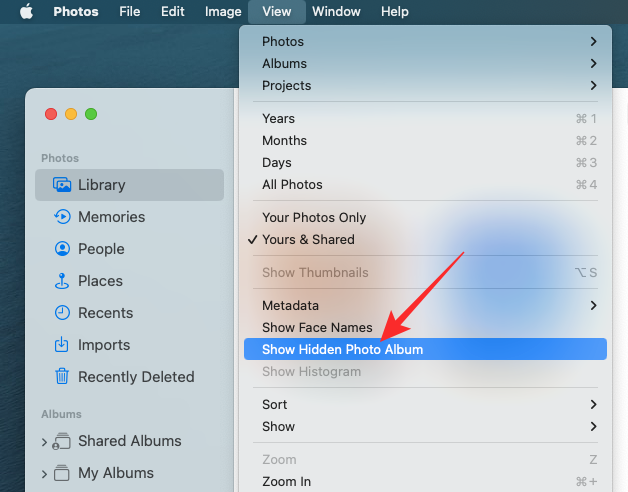
- Open the Photos app on your Mac.
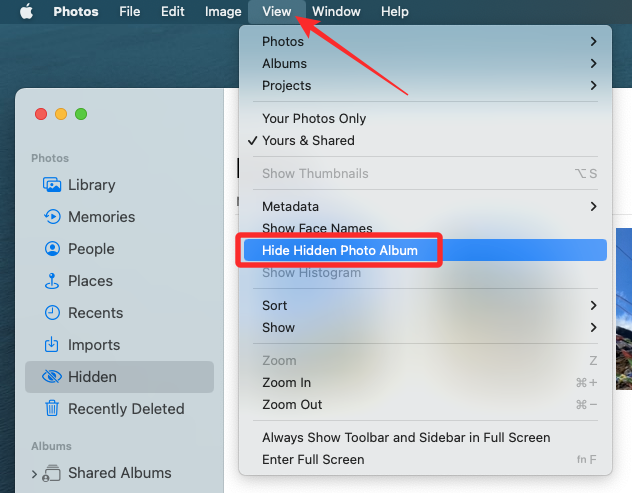
- With the Photos app open, click the View tab on the top menu bar and select Show Hidden Albums.
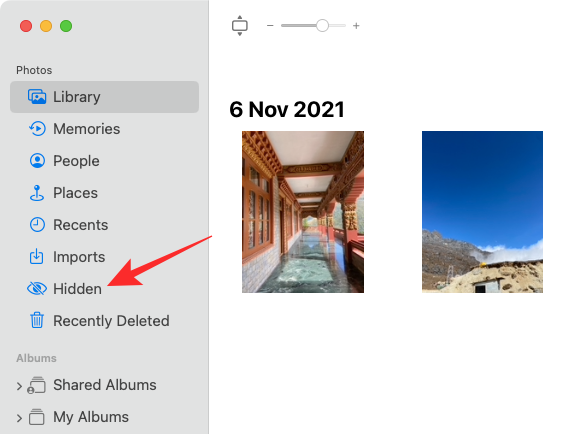
- Now you will see a new tab inside the Photos app. To open a locked photo, click the "Hide" tab on the left sidebar.
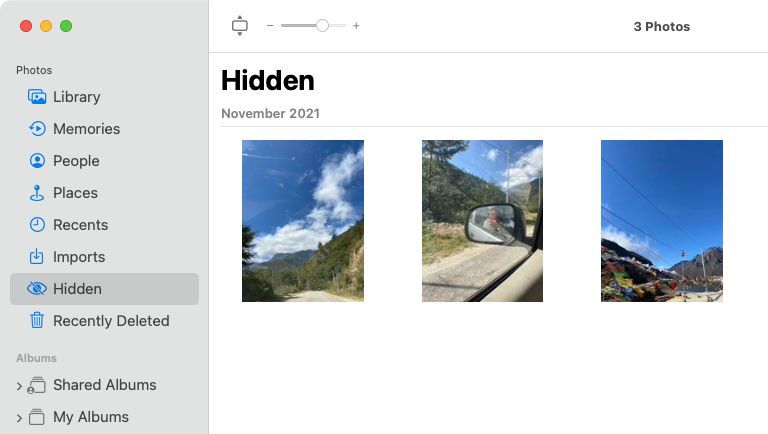
- Here you will see all the pictures you locked using method #1 above.
- To hide these pictures again, click the View tab in the menu bar and select Hide Hidden Albums.
Method 2: If you locked the picture using Disk Utility
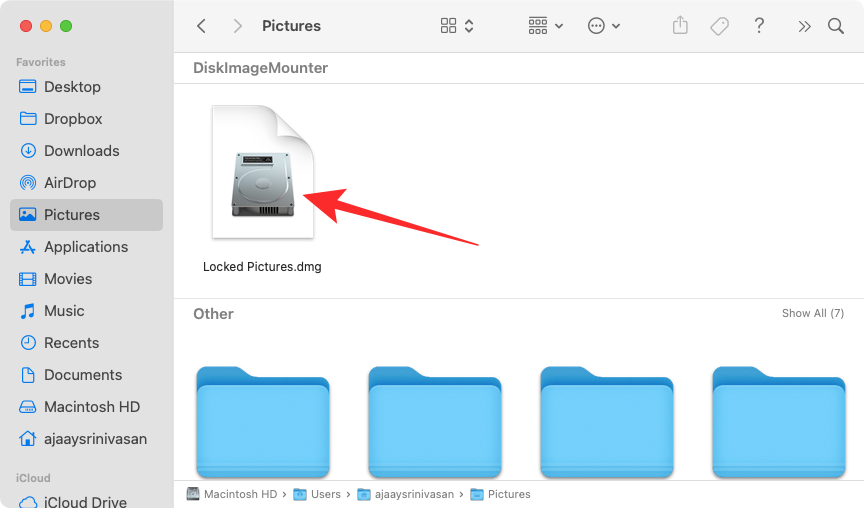
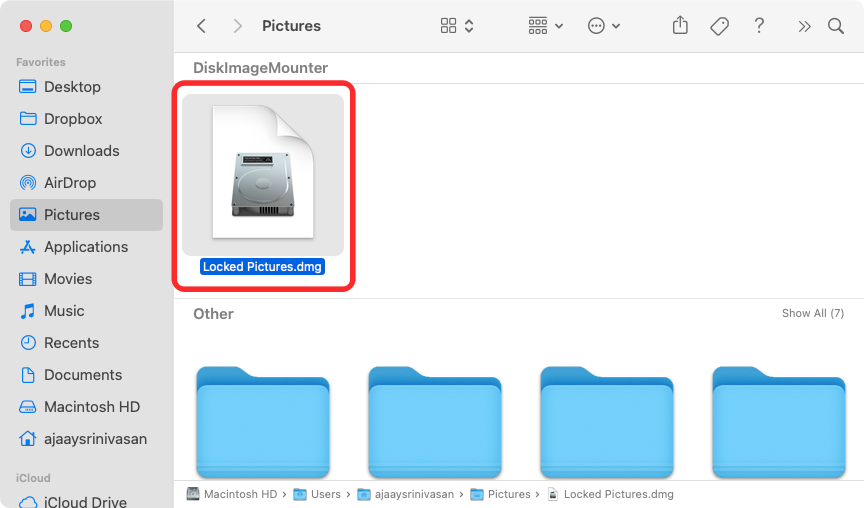
- If you locked the picture on your Mac using Method 2 above, you can View them by opening the Finder application and navigating to the location where the folder lock image was created.
- Once you find the disk image you created, double-click it to access its contents.
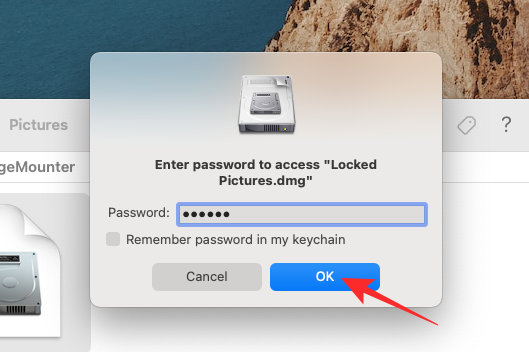
- Now you will see a prompt on the screen asking you to enter your password. Type the password you added to the folder in Method #2 and click OK.
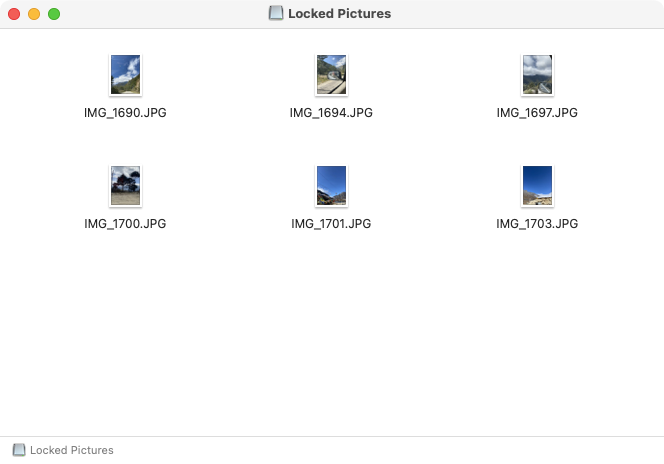
- The contents of the locked folder will now appear in the disk image folder in a new window. You can open, copy, or share pictures just like in any folder.
- The disk image will also appear on the desktop with a gray drive icon.
- After you have accessed the image, right-click or Control-click the disk image and select Eject
.

If you leave the disk image as injected, you can access it from the desktop and other users who open it may not need to enter the necessary password. Therefore, pop up after you are done with the locked folder Disk images are very important.
How to Disable Photos from Other Apps on Mac
Lock pictures have many uses, but if you want to prevent other apps on your Mac from accessing Photos stored in " pictures in the Photos app, you need to disable this access from macOS settings.
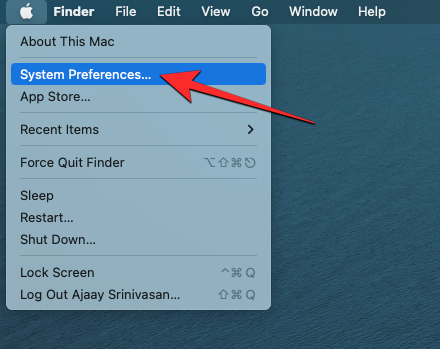
- Open the System Preferences app from the Dock, Launchpad, or Spotlight on your Mac. You can also open it by clicking the Apple (?) icon in the menu bar and selecting System Preferences from the menu.
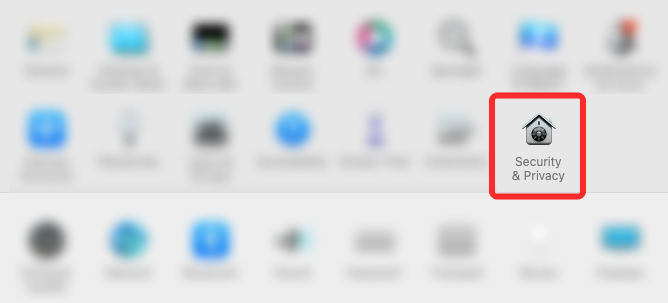
- In System Preferences, click Security & Privacy.
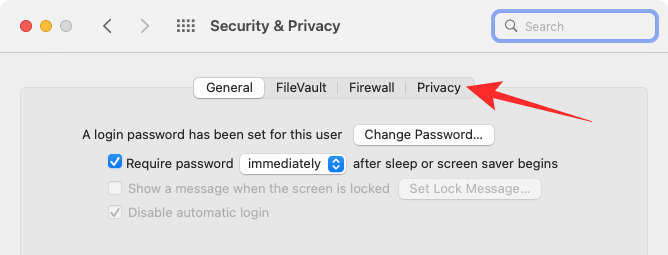
- On the next screen, select the Privacy tab at the top.
- Here, click on the Photos tab in the left pane.
- Now you will see a list of apps that can access pictures and videos from the Photos app. The selected apps are the apps that currently have permission to view your content in Photos. To disable this access from an app, uncheck the checkbox to the left of the app you want to remove permission from.
- When you uncheck this box, any content in the Photos app will not be accessible on the selected app.
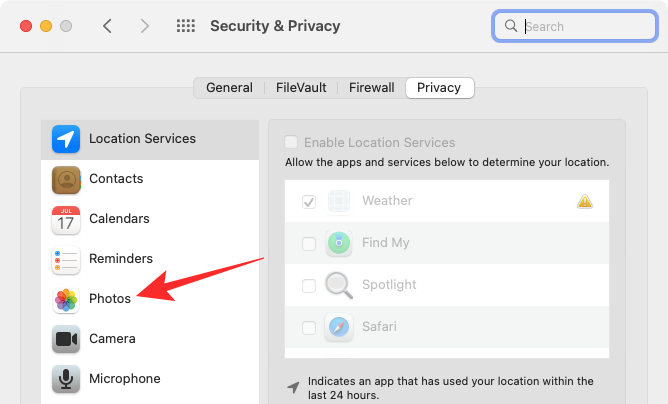
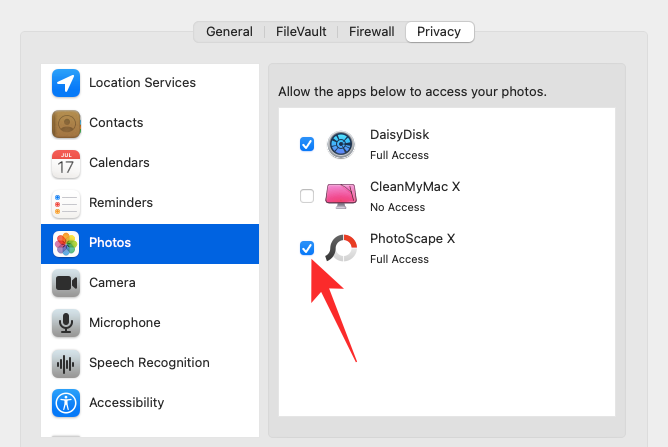

You can repeat this for other apps that you want to block access to Photos.
The above is the detailed content of 2 Ways to Lock Photos on Mac. For more information, please follow other related articles on the PHP Chinese website!

Hot AI Tools

Undress AI Tool
Undress images for free

Undresser.AI Undress
AI-powered app for creating realistic nude photos

AI Clothes Remover
Online AI tool for removing clothes from photos.

Clothoff.io
AI clothes remover

Video Face Swap
Swap faces in any video effortlessly with our completely free AI face swap tool!

Hot Article
Hot Tools

Notepad++7.3.1
Easy-to-use and free code editor

SublimeText3 Chinese version
Chinese version, very easy to use

Zend Studio 13.0.1
Powerful PHP integrated development environment

Dreamweaver CS6
Visual web development tools

SublimeText3 Mac version
God-level code editing software (SublimeText3)


 BenQ unveils MA series of 4K monitors with MacBook-centric features
Aug 28, 2024 pm 12:37 PM
BenQ unveils MA series of 4K monitors with MacBook-centric features
Aug 28, 2024 pm 12:37 PM
BenQ has just announced the MA270U and MA320U, a pair of 4K monitors targeted at MacBook users. They're designed to be paired with the company's Display Pilot 2software, which simplifies screen settings adjustments without having to fiddle with the O
 Balatro Friends of Jimbo free update is live
Aug 28, 2024 pm 12:39 PM
Balatro Friends of Jimbo free update is live
Aug 28, 2024 pm 12:39 PM
With the promise of a significant free update in 2025, Balatro continues to build on the hit deck builder with the second of three free updates. The “Friends of Jimbo” update brings theming options to the face cards of all four card suits. Despite ea
 Guide to installing PHP on Mac
Dec 12, 2024 am 11:46 AM
Guide to installing PHP on Mac
Dec 12, 2024 am 11:46 AM
PHP is a widely used programming language for web development and you can install PHP on your Mac by following these steps
 How to access an NTFS drive on a Mac?
Jun 21, 2025 am 12:08 AM
How to access an NTFS drive on a Mac?
Jun 21, 2025 am 12:08 AM
There are three ways to enable NTFS hard disk write permission on macOS: 1. Use third-party software such as ParagonNTFSforMac, TuxeraNTFSforMac or free Mounty, and automatically support read and write operations after installation; 2. Enable the write function by manually editing configuration files through terminal commands, and SIP needs to be turned off and there is a risk of data corruption, which is suitable for advanced users; 3. Format the hard disk into compatible formats such as exFAT or FAT32 to realize two-way read and write support between Mac and Windows, but will clear the original data.
 How to use an iPad as a second display for Mac
Jul 03, 2025 am 01:01 AM
How to use an iPad as a second display for Mac
Jul 03, 2025 am 01:01 AM
To use the iPad as a Mac sub-screen, you can use the Sidecar function. The steps are as follows: First, make sure the device meets the requirements (Mac will run macOSCatalina and above after 2016, and iPad requires iPadOS13 or above); then go to "System Settings" > "Display" on the Mac, click "Add Monitor" and select iPad to connect; if it is unable to connect, you need to check whether Wi-Fi and Bluetooth are on, and make sure the two devices are in the same network environment. In terms of connection mode, wireless is suitable for daily office work but may have delays, while wired is more stable and supports charging. The display mode is divided into two types: extension and mirroring. It is recommended to use extension mode to improve work efficiency. In addition, it can also be achieved through preferences
 How to set up file sharing between two Macs on the same network?
Jul 14, 2025 am 12:08 AM
How to set up file sharing between two Macs on the same network?
Jul 14, 2025 am 12:08 AM
To share files between two Macs on the same network, first make sure that the two devices are connected to the same LAN, then enable file sharing on the host, set shared folders and access permissions, and then connect from another Mac through the access sidebar or manually enter the SMB address, and finally you can browse, copy or transfer files. Common problems include waiting or restarting the network when the device cannot be discovered. If the permissions are incorrect, you need to check the username, password and sharing settings. If the connection fails, you can try the SMB address. If the firewall blocks, you can temporarily close the test.
 How to find large files on my Mac?
Jul 01, 2025 am 12:06 AM
How to find large files on my Mac?
Jul 01, 2025 am 12:06 AM
To free up Mac storage space, you can use three methods to find and process large files: 1. Use the system's own storage management tool to view the "big file" list in "About Native" - ??"Storage"; 2. Set file size and modification time in Finder to search for large files; 3. Use third-party tools such as DaisyDisk, OmniDiskSweeper or GrandPerspective to scan and visualize disk usage. Each method has its own advantages, the system tools are convenient and fast, Finder provides more accurate search options, and third-party software provides stronger analysis functions. Remember to clear the wastebasket after deleting it to avoid remaining space.
 How to use a Windows keyboard on a Mac
Jul 08, 2025 am 12:12 AM
How to use a Windows keyboard on a Mac
Jul 08, 2025 am 12:12 AM
When typing on a Mac using a Windows keyboard, the Win key corresponds to the Command key and the Alt key corresponds to the Option key; 1. Understand the key mapping: The Win key replaces the Command key for commonly used shortcut keys such as Command C/V, the Alt key replaces the Option key for special symbol input, and the right Alt key may be mapped to Control or other functions; 2. Adjust the keyboard mapping can be customized through system settings or third-party tool Karabiner-Elements; 3. In terms of function keys and multimedia key support, the F key needs to be used with the Fn key, the default brightness and volume function can be adjusted, and some brand shortcut keys are incompatible and need to be customized; 4. Common shortcut key comparison includes copy and paste.
