


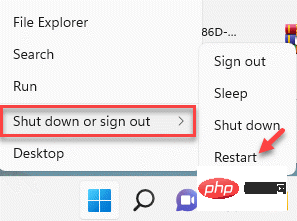
Open Hyper-V Manager from the Start menu or via Windows X. 2. Select the target virtual machine in the Hyper-V host list—ensure it’s running or off. 3. Right-click the VM and choose Checkpoint, or use the Actions pane to create one, which saves the current state including disk, memory (if running), and settings. 4. Manage the checkpoint by renaming, applying, or deleting it in the Checkpoints section. Note: By default, standard checkpoints are created; for production use, set the checkpoint type to Production in VM settings. Remember, checkpoints are temporary safety nets, not permanent backups—use backup tools or VM exports for long-term protection.

Creating a checkpoint in Hyper-V on Windows is a straightforward process that allows you to save the current state of a virtual machine (VM) so you can revert back to it later if needed—useful for testing updates, software installations, or configuration changes.
Here’s how to create a checkpoint:
1. Open Hyper-V Manager
- Press Windows X and select Hyper-V Manager from the menu, or search for it in the Start menu.
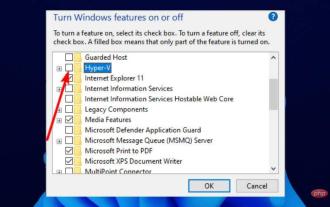
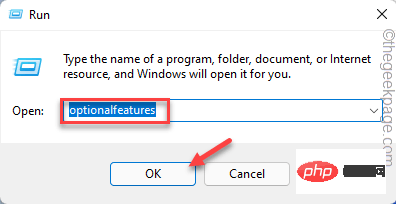
- Make sure your host computer has Hyper-V enabled (available on Windows Pro, Enterprise, or Education editions).
2. Select the Virtual Machine
- In the left pane, select the Hyper-V host (usually your computer name).
- In the center pane, locate and click on the virtual machine you want to checkpoint.
?? Make sure the VM is running or turned off—checkpoints can be created in either state.


3. Create the Checkpoint
-
With the VM selected, right-click on it and choose Checkpoint from the context menu.
- Alternatively, in the Actions pane on the right, click Checkpoint.
-
A confirmation will appear. Hyper-V will create a snapshot of the VM’s current state, including memory (if running), disk state, and settings.

? Note: This creates a standard checkpoint by default, which uses saved memory state and is ideal for short-term recovery. If you need a production-safe checkpoint (without memory state, better for stable backups), make sure Checkpoint Type is set to Production in the VM settings.
4. Manage Checkpoints
- After creation, the checkpoint appears under the Checkpoints section in Hyper-V Manager.
- You can:
- Apply a checkpoint: Revert the VM to that saved state.
- Rename it: Right-click the checkpoint to give it a descriptive name.
- Delete it: Right-click and delete when no longer needed (this removes the saved state and merges the differencing disks).
Tips and Notes:
- Checkpoints are not full backups—they rely on differencing virtual hard disks and can impact performance if kept long-term.
- Avoid keeping multiple long-term checkpoints; they increase disk usage and complexity.
- For long-term protection, use backup software or export the VM instead.
Basically, creating a checkpoint is quick and useful for temporary safety nets—just don’t rely on them as permanent backups.
The above is the detailed content of How to create a checkpoint in Hyper-V on Windows. For more information, please follow other related articles on the PHP Chinese website!

Hot AI Tools

Undress AI Tool
Undress images for free

Undresser.AI Undress
AI-powered app for creating realistic nude photos

AI Clothes Remover
Online AI tool for removing clothes from photos.

Clothoff.io
AI clothes remover

Video Face Swap
Swap faces in any video effortlessly with our completely free AI face swap tool!

Hot Article
Hot Tools

Notepad++7.3.1
Easy-to-use and free code editor

SublimeText3 Chinese version
Chinese version, very easy to use

Zend Studio 13.0.1
Powerful PHP integrated development environment

Dreamweaver CS6
Visual web development tools

SublimeText3 Mac version
God-level code editing software (SublimeText3)
Hot Topics


 How to fix hypervisor errors in Windows 11
Apr 16, 2023 pm 12:37 PM
How to fix hypervisor errors in Windows 11
Apr 16, 2023 pm 12:37 PM
For many users, Windows has a hidden built-in feature for easily creating and managing virtual machines. This feature is called Hypervisor or Hyper-V. But like other Windows features, this one isn't completely bug-free. In this article, we will show you how to fix Hyper-V issues easily and quickly. So without further ado, let’s jump into the solution and get the virtual machine up and running. Fix 1 – Check if your system supports Hyper-V The first thing you should try is to check if your system supports Hyper-V and is still active. 1. You must restart the system. To do this safely, press Wi once
 Fixed: Windows 11 Android emulator not responding
Apr 17, 2023 pm 06:58 PM
Fixed: Windows 11 Android emulator not responding
Apr 17, 2023 pm 06:58 PM
It’s no news that Windows 11 has now become the operating system of choice since its release. At the top of the list are developers looking to take advantage of its new features and improvements. But it's a painful trade-off. Since the upgrade, most developers have complained that Windows 11 Android Emulator is unresponsive. Today, emulators have become an integral part of app development, and most people have to downgrade their PCs to Windows 10 to solve the problem. This tutorial will take you through three effective ways to fix this problem without downgrading your PC. Not all requirements for running Android apps on Windows 11
 How to solve the problem that win11 does not have hyper-v option? Win11 cannot find hyper-v option problem analysis
Feb 29, 2024 pm 05:25 PM
How to solve the problem that win11 does not have hyper-v option? Win11 cannot find hyper-v option problem analysis
Feb 29, 2024 pm 05:25 PM
When we use the win11 system, we sometimes need to use the hyper-v option, but many users are asking what to do if win11 does not have the hyper-v option? Users can directly create a new text document, and then copy the following code to perform the operation. Let this site carefully introduce to users the analysis of the problem that win11 cannot find the hyper-v option. Analysis of the problem that the hyper-v option cannot be found in win11 1. Right-click a blank space on the desktop and select New Text Document.
 Fix for BlueStacks not functioning properly after enabling Hyper-V
Apr 22, 2023 pm 02:10 PM
Fix for BlueStacks not functioning properly after enabling Hyper-V
Apr 22, 2023 pm 02:10 PM
Are you seeing "BlueStackscan'tstartwhenHyper-Visenabled" when trying to launch BlueStacks applications on your system? In fact, older versions of BlueStacks do directly conflict with Hypervisor or Hyper-V. However, some versions of Bluestacks officially support Hyper-V. Therefore, there are two simple ways to solve this problem. Way 1 – Disable Hyper-V functionality Way 2 – Install new Bluestacks with Hyper-V support We have described both the processes in detail so that
 How to disable Hyper-V in Windows 11: 3 easy ways
Apr 20, 2023 am 08:28 AM
How to disable Hyper-V in Windows 11: 3 easy ways
Apr 20, 2023 am 08:28 AM
Virtualization is popular because it allows us to run many operating systems on one computer, even if their file systems are incompatible with each other. Some people may be wondering if they can disable Hyper-V in Windows 11. In the form of Hyper-V, Microsoft has created its own virtualization technology. By using this feature, we can create and run various types of virtual machines (including but not limited to Windows, Linux, etc.). One of the reasons why you want to enable Hyper-V in Windows 11 is to be able to run virtual machines in their own isolated space, which allows us to run not just one virtual machine but multiple virtual machines at the same time, which is very convenient. However, some user tables
 Here are the Windows 11 requirements for VMware and Hyper-V
Apr 14, 2023 am 08:28 AM
Here are the Windows 11 requirements for VMware and Hyper-V
Apr 14, 2023 am 08:28 AM
A virtual machine is computer software that creates a virtual environment on a host machine with dedicated memory, hardware, storage, network settings for different purposes. It enables users to run application, software, and cloud tests. Most virtual machines are free to use, but others require payment to access premium features and are primarily aimed at enterprise users. Some common virtual machines are Hyper-V built into the Windows operating system and VMware is an enterprise-grade virtual machine built by the Vmware cloud company. For example, VMware Workstation is a desktop management program for running virtual machines on Windows or Linux. This tutorial will look at Window
 How to solve the problem of hyper-v missing in win11 home version
Jan 02, 2024 pm 12:37 PM
How to solve the problem of hyper-v missing in win11 home version
Jan 02, 2024 pm 12:37 PM
Installing the Android subsystem in win11 requires turning on the hyper-v service, but some users find that their win11 home version does not have hyper-v. In fact, we can solve the problem by running commands. Win11 Android subsystem file path: 1. First, we right-click a blank space on the desktop and select New "Text Document" 2. Then enter the following command and save it. pushd "%~dp0" dir/b%SystemRoot%\servicing\Packages\*Hyper-V*.mum》hyper-v.txt》for/f%%iin('findstr/i.hyper-v.txt2^》nul '
 How to disable Hyper-V in Windows 11
May 05, 2023 pm 03:37 PM
How to disable Hyper-V in Windows 11
May 05, 2023 pm 03:37 PM
Virtualization is popular because it allows us to run multiple operating systems on one computer, even if their file systems are incompatible with each other. Since no hardware is required, money is saved and the behavior of an application or new system can be predicted before it is installed or updated in an actual setting. Microsoft has created its own virtualization technology in the form of Hyper-V. By using this feature, we can create and run various types of virtual machines (including but not limited to Windows, Linux, etc.). One of the advantages of Hyper-V is the ability to run virtual machines in their own isolated space, which allows us to not only run one virtual machine, but also multiple virtual machines at the same time, which is very convenient. However, some users reported that they wished to disable
