


Hyper-V can be enabled on Windows 11 Pro, Enterprise, or Education by meeting system requirements and using one of three methods: 1) Go to Settings > Apps > Optional features > View features, check Hyper-V, click Next and Install, then restart; 2) Open PowerShell as Administrator and run Enable-WindowsOptionalFeature -Online -FeatureName Microsoft-Hyper-V -All, then restart; 3) Press Windows R, type optionalfeatures, check Hyper-V Platform, Services, and Management Tools, click OK, then restart. After enabling, verify it’s running by opening Hyper-V Manager or running Get-WindowsOptionalFeature -Online -FeatureName Microsoft-Hyper-V -All in PowerShell to confirm State: Enabled, and ensure virtualization is enabled in BIOS/UEFI if encountering errors.

Enabling Hyper-V in Windows 11 allows you to run virtual machines directly on your PC, which is useful for developers, IT pros, or anyone wanting to test different operating systems. Here’s how to enable it — it’s straightforward, but your system must meet certain requirements first.
Check System Requirements
Before enabling Hyper-V, make sure your PC supports it:
- Windows 11 Pro, Enterprise, or Education (Hyper-V is not available on Windows 11 Home)
- 64-bit processor with SLAT (Second Level Address Translation)
- At least 4 GB RAM (more recommended)
- BIOS-level hardware virtualization enabled (Intel VT-x or AMD-V)
? If you're on Windows 11 Home, you won't see Hyper-V in optional features. You can use Windows Subsystem for Linux (WSL) or third-party tools like VirtualBox instead.


Method 1: Enable Hyper-V via Settings (Recommended)
This is the easiest way if your edition supports it.
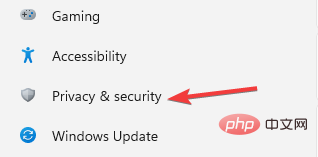
- Press Windows I to open Settings.
- Go to Apps > Optional features.
- Click View features next to "Related settings".
- In the list, scroll and check the box next to Hyper-V.
- Click Next, then Install.
- Wait for the installation to complete — you may need to restart your computer.
After reboot, Hyper-V Manager and related tools will be available.
Method 2: Using PowerShell (Fast)
If you prefer the command line:
-
Open PowerShell as Administrator:
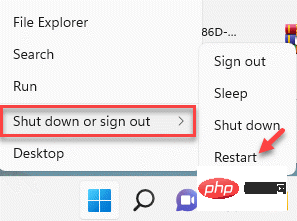
- Press Windows X, then select Terminal (Admin) or PowerShell (Admin).
-
Run this command:
Enable-WindowsOptionalFeature -Online -FeatureName Microsoft-Hyper-V -All
Wait for the process to finish — it may take a few minutes.
Restart your computer when prompted.
After reboot, Hyper-V is active.
Method 3: Using Windows Features Dialog
You can also enable it through the classic Control Panel method:
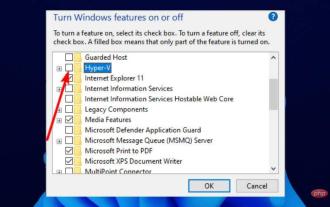
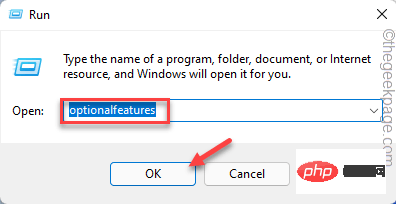
- Press Windows R, type
optionalfeatures, and press Enter. - In the "Windows Features" window, scroll down and check:
- ? Hyper-V Platform
- ? Hyper-V Services
- ? Hyper-V Management Tools (includes GUI)
- Click OK and wait for the changes to apply.
- Restart your PC.
Verify Hyper-V Is Running
After enabling and restarting:
Press Windows S, type Hyper-V Manager, and open it.
Or open PowerShell and run:
Get-WindowsOptionalFeature -Online -FeatureName Microsoft-Hyper-V -All
-
"Hyper-V cannot be installed" error? Make sure virtualization is enabled in BIOS/UEFI:
- Restart your PC, enter BIOS (usually by pressing F2, F10, or Del during boot).
- Look for settings like Intel VT-x, AMD-V, or Virtualization Technology and enable them.
- Still not working? Run
systeminfoin Command Prompt and check:- Hyper-V Requirements: All should say "Yes" at the bottom.
You should see State: Enabled.
Troubleshooting Tips
That’s it. Once enabled, you can create and manage virtual machines using Hyper-V Manager or PowerShell. Just remember: Windows 11 Home users need to upgrade or use alternatives like WSL or VirtualBox.
Basically, if your system supports it and you’re on the right Windows edition, turning on Hyper-V takes just a few clicks.
The above is the detailed content of How to enable Hyper-V in Windows 11. For more information, please follow other related articles on the PHP Chinese website!

Hot AI Tools

Undress AI Tool
Undress images for free

Undresser.AI Undress
AI-powered app for creating realistic nude photos

AI Clothes Remover
Online AI tool for removing clothes from photos.

Clothoff.io
AI clothes remover

Video Face Swap
Swap faces in any video effortlessly with our completely free AI face swap tool!

Hot Article
Hot Tools

Notepad++7.3.1
Easy-to-use and free code editor

SublimeText3 Chinese version
Chinese version, very easy to use

Zend Studio 13.0.1
Powerful PHP integrated development environment

Dreamweaver CS6
Visual web development tools

SublimeText3 Mac version
God-level code editing software (SublimeText3)


 How to fix hypervisor errors in Windows 11
Apr 16, 2023 pm 12:37 PM
How to fix hypervisor errors in Windows 11
Apr 16, 2023 pm 12:37 PM
For many users, Windows has a hidden built-in feature for easily creating and managing virtual machines. This feature is called Hypervisor or Hyper-V. But like other Windows features, this one isn't completely bug-free. In this article, we will show you how to fix Hyper-V issues easily and quickly. So without further ado, let’s jump into the solution and get the virtual machine up and running. Fix 1 – Check if your system supports Hyper-V The first thing you should try is to check if your system supports Hyper-V and is still active. 1. You must restart the system. To do this safely, press Wi once
 Fixed: Windows 11 Android emulator not responding
Apr 17, 2023 pm 06:58 PM
Fixed: Windows 11 Android emulator not responding
Apr 17, 2023 pm 06:58 PM
It’s no news that Windows 11 has now become the operating system of choice since its release. At the top of the list are developers looking to take advantage of its new features and improvements. But it's a painful trade-off. Since the upgrade, most developers have complained that Windows 11 Android Emulator is unresponsive. Today, emulators have become an integral part of app development, and most people have to downgrade their PCs to Windows 10 to solve the problem. This tutorial will take you through three effective ways to fix this problem without downgrading your PC. Not all requirements for running Android apps on Windows 11
 How to solve the problem that win11 does not have hyper-v option? Win11 cannot find hyper-v option problem analysis
Feb 29, 2024 pm 05:25 PM
How to solve the problem that win11 does not have hyper-v option? Win11 cannot find hyper-v option problem analysis
Feb 29, 2024 pm 05:25 PM
When we use the win11 system, we sometimes need to use the hyper-v option, but many users are asking what to do if win11 does not have the hyper-v option? Users can directly create a new text document, and then copy the following code to perform the operation. Let this site carefully introduce to users the analysis of the problem that win11 cannot find the hyper-v option. Analysis of the problem that the hyper-v option cannot be found in win11 1. Right-click a blank space on the desktop and select New Text Document.
 Fix for BlueStacks not functioning properly after enabling Hyper-V
Apr 22, 2023 pm 02:10 PM
Fix for BlueStacks not functioning properly after enabling Hyper-V
Apr 22, 2023 pm 02:10 PM
Are you seeing "BlueStackscan'tstartwhenHyper-Visenabled" when trying to launch BlueStacks applications on your system? In fact, older versions of BlueStacks do directly conflict with Hypervisor or Hyper-V. However, some versions of Bluestacks officially support Hyper-V. Therefore, there are two simple ways to solve this problem. Way 1 – Disable Hyper-V functionality Way 2 – Install new Bluestacks with Hyper-V support We have described both the processes in detail so that
 How to disable Hyper-V in Windows 11: 3 easy ways
Apr 20, 2023 am 08:28 AM
How to disable Hyper-V in Windows 11: 3 easy ways
Apr 20, 2023 am 08:28 AM
Virtualization is popular because it allows us to run many operating systems on one computer, even if their file systems are incompatible with each other. Some people may be wondering if they can disable Hyper-V in Windows 11. In the form of Hyper-V, Microsoft has created its own virtualization technology. By using this feature, we can create and run various types of virtual machines (including but not limited to Windows, Linux, etc.). One of the reasons why you want to enable Hyper-V in Windows 11 is to be able to run virtual machines in their own isolated space, which allows us to run not just one virtual machine but multiple virtual machines at the same time, which is very convenient. However, some user tables
 Here are the Windows 11 requirements for VMware and Hyper-V
Apr 14, 2023 am 08:28 AM
Here are the Windows 11 requirements for VMware and Hyper-V
Apr 14, 2023 am 08:28 AM
A virtual machine is computer software that creates a virtual environment on a host machine with dedicated memory, hardware, storage, network settings for different purposes. It enables users to run application, software, and cloud tests. Most virtual machines are free to use, but others require payment to access premium features and are primarily aimed at enterprise users. Some common virtual machines are Hyper-V built into the Windows operating system and VMware is an enterprise-grade virtual machine built by the Vmware cloud company. For example, VMware Workstation is a desktop management program for running virtual machines on Windows or Linux. This tutorial will look at Window
 How to solve the problem of hyper-v missing in win11 home version
Jan 02, 2024 pm 12:37 PM
How to solve the problem of hyper-v missing in win11 home version
Jan 02, 2024 pm 12:37 PM
Installing the Android subsystem in win11 requires turning on the hyper-v service, but some users find that their win11 home version does not have hyper-v. In fact, we can solve the problem by running commands. Win11 Android subsystem file path: 1. First, we right-click a blank space on the desktop and select New "Text Document" 2. Then enter the following command and save it. pushd "%~dp0" dir/b%SystemRoot%\servicing\Packages\*Hyper-V*.mum》hyper-v.txt》for/f%%iin('findstr/i.hyper-v.txt2^》nul '
 How to disable Hyper-V in Windows 11
May 05, 2023 pm 03:37 PM
How to disable Hyper-V in Windows 11
May 05, 2023 pm 03:37 PM
Virtualization is popular because it allows us to run multiple operating systems on one computer, even if their file systems are incompatible with each other. Since no hardware is required, money is saved and the behavior of an application or new system can be predicted before it is installed or updated in an actual setting. Microsoft has created its own virtualization technology in the form of Hyper-V. By using this feature, we can create and run various types of virtual machines (including but not limited to Windows, Linux, etc.). One of the advantages of Hyper-V is the ability to run virtual machines in their own isolated space, which allows us to not only run one virtual machine, but also multiple virtual machines at the same time, which is very convenient. However, some users reported that they wished to disable
