

How to take screenshots in Ubuntu
Mar 21, 2024 am 11:30 AM
Screenshot is a tool used to capture important data or information on your phone or computer screen. Capable of recording exactly what you see in an instant, it's a convenient way to record, share or save visual information. The Ubuntu operating system provides a variety of screenshot methods. Users can choose to capture the entire desktop, a specific window, or a customized area. These features allow Ubuntu users to easily capture key information on the screen, improving work efficiency and the convenience of sharing information.
In this article, we'll look at how to take screenshots using the desktop application and keyboard shortcuts.
Method 1: Use shortcut keys to take screenshots
Manual snapshots are usually the default and commonly used method because they are relatively easy to get started with. For average users who don't need complex photo or video editing features, this may be the most suitable option.
Ubuntu offers several options for capturing the screen manually. Let's look at them one by one:
1.Snapshot of the entire screen
Simply press the Print Screen (PrtScn) key on your keyboard to take a full-screen screenshot. Captured images are automatically saved to the "Pictures" folder.
2.Snapshot of selected area
Sometimes, you may only want to capture a specific part of the screen, such as a dialog box, a certain part of the browser window, or other active windows. You can easily take a screenshot of the desired area by simply pressing the Shift key and the Print Screen key simultaneously.
3. Snapshot of active window
You can take a screenshot of the currently open window in Ubuntu by pressing the "ALT" and "PrtSc" keyboard shortcuts. When you use this keyboard shortcut, the operating system will capture a screenshot of the currently active/open window.
Note: Any of the above three methods will store the screenshot directly in the "Screenshot" directory.
Method 2: Use built-in tools to take screenshots
By default, the screenshot tool included with Ubuntu 22.04 provides the ability to record and capture the screen.
On Ubuntu 22.04, pressing the "PRTSC" button will trigger the built-in screenshot tool. Just press the "PRTSC" key and the tool will appear, allowing you to use it.
You can see that three options appear in the screenshot:
1.Select tool
This option selects and takes a snapshot of a specific area of ??the screen. To do this, click on the pick icon, change the rectangular form selection to suit your requirements and press the white circle button to capture the desired area.
2.Filtering tools
When you click the screen button, it automatically selects the entire screen. Just press the capture button below it to take a snapshot of the entire screen display.
3.Window tools
To screenshot a specific window, click the window icon to display all open windows. Then, select an active window that you want to capture and press the circled capture button.
Method 3: Use terminal to take screenshot
You can use these commands to capture screenshots of a window, part of or the entire display while still in the terminal.
Launch Ubuntu Terminal and use the following command:
gnome—screening
When you press "Enter", the terminal will take a full-screen screenshot. However, keep in mind that with this command, the operating system captures the terminal window and screen. By specifying a delay time, the screenshot process can be delayed by a few seconds to avoid it. You will have time to minimize the terminal window.
gnome—screen—d4
You can use the "-d" parameter to delay the screenshot capture time. The symbol "-d" means delay and the value 4 means the number of seconds you want the screenshot to wait before taking the snapshot.
To get a snapshot of the active/current window, use the following command:
gnome—screening—w
For some minor modifications, enter the following command to add a border to the screenshot:
gnome—screening—w—b
Method 4: Use Gnome Tools to Take Screenshots
Gnome Screenshot Tool is a simple and intuitive application for taking screenshots in Ubuntu.
Step One: The Gnome Screenshot tool is usually pre-installed in Ubuntu. However, if it is not installed yet, run the following command:
sudo apt install gnome—screenshot
output:
Step 2: Enter "Screenshot" in the application launcher and open it to find the "Screenshot" application.
Step 3: As you can see, you can select "Screen" to take a screenshot of the entire screen, "Window" to capture a single window, and "Select" to capture a portion of the screen. To take a screenshot, click "Take Screenshot".
Step 4: Save the screenshot photo in the picture folder.
Step 5: The Gnome Snipping Tool can choose to delay taking screenshots, which is one of its most powerful features.
Method 5: Use a third-party app to take screenshots
Shutter is another fantastic tool for capturing screenshots in Ubuntu. It's relatively easy to use, even if it seems a bit complicated at first. By default, the tool comes with a basic editor. Additionally, experienced users can easily share screenshots to Dropbox and Imgur. It includes the option to take delayed screenshots.
Step 1: To install Shutter, execute the following command:
Sudoku APT update
sudo apt install shutter
Step 2: After installation, search for the application in the application launcher to start using it. After that, it will appear in the system tray area in the upper right corner where you can click to access it.
Step 3: Select "Select" to capture a specific part of the screen, select "Desktop" to capture the complete display, or select "Window" to capture a specific current window to take a screenshot within the application.
By default, snapshots are stored in the "Pictures" folder. No need to save it manually.
Step 4: If you have taken multiple screenshots, they will also appear in an on-screen interface under the "Shutter" window.
in conclusion
In this article, we introduce several ways to take screenshots in Ubuntu. You can use keyboard shortcuts, the built-in snipping tool, the terminal, the Gnome snipping tool, or a third-party tool like Shutter. Your preferences and requirements will determine your best choice. If you want to capture quickly and easily, keyboard shortcuts are the way to go. If you need more control over the screenshot process, such as delaying the screenshot or modifying the screenshot, a dedicated snapshot tool is preferred.
The above is the detailed content of How to take screenshots in Ubuntu. For more information, please follow other related articles on the PHP Chinese website!

Hot AI Tools

Undress AI Tool
Undress images for free

Undresser.AI Undress
AI-powered app for creating realistic nude photos

AI Clothes Remover
Online AI tool for removing clothes from photos.

Clothoff.io
AI clothes remover

Video Face Swap
Swap faces in any video effortlessly with our completely free AI face swap tool!

Hot Article
Hot Tools

Notepad++7.3.1
Easy-to-use and free code editor

SublimeText3 Chinese version
Chinese version, very easy to use

Zend Studio 13.0.1
Powerful PHP integrated development environment

Dreamweaver CS6
Visual web development tools

SublimeText3 Mac version
God-level code editing software (SublimeText3)


 Android TV Box gets unofficial Ubuntu 24.04 upgrade
Sep 05, 2024 am 06:33 AM
Android TV Box gets unofficial Ubuntu 24.04 upgrade
Sep 05, 2024 am 06:33 AM
For many users, hacking an Android TV box sounds daunting. However, developer Murray R. Van Luyn faced the challenge of looking for suitable alternatives to the Raspberry Pi during the Broadcom chip shortage. His collaborative efforts with the Armbia
 How to switch language in Adobe After Effects cs6 (Ae cs6) Detailed steps for switching between Chinese and English in Ae cs6 - ZOL download
May 09, 2024 pm 02:00 PM
How to switch language in Adobe After Effects cs6 (Ae cs6) Detailed steps for switching between Chinese and English in Ae cs6 - ZOL download
May 09, 2024 pm 02:00 PM
1. First find the AMTLanguages ??folder. We found some documentation in the AMTLanguages ??folder. If you install Simplified Chinese, there will be a zh_CN.txt text document (the text content is: zh_CN). If you installed it in English, there will be a text document en_US.txt (the text content is: en_US). 3. Therefore, if we want to switch to Chinese, we need to create a new text document of zh_CN.txt (the text content is: zh_CN) under the AdobeAfterEffectsCCSupportFilesAMTLanguages ??path. 4. On the contrary, if we want to switch to English,
 How to shoot videos on Douyin? How to turn on the microphone for video shooting?
May 09, 2024 pm 02:40 PM
How to shoot videos on Douyin? How to turn on the microphone for video shooting?
May 09, 2024 pm 02:40 PM
As one of the most popular short video platforms today, the quality and effect of Douyin’s videos directly affect the user’s viewing experience. So, how to shoot high-quality videos on Douyin? 1. How to shoot videos on Douyin? 1. Open the Douyin APP and click the "+" button in the middle at the bottom to enter the video shooting page. 2. Douyin provides a variety of shooting modes, including normal shooting, slow motion, short video, etc. Choose the appropriate shooting mode according to your needs. 3. On the shooting page, click the "Filter" button at the bottom of the screen to choose different filter effects to make the video more personalized. 4. If you need to adjust parameters such as exposure and contrast, you can click the "Parameters" button in the lower left corner of the screen to set it. 5. During shooting, you can click on the left side of the screen
 6000 mAh silicon negative battery! Xiaomi 15Pro upgrade leaked again
Jul 24, 2024 pm 12:45 PM
6000 mAh silicon negative battery! Xiaomi 15Pro upgrade leaked again
Jul 24, 2024 pm 12:45 PM
According to news on July 23, blogger Digital Chat Station broke the news that the battery capacity of Xiaomi 15 Pro has been increased to 6000mAh and supports 90W wired flash charging. This will be the Pro model with the largest battery in Xiaomi’s digital series. Digital Chat Station previously revealed that the battery of Xiaomi 15Pro has ultra-high energy density and the silicon content is much higher than that of competing products. After silicon-based batteries are tested on a large scale in 2023, second-generation silicon anode batteries have been identified as the future development direction of the industry. This year will usher in the peak of direct competition. 1. The theoretical gram capacity of silicon can reach 4200mAh/g, which is more than 10 times the gram capacity of graphite (the theoretical gram capacity of graphite is 372mAh/g). For the negative electrode, the capacity when the lithium ion insertion amount reaches the maximum is the theoretical gram capacity, which means that under the same weight
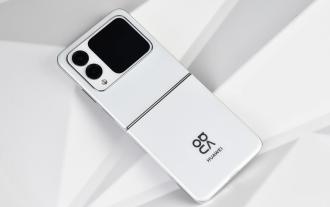 Huawei nova Flip unboxing, thin and light, new color, shocking 'new' movement
Jul 31, 2024 am 05:27 AM
Huawei nova Flip unboxing, thin and light, new color, shocking 'new' movement
Jul 31, 2024 am 05:27 AM
In the foldable screen mobile phone market, small foldable phones have always had a place due to their exquisite, compact and foldable features. Among the many small folding mobile phones, Huawei's Pocket series is relatively unique. It has not launched products with larger external screens to cater to the market. It has always maintained the family-style "double ring" design, plus Some unique functions make it a little more "personalized" and "featured" compared to other small foldables. Huawei novaFlip What kind of chemical reaction will occur when the small folding mobile phone meets the younger and more fashionable Huawei nova series? Today we will quickly get started with Huawei’s newly launched novaFlip and show you how to
 ai tool recommendation
Nov 29, 2024 am 11:08 AM
ai tool recommendation
Nov 29, 2024 am 11:08 AM
This article introduces six popular AI tools, including Douyin Doubao, Wenxin Yige, Tencent Zhiying, Baidu Feipiao EasyDL, Baidu AI Studio and iFlytek Spark Cognitive Large Model. These tools cover different functions such as text creation, image generation, video editing, and AI model development. Choosing the right AI tool requires consideration of factors such as functional requirements, technical level, and cost budget. These tools provide convenient and efficient solutions for individuals and businesses in need of AI assistance.
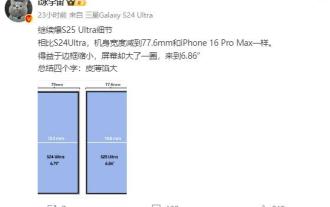 Samsung S25 Ultra details exposed: same width as iPhone 16 Pro Max, but with a larger screen
Aug 23, 2024 pm 09:33 PM
Samsung S25 Ultra details exposed: same width as iPhone 16 Pro Max, but with a larger screen
Aug 23, 2024 pm 09:33 PM
According to news on August 22, as the release of Samsung’s new generation flagship mobile phone S25 Ultra approaches, more and more details are beginning to emerge. The well-known blogger @ibinguniverse revealed more specifications of the S25 Ultra on Weibo today. The most eye-catching one is that its body width is the same as the Apple iPhone 16 Pro Max, both 77.6mm. 1. Thanks to Samsung’s further optimization of the frame design, the screen size of the S25 Ultra has been increased to 6.86 inches while maintaining the same width as the iPhone 16 Pro Max, providing users with a more immersive visual experience. The blogger further pointed out in the comment area that the black edges of the S25 Ultra are better than those of the iPhone 16 Pro Max&
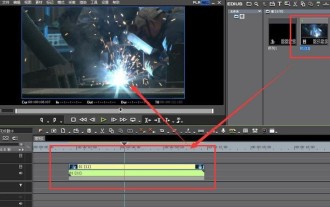 How to export audio files separately from EDIUS Tutorial on exporting audio files separately from EDIUS
May 09, 2024 pm 01:10 PM
How to export audio files separately from EDIUS Tutorial on exporting audio files separately from EDIUS
May 09, 2024 pm 01:10 PM
First, after importing the video material, drag and drop it onto the audio and video track. Then, open the sound waveform display of the track, click the unlock button in the connection group column, and then edit the anchor point for the detached audio track and set the starting point of playback. and the end position. Then, right-click the Output to File button. Finally, find the audio option in the format settings window that opens, click to select PCMWAVE format output and save it.
