


Git is a fast, reliable, and adaptable distributed version control system. It is designed to support distributed, non-linear workflows, making it ideal for software development teams of all sizes. Each Git working directory is an independent repository with a complete history of all changes and the ability to track versions even without network access or a central server.
GitHub is a Git repository hosted on the cloud that provides all the features of distributed revision control. GitHub is a Git repository hosted on the cloud. Unlike Git which is a CLI tool, GitHub has a web-based graphical user interface. It is used for version control, which involves collaborating with other developers and tracking changes made to scripts and code over time. With GitHub, every team member can create a central cloud-based repository and make changes to data, enabling project collaboration.
This article demonstrates how to get Git on an Ubuntu system.
Git installation on Ubuntu
There are three main ways to install Git on Ubuntu:
- Using Ubuntu Package Manager (APT)
- Using Git Maintainers PPA
- Source: Git
Method 1: Install GIT using the default APT repository on Ubuntu 22.04
Step 1: Update the system
When installing Git on an Ubuntu system, it is crucial to use updated packages. Doing so can help mitigate package conflicts that may arise during the installation process and ensure a smooth installation process.
You can use the "Update" command in the "Advanced Packaging Tool" to update the system's software package.
Sudoku APT update
Output:

It is recommended to upgrade any outdated packages after the update is complete. Use this command to perform this upgrade:
sudo apt upgrade
Output:

Step 2: Check if Git exists on Ubuntu
It is recommended to confirm whether Git already exists on your computer before proceeding with the installation. This allows us to avoid repeated installations and keep the system clean.
Use the "git" command and --version to check whether Git already exists in the system. If Git is installed, the previously installed version is displayed:
git——version
Output:

Step 3: Use APT command
If the previous command returns nothing, it will verify that Git is not installed on your machine. Now it's time to set up Git.
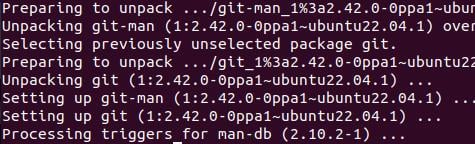
Because it provides an easy-to-use process, we install Git using Ubuntu's repository. Run the "Install" command using sudo apt to install Git.
Sudo apt install git
Output:

Step 4: Verify that Ubuntu’s GIT installation is successful
After the installation is complete, you should ensure that Git is installed correctly.
Once again, we can use -version to verify the installation. At this point, the following command should return the most recently installed Git version:
Git-version
When the command runs, you should see something like this:

Method 2: Install GIT on Ubuntu via Git Maintainer PPA
It is sometimes better to use the latest Git version, especially when new features or critical bug fixes are needed. The Ubuntu Git maintenance team maintains the Personal Package Archive (PPA), which is usually the source of the latest stable version of Git. Depending on your specific needs and your work environment, this approach may have a number of major benefits.
Step 1: Import Git Maintainer PPA
We need to add the Git PPA to the system's repository list. Access to the latest stable Git version is guaranteed by this PPA. Even though your system may already have the following packages installed, it's not a bad thing to recheck.
SUDO add-apt-repository-ppa:git-core/ppa
Output:

Step 2: Refresh package index after PPA import
After importing a Git PPA into the system's repository list, the package index must be refreshed. Now that the repository has been added, your system is able to recognize recently downloaded packages.
To update the package index, do the following:
Sudoku APT update
Step 3: Install git using apt ppa command
Step 3: Install git using apt ppa command
You can upgrade or install Git once the PPA is set up. This command performs this task:
Sudo apt install git-y
Output:
If you have installed GIT from the Ubuntu repository, you can upgrade Git from the additional PPA to the latest version by running this command.
After the upgrade or installation is completed, confirm the installed Git version:
git——version
Output:
You should see something like this:

This indicates that the latest version of Git is installed correctly on your computer.
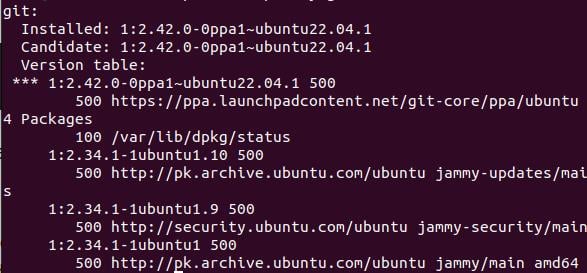
Checking the repository your Git installation came from can give you more information. Because PPAs usually contain a newer version of Git, using the following command should reflect the latest PPA additions:
APT-Cache Strategy Git
Output:
Method 3: Install Git from source
This method gives the user more control over the installation process and grants access to specific features that may not be included in the prepackaged distribution.
Step 1: Configure Ubuntu using GIT Build Predencies
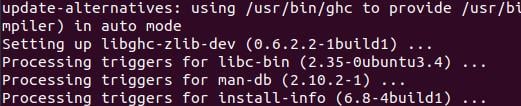
First, you need to install the necessary build dependencies on your Ubuntu system. These requirements are required for Git compilation. To configure these, use the following commands:
Sudo apt install make libssl-dev libghc-zlib-dev libcurl4-Gnutls-dev libexpat1-dev gettext decompression-y
Output:
Step 2: Get the GIT source code
Go to the Git release page to get the source code. To download the required version, use the following command. Don't forget to replace {version} with the desired Git version.
curl—o git.tar.gz www.example.com
Output:

Step 3: Extract and install GIT source code
Now, now compile and install git. To start compilation, use the following command:
sudo tar—xf git.tar.gz
Find and open the unzipped directory:
cd git—2.37.1
Output:

Now, compile and install git. Start compilation using the following command:
sudo make prefix =/usr/local all

This command instructs the build system to install in the "/usr/local" folder at the end of the compilation process. The "all" flag ensures a complete build including all components.
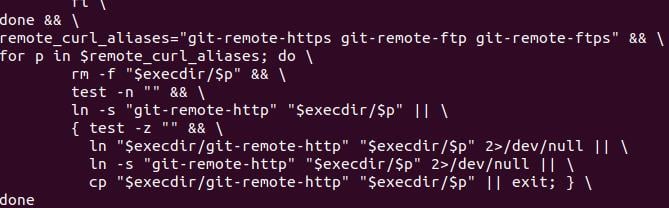
After compilation is completed, start the installation:
sudo make prefix =/usr/local install
Output:
Git is now installed in the "/usr/local" directory. The process involves copying the necessary files and granting the necessary permissions to make Git accessible on your machine.
Verify that the build is accurate and the installation was successful.
git——version
Output:

This command should confirm that Git is properly integrated into your system by returning your installed version.
in conclusion
Git is a widely used and powerful distributed version control system. This article demonstrates how to install Git on Ubuntu 22.04 and earlier. We discussed three methods: using the Ubuntu Package Manager (apt), using the Git Maintainer PPA, and using Git source code. You can find many online resources, such as the official Git manual, to help you learn how to use Git.
The above is the detailed content of Git installation process on Ubuntu. For more information, please follow other related articles on the PHP Chinese website!

Hot AI Tools

Undress AI Tool
Undress images for free

Undresser.AI Undress
AI-powered app for creating realistic nude photos

AI Clothes Remover
Online AI tool for removing clothes from photos.

Clothoff.io
AI clothes remover

Video Face Swap
Swap faces in any video effortlessly with our completely free AI face swap tool!

Hot Article
Hot Tools

Notepad++7.3.1
Easy-to-use and free code editor

SublimeText3 Chinese version
Chinese version, very easy to use

Zend Studio 13.0.1
Powerful PHP integrated development environment

Dreamweaver CS6
Visual web development tools

SublimeText3 Mac version
God-level code editing software (SublimeText3)


 How do I view the commit history of my Git repository?
Jul 13, 2025 am 12:07 AM
How do I view the commit history of my Git repository?
Jul 13, 2025 am 12:07 AM
To view Git commit history, use the gitlog command. 1. The basic usage is gitlog, which can display the submission hash, author, date and submission information; 2. Use gitlog--oneline to obtain a concise view; 3. Filter by author or submission information through --author and --grep; 4. Add -p to view code changes, --stat to view change statistics; 5. Use --graph and --all to view branch history, or use visualization tools such as GitKraken and VSCode.
 How do I delete a Git branch?
Jul 13, 2025 am 12:02 AM
How do I delete a Git branch?
Jul 13, 2025 am 12:02 AM
To delete a Git branch, first make sure it has been merged or no retention is required. Use gitbranch-d to delete the local merged branch. If you need to force delete unmerged branches, use the -D parameter. Remote branch deletion uses the gitpushorigin-deletebranch-name command, and can synchronize other people's local repositories through gitfetch-prune. 1. To delete the local branch, you need to confirm whether it has been merged; 2. To delete the remote branch, you need to use the --delete parameter; 3. After deletion, you should verify whether the branch is successfully removed; 4. Communicate with the team to avoid accidentally deleting shared branches; 5. Clean useless branches regularly to keep the warehouse clean.
 Can I buy Dogecoin in the currency circle? How to identify scam items?
Jul 10, 2025 pm 09:54 PM
Can I buy Dogecoin in the currency circle? How to identify scam items?
Jul 10, 2025 pm 09:54 PM
The "Dogcoin" in the currency circle usually refers to newly issued cryptocurrencies with extremely low market value, opaque project information, weak technical foundation or even no practical application scenarios. These tokens often appear with high-risk narratives.
 How to identify fake altcoins? Teach you to avoid cryptocurrency fraud
Jul 15, 2025 pm 10:36 PM
How to identify fake altcoins? Teach you to avoid cryptocurrency fraud
Jul 15, 2025 pm 10:36 PM
To identify fake altcoins, you need to start from six aspects. 1. Check and verify the background of the materials and project, including white papers, official websites, code open source addresses and team transparency; 2. Observe the online platform and give priority to mainstream exchanges; 3. Beware of high returns and people-pulling modes to avoid fund traps; 4. Analyze the contract code and token mechanism to check whether there are malicious functions; 5. Review community and media operations to identify false popularity; 6. Follow practical anti-fraud suggestions, such as not believing in recommendations or using professional wallets. The above steps can effectively avoid scams and protect asset security.
 How do I add a subtree to my Git repository?
Jul 16, 2025 am 01:48 AM
How do I add a subtree to my Git repository?
Jul 16, 2025 am 01:48 AM
To add a subtree to a Git repository, first add the remote repository and get its history, then merge it into a subdirectory using the gitmerge and gitread-tree commands. The steps are as follows: 1. Use the gitremoteadd-f command to add a remote repository; 2. Run gitmerge-srecursive-no-commit to get branch content; 3. Use gitread-tree--prefix= to specify the directory to merge the project as a subtree; 4. Submit changes to complete the addition; 5. When updating, gitfetch first and repeat the merging and steps to submit the update. This method keeps the external project history complete and easy to maintain.
 What is Useless Coin? Overview of USELESS currency usage, outstanding features and future growth potential
Jul 24, 2025 pm 11:54 PM
What is Useless Coin? Overview of USELESS currency usage, outstanding features and future growth potential
Jul 24, 2025 pm 11:54 PM
What are the key points of the catalog? UselessCoin: Overview and Key Features of USELESS The main features of USELESS UselessCoin (USELESS) Future price outlook: What impacts the price of UselessCoin in 2025 and beyond? Future Price Outlook Core Functions and Importances of UselessCoin (USELESS) How UselessCoin (USELESS) Works and What Its Benefits How UselessCoin Works Major Advantages About USELESSCoin's Companies Partnerships How they work together
 Completed python blockbuster online viewing entrance python free finished website collection
Jul 23, 2025 pm 12:36 PM
Completed python blockbuster online viewing entrance python free finished website collection
Jul 23, 2025 pm 12:36 PM
This article has selected several top Python "finished" project websites and high-level "blockbuster" learning resource portals for you. Whether you are looking for development inspiration, observing and learning master-level source code, or systematically improving your practical capabilities, these platforms are not to be missed and can help you grow into a Python master quickly.
 What is the code number of Bitcoin? What style of code is Bitcoin?
Jul 22, 2025 pm 09:51 PM
What is the code number of Bitcoin? What style of code is Bitcoin?
Jul 22, 2025 pm 09:51 PM
As a pioneer in the digital world, Bitcoin’s unique code name and underlying technology have always been the focus of people’s attention. Its standard code is BTC, also known as XBT on certain platforms that meet international standards. From a technical point of view, Bitcoin is not a single code style, but a huge and sophisticated open source software project. Its core code is mainly written in C and incorporates cryptography, distributed systems and economics principles, so that anyone can view, review and contribute its code.
