


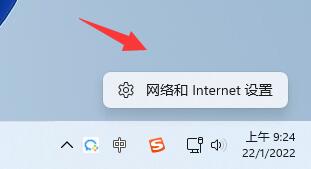
Previously Microsoft provided dns encryption service for win11, but many users don’t know how to use win11 encrypted dns. In fact, we only need to open the dns settings under network settings.
Win11 encrypted dns detailed tutorial:
1. First enter the disk and find the folder you want to encrypt.
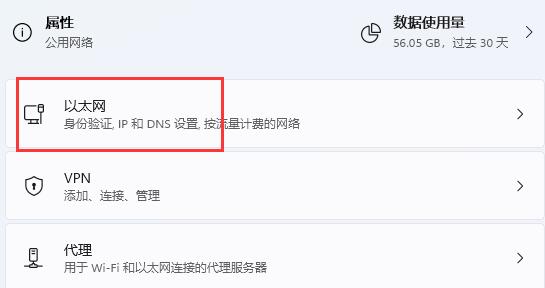
2. Then open "Ethernet" on the right
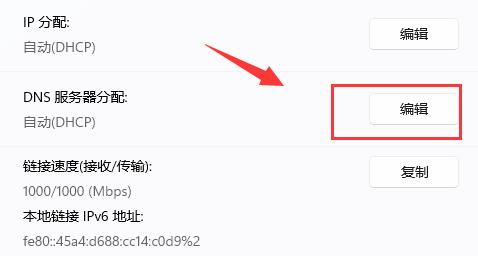
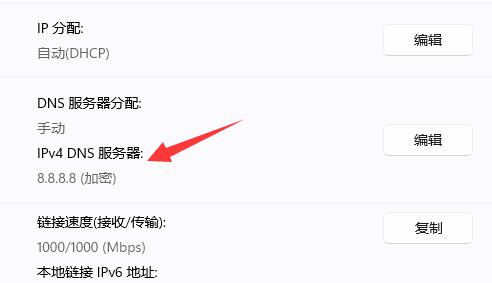
3. Then find the DNS server allocation below , click "Edit"
4. After changing "Automatic (DHCP)" to "Manual", turn on "IPv4" below

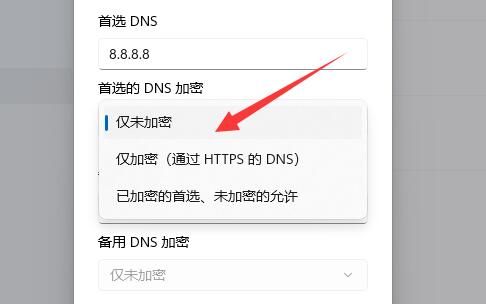
5. After turning it on, enter "8.8.8.8" in the preferred DNS
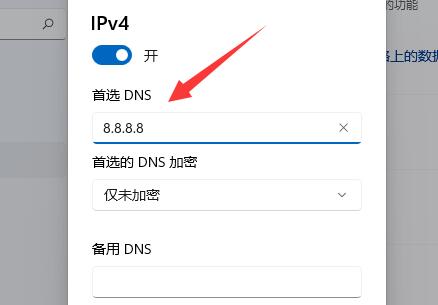
6, and then change the preferred DNS encryption to "Encryption only" (DNS via HTTPS)"
7. After the changes are completed, click "Save" and you will find that the dns encryption is successful.
Currently only a few specific dns support server encryption, not all.
The above is the detailed content of Win11 encrypted dns detailed tutorial. For more information, please follow other related articles on the PHP Chinese website!

Hot AI Tools

Undress AI Tool
Undress images for free

Undresser.AI Undress
AI-powered app for creating realistic nude photos

AI Clothes Remover
Online AI tool for removing clothes from photos.

Clothoff.io
AI clothes remover

Video Face Swap
Swap faces in any video effortlessly with our completely free AI face swap tool!

Hot Article
Hot Tools

Notepad++7.3.1
Easy-to-use and free code editor

SublimeText3 Chinese version
Chinese version, very easy to use

Zend Studio 13.0.1
Powerful PHP integrated development environment

Dreamweaver CS6
Visual web development tools

SublimeText3 Mac version
God-level code editing software (SublimeText3)


 How to use shortcut keys to take screenshots in Win8?
Mar 28, 2024 am 08:33 AM
How to use shortcut keys to take screenshots in Win8?
Mar 28, 2024 am 08:33 AM
How to use shortcut keys to take screenshots in Win8? In our daily use of computers, we often need to take screenshots of the content on the screen. For users of Windows 8 system, taking screenshots through shortcut keys is a convenient and efficient operation method. In this article, we will introduce several commonly used shortcut keys to take screenshots in Windows 8 system to help you take screenshots more quickly. The first method is to use the "Win key + PrintScreen key" key combination to perform full
 Detailed steps to install Go language on Win7 computer
Mar 27, 2024 pm 02:00 PM
Detailed steps to install Go language on Win7 computer
Mar 27, 2024 pm 02:00 PM
Detailed steps to install Go language on Win7 computer Go (also known as Golang) is an open source programming language developed by Google. It is simple, efficient and has excellent concurrency performance. It is suitable for the development of cloud services, network applications and back-end systems. . Installing the Go language on a Win7 computer allows you to quickly get started with the language and start writing Go programs. The following will introduce in detail the steps to install the Go language on a Win7 computer, and attach specific code examples. Step 1: Download the Go language installation package and visit the Go official website
 How to install Go language under Win7 system?
Mar 27, 2024 pm 01:42 PM
How to install Go language under Win7 system?
Mar 27, 2024 pm 01:42 PM
Installing Go language under Win7 system is a relatively simple operation. Just follow the following steps to successfully install it. The following will introduce in detail how to install Go language under Win7 system. Step 1: Download the Go language installation package. First, open the Go language official website (https://golang.org/) and enter the download page. On the download page, select the installation package version compatible with Win7 system to download. Click the Download button and wait for the installation package to download. Step 2: Install Go language
 Win11 Tips Sharing: Skip Microsoft Account Login with One Trick
Mar 27, 2024 pm 02:57 PM
Win11 Tips Sharing: Skip Microsoft Account Login with One Trick
Mar 27, 2024 pm 02:57 PM
Win11 Tips Sharing: One trick to skip Microsoft account login Windows 11 is the latest operating system launched by Microsoft, with a new design style and many practical functions. However, for some users, having to log in to their Microsoft account every time they boot up the system can be a bit annoying. If you are one of them, you might as well try the following tips, which will allow you to skip logging in with a Microsoft account and enter the desktop interface directly. First, we need to create a local account in the system to log in instead of a Microsoft account. The advantage of doing this is
 Comparing the performance of Win11 and Win10 systems, which one is better?
Mar 27, 2024 pm 05:09 PM
Comparing the performance of Win11 and Win10 systems, which one is better?
Mar 27, 2024 pm 05:09 PM
The Windows operating system has always been one of the most widely used operating systems on personal computers, and Windows 10 has long been Microsoft's flagship operating system until recently when Microsoft launched the new Windows 11 system. With the launch of Windows 11 system, people have become interested in the performance differences between Windows 10 and Windows 11 systems. Which one is better between the two? First, let’s take a look at W
 What is the difference in the 'My Computer' path in Win11? Quick way to find it!
Mar 29, 2024 pm 12:33 PM
What is the difference in the 'My Computer' path in Win11? Quick way to find it!
Mar 29, 2024 pm 12:33 PM
What is the difference in the "My Computer" path in Win11? Quick way to find it! As the Windows system is constantly updated, the latest Windows 11 system also brings some new changes and functions. One of the common problems is that users cannot find the path to "My Computer" in Win11 system. This was usually a simple operation in previous Windows systems. This article will introduce how the paths of "My Computer" are different in Win11 system, and how to quickly find them. In Windows1
 Must read before purchasing a system: Analysis of the advantages and disadvantages of Win11 and Win10
Mar 28, 2024 pm 01:33 PM
Must read before purchasing a system: Analysis of the advantages and disadvantages of Win11 and Win10
Mar 28, 2024 pm 01:33 PM
In today's information age, personal computers play an important role as an indispensable tool in our daily lives. As one of the core software of computers, the operating system affects our usage experience and work efficiency. In the market, Microsoft's Windows operating system has always occupied a dominant position, and now people face the choice between the latest Windows 11 and the old Windows 10. For ordinary consumers, when choosing an operating system, they do not just look at the version number, but also understand its advantages and disadvantages.
 How to encrypt the compressed package in winrar-winrar encrypted compressed package method
Mar 23, 2024 pm 12:10 PM
How to encrypt the compressed package in winrar-winrar encrypted compressed package method
Mar 23, 2024 pm 12:10 PM
The editor will introduce to you three methods of encryption and compression: Method 1: Encryption The simplest encryption method is to enter the password you want to set when encrypting the file, and the encryption and compression are completed. Method 2: Automatic encryption Ordinary encryption method requires us to enter a password when encrypting each file. If you want to encrypt a large number of compressed packages and the passwords are the same, then we can set automatic encryption in WinRAR, and then just When compressing files normally, WinRAR will add a password to each compressed package. The method is as follows: Open WinRAR, click Options-Settings in the setting interface, switch to [Compression], click Create Default Configuration-Set Password Enter the password we want to set here, click OK to complete the setting, we only need to correct
