
 Common Problem
What to do if the taskbar at the bottom of Windows 10 system becomes unresponsive
Common Problem
What to do if the taskbar at the bottom of Windows 10 system becomes unresponsive
What to do if the taskbar at the bottom of Windows 10 system becomes unresponsive
Jul 12, 2023 am 11:45 AM
The editor found that many users have upgraded their computers to the win10 system, but after using it for a long time, various problems will inevitably occur. For example, some users who use the win10 system have reported to the editor I encountered the problem of unresponsive taskbar at the bottom of win10 and I don't know what to do. In order to solve the problem of the unresponsive taskbar at the bottom of win10, the editor has compiled some solutions for you today.
Method 1:
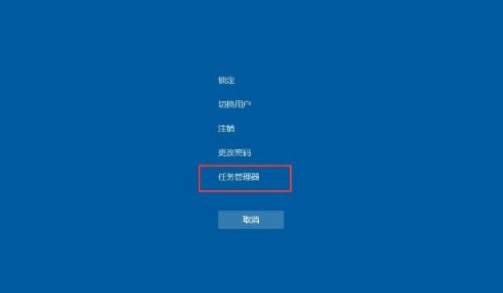
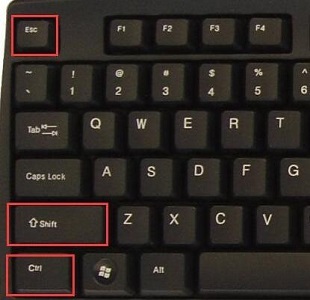
1. Press the "ctrl alt delete" key to open the task manager;
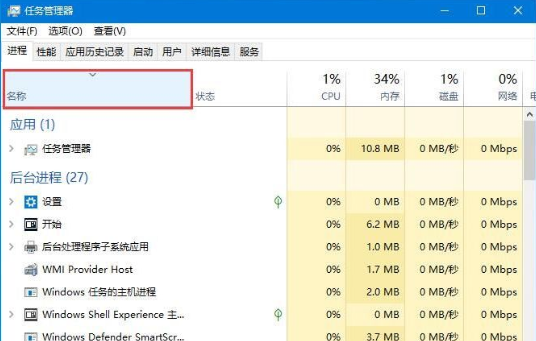
2. First click [Name] in the first column to sort by name so that the process name remains unchanged in the list;
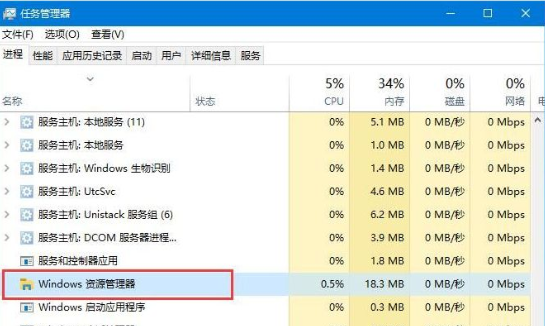
3. Find a column called "Windows Explorer" process, click Restart in the lower right corner and wait a few seconds to solve the problem.
Method 2:
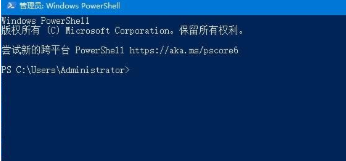
1. Press "win R" to open the run window and enter "powershell";
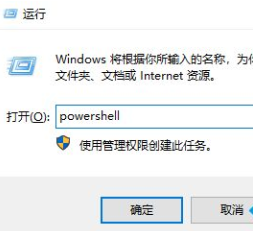
2. Make sure to run "powershell". You can view and operate the process in powershell. To restart the explorer process, just stop it and it will restart automatically.
Method three:
1. Reset system settings by creating a new Windows user;
2. Enter the "Control Panel" in sequence -"User Management"-"Manage Other Users" interface.
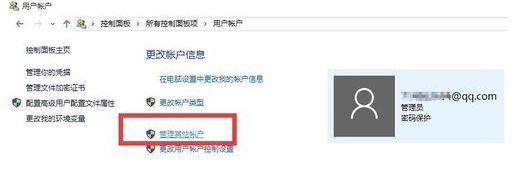
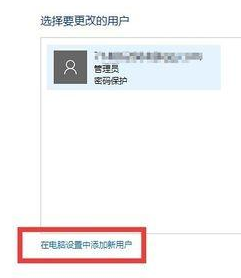
3. From the "Select User to Change" interface, click the "Add New User in Computer Settings" button to create a new user. The problem of unresponsiveness when right-clicking on the taskbar can be solved by logging in as a new user.
The above are three methods to solve the problem of unresponsiveness of the taskbar at the bottom of win10 system. If the same situation occurs, you might as well try the above methods to solve it, which can effectively help everyone. Recover.
The above is the detailed content of What to do if the taskbar at the bottom of Windows 10 system becomes unresponsive. For more information, please follow other related articles on the PHP Chinese website!

Hot AI Tools

Undress AI Tool
Undress images for free

Undresser.AI Undress
AI-powered app for creating realistic nude photos

AI Clothes Remover
Online AI tool for removing clothes from photos.

Clothoff.io
AI clothes remover

Video Face Swap
Swap faces in any video effortlessly with our completely free AI face swap tool!

Hot Article
Hot Tools

Notepad++7.3.1
Easy-to-use and free code editor

SublimeText3 Chinese version
Chinese version, very easy to use

Zend Studio 13.0.1
Powerful PHP integrated development environment

Dreamweaver CS6
Visual web development tools

SublimeText3 Mac version
God-level code editing software (SublimeText3)


 Solution to the problem that Win11 system cannot install Chinese language pack
Mar 09, 2024 am 09:48 AM
Solution to the problem that Win11 system cannot install Chinese language pack
Mar 09, 2024 am 09:48 AM
Solution to the problem that Win11 system cannot install Chinese language pack With the launch of Windows 11 system, many users began to upgrade their operating system to experience new functions and interfaces. However, some users found that they were unable to install the Chinese language pack after upgrading, which troubled their experience. In this article, we will discuss the reasons why Win11 system cannot install the Chinese language pack and provide some solutions to help users solve this problem. Cause Analysis First, let us analyze the inability of Win11 system to
 Solution for Win11 unable to install Chinese language pack
Mar 09, 2024 am 09:15 AM
Solution for Win11 unable to install Chinese language pack
Mar 09, 2024 am 09:15 AM
Win11 is the latest operating system launched by Microsoft. Compared with previous versions, Win11 has greatly improved the interface design and user experience. However, some users reported that they encountered the problem of being unable to install the Chinese language pack after installing Win11, which caused trouble for them to use Chinese in the system. This article will provide some solutions to the problem that Win11 cannot install the Chinese language pack to help users use Chinese smoothly. First, we need to understand why the Chinese language pack cannot be installed. Generally speaking, Win11
 How to make the Win11 taskbar black? Introduction to how to set the black taskbar in Win11
Apr 22, 2024 pm 06:40 PM
How to make the Win11 taskbar black? Introduction to how to set the black taskbar in Win11
Apr 22, 2024 pm 06:40 PM
Some friends also want the taskbar to turn black after changing the dark wallpaper on their computers, but they don’t know how to do it. Let’s take a look at the specific methods below! 1. Right-click an empty area in the taskbar and select "Taskbar Settings." 2. In the taskbar settings window, find the "Appearance" tab and click it. 3. Under the "Appearance" tab, find the "Taskbar Background" option and click the drop-down menu. 4. Select "Black". 5. Close the "Taskbar Settings" window. Taskbar beautification Xiaozhi Eye Protector is a very easy-to-use win11 transparent taskbar tool. It supports taskbar transparency, taskbar beautification, and multiple styles to beautify the taskbar interface, making your computer interface more beautiful. Xiaozhi Eye Protector Eye Baby (click to download now) Xiaozhi Eye Protection
 What should I do if the Win7 taskbar does not display the icon? How to solve the problem of the computer taskbar icon disappearing
Jun 09, 2024 pm 01:49 PM
What should I do if the Win7 taskbar does not display the icon? How to solve the problem of the computer taskbar icon disappearing
Jun 09, 2024 pm 01:49 PM
Recently, many users using Win7 system have found that the icons in the taskbar suddenly disappeared, which makes the operation very inconvenient and they do not know how to solve the problem. This article will introduce to you how to solve the problem of disappearing taskbar icons in Win7 system. Bar! Cause Analysis When encountering such a situation, there are generally two situations: one is that the taskbar on the computer does not really disappear, but is just hidden, and the other is that the taskbar does disappear. Method 1: 1. There is a situation that you need to confirm first, that is, when the mouse is placed at the bottom of the screen, the taskbar will be displayed. You can directly click the mouse on the taskbar and select "Properties". 2. In the dialog box that opens, click & on the "Hide taskbar" option.
 How to solve the problem that the win11 taskbar does not respond when clicked/cannot be used
May 09, 2024 pm 06:43 PM
How to solve the problem that the win11 taskbar does not respond when clicked/cannot be used
May 09, 2024 pm 06:43 PM
After upgrading to Windows 11 system, many users encountered the problem that the taskbar cannot be clicked, which has a great impact on life and work. So how to solve it specifically? Let’s take a look below! Method 1 1. First, we press the Ctrl+Shift+Esc shortcut keys on the keyboard to open the Task Manager. 2. Then click File in the upper left corner and select Run New Task. 3. After opening it, enter control and press Enter to enter the control panel. 4. Find the time and area and choose to change the date and time. 5. Change the time to September 4 or later, turn off automatic time synchronization after the setting is completed, and then restart the computer. 6. After restarting, re-enter the time settings and come to the internet time selection.
 How to use shortcut keys to take screenshots in Win8?
Mar 28, 2024 am 08:33 AM
How to use shortcut keys to take screenshots in Win8?
Mar 28, 2024 am 08:33 AM
How to use shortcut keys to take screenshots in Win8? In our daily use of computers, we often need to take screenshots of the content on the screen. For users of Windows 8 system, taking screenshots through shortcut keys is a convenient and efficient operation method. In this article, we will introduce several commonly used shortcut keys to take screenshots in Windows 8 system to help you take screenshots more quickly. The first method is to use the "Win key + PrintScreen key" key combination to perform full
 How to set the Win11 taskbar to be fully transparent? Detailed guide to setting up 100% transparency for the Win11 taskbar
May 09, 2024 pm 01:22 PM
How to set the Win11 taskbar to be fully transparent? Detailed guide to setting up 100% transparency for the Win11 taskbar
May 09, 2024 pm 01:22 PM
Windows 11 is the latest operating system launched by Microsoft. It adopts a new interface design and interaction method. Many users will habitually set the taskbar to be fully transparent. So how should they do it? Let’s take a look below! Basic settings 1. Right-click a blank space on the taskbar and select "Taskbar Settings". 2. In the "Personalization" tab, find the "Theme" option. 3. Scroll to the bottom and find the "Transparency" option. 4. Adjust the "Transparency" slider to the far right to set the taskbar to be fully transparent. The third-party tool Xiaozhi Eye Protection is an efficient eye protection software that effectively filters screen blue light. Compared with Eye Protection Wizard and Eye Protection Guardian, we provide a variety of eye protection color adjustments to meet the needs of color-sensitive groups at all times of the day. Eye protection requirements
 How to solve the problem that the taskbar cannot be resized in Windows 11 system
Apr 17, 2024 pm 06:40 PM
How to solve the problem that the taskbar cannot be resized in Windows 11 system
Apr 17, 2024 pm 06:40 PM
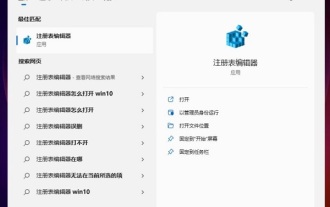
Recently, some Windows 11 users have found that the size of the taskbar cannot be freely scaled according to personal preferences, especially when they want to increase or decrease the size of the taskbar. In order to solve the troubles faced by these users, this article will focus on the problem that the taskbar size cannot be adjusted in Windows 11 system and provide relevant solutions. Operation method 1. Click Start in the taskbar in the lower left corner, enter "Registry Editor" in the search box above and open it. 2. After entering the new interface, click "HKEY_CURRENT_USERSoftwareMicrosoftWindowsCurrentVersionExpl" in the left column