
 Common Problem
How to Ungroup Icons on Windows 11 Taskbar Using Registry Hacking (and 2 More Methods)
Common Problem
How to Ungroup Icons on Windows 11 Taskbar Using Registry Hacking (and 2 More Methods)
How to Ungroup Icons on Windows 11 Taskbar Using Registry Hacking (and 2 More Methods)
Jun 05, 2023 pm 01:39 PM
What is icon grouping in the taskbar?
Icon grouping is a new feature introduced in Windows 10. When the feature is enabled, all instances of an application will be grouped under one taskbar icon, regardless of how many windows you have open.
Hovering over this icon will allow you to view and select one of the open instances. The idea behind this feature is to better manage the taskbar and help users who usually have multiple windows open on their desktop keep it organized.
Windows introduces the ability to group all taskbar icons in Windows 10. However, you could disable this feature in previous iterations of the operating system by selecting Never Combination in the taskbar settings.
This option has been removed in Windows 11 and the option to disable icon grouping in the taskbar is no longer allowed. Thankfully, you can now disable this option using a few workarounds to get a taskbar reminiscent of the Windows 10 days.
Does Windows 11 have a feature to never merge taskbar icons?
Sadly, Windows 11 no longer has a "Never merge" option when customizing the taskbar. This feature has been removed in favor of Windows 11's new minimalist look, which is enhanced with icon grouping.
Disabling group icons may work for you, but it is detrimental to the overall material design Microsoft has adopted for Windows 11. As a result, the Never merge feature has now been removed from taskbar customization in Windows 11.
How to Ungroup Icons in Windows 11 Taskbar in 3 Ways
We recommend that you confirm that you have installed the latest updates from Microsoft. Additionally, we recommend that you create a registry backup in case you need to restore it in the future.
You can use this tutorial we provide to back up your registry. Then you can refer to one of the following methods according to your preference and requirements.
Method 1: Use a paid app to ungroup icons
You can use a paid app to ungroup icons in the taskbar. This eliminates the hassle of editing the file yourself and allows you to ungroup taskbar icons with a single click. Use any of the following tools to ungroup icons in the taskbar.
Option 1: Use StartAllBack
- Start All Back| Website Link
StartAllBack is a tool that many like the old Windows 10 UI and A well-known tool used by users of the interface. If you want the Start menu and taskbar of yore, StartAllBack offers you a ton of features.
Sadly, the program costs $5.99, which may be a deal-breaker for some users. But if you're someone who really misses Windows 10, at least you have more than 22 different major customization options to choose from for your money.
You can use StartAllBack to customize and change the following aspects of Windows 11.
- Taskbar
- File Manager
- Control Panel
- Context Menu
- Start Menu
- Common UI Elements
To get started, visit the link above and download StartAllBack to your PC. Use the on-screen instructions to install and activate the app. Once done, follow the steps below to ungroup taskbar icons.
Launch StartAllBack on your PC and click Taskbar.
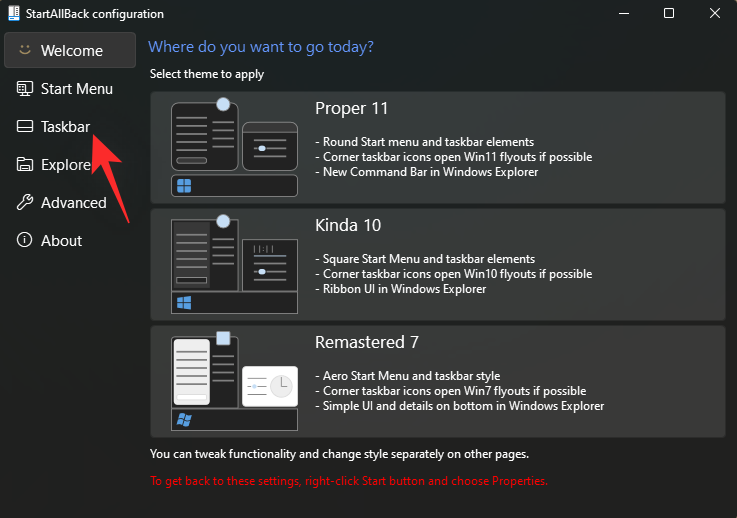
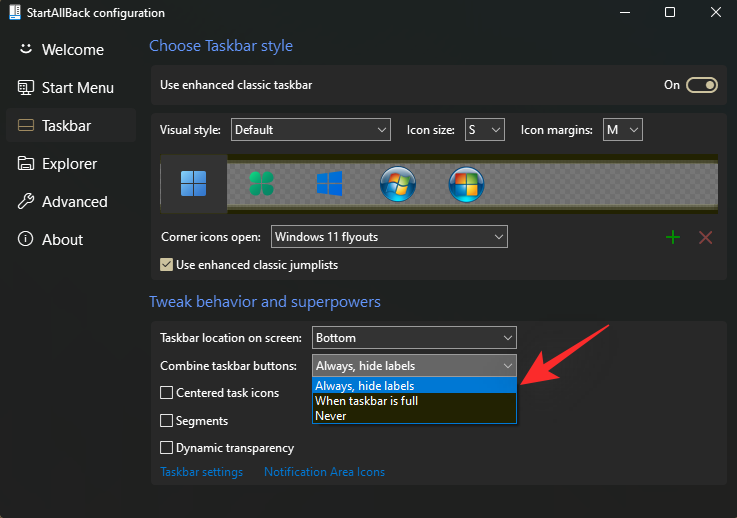
Click the drop-down menu next to the Combined Taskbar button : and select Never.
That's it! Your taskbar will automatically refresh and your icons should now be ungrouped as shown below.
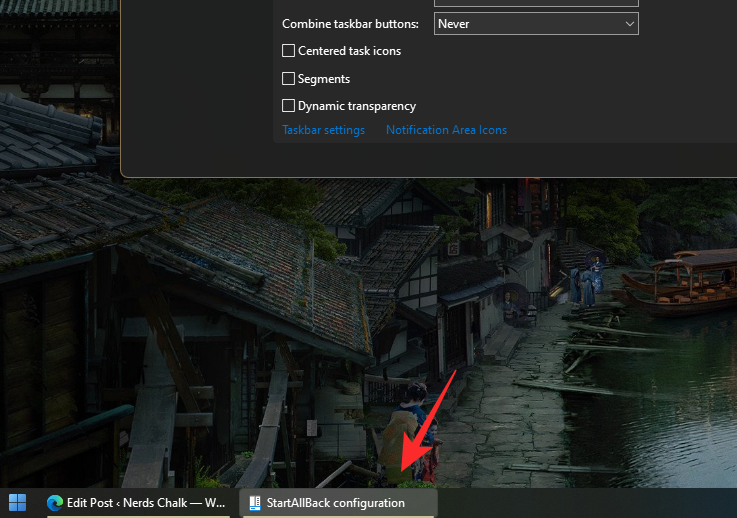
#You can now continue exploring your new tools and find other ways to customize Windows 11 to your liking.
Option 2: Use Stardock’s Start11
- Stardock’s Start11 | Website link
Start11 is a tool similar in nature that enables you to customize various aspects of Windows 11. After you try Start11 for 30 days, you can purchase the license that best suits your needs. Here are the main features of the tool currently available to you.
- Customize start menu style
- Customize start button
- Taskbar alignment, position, ungrouping, etc.
- Enhanced Windows Search
- Edit default hotkeys, shortcuts, and more
Visit the link above and download Start 1 to your PC. If you are convinced about the tool, you can choose a trial version or purchase a license. After downloading, use the installer to install Start11 on your system.
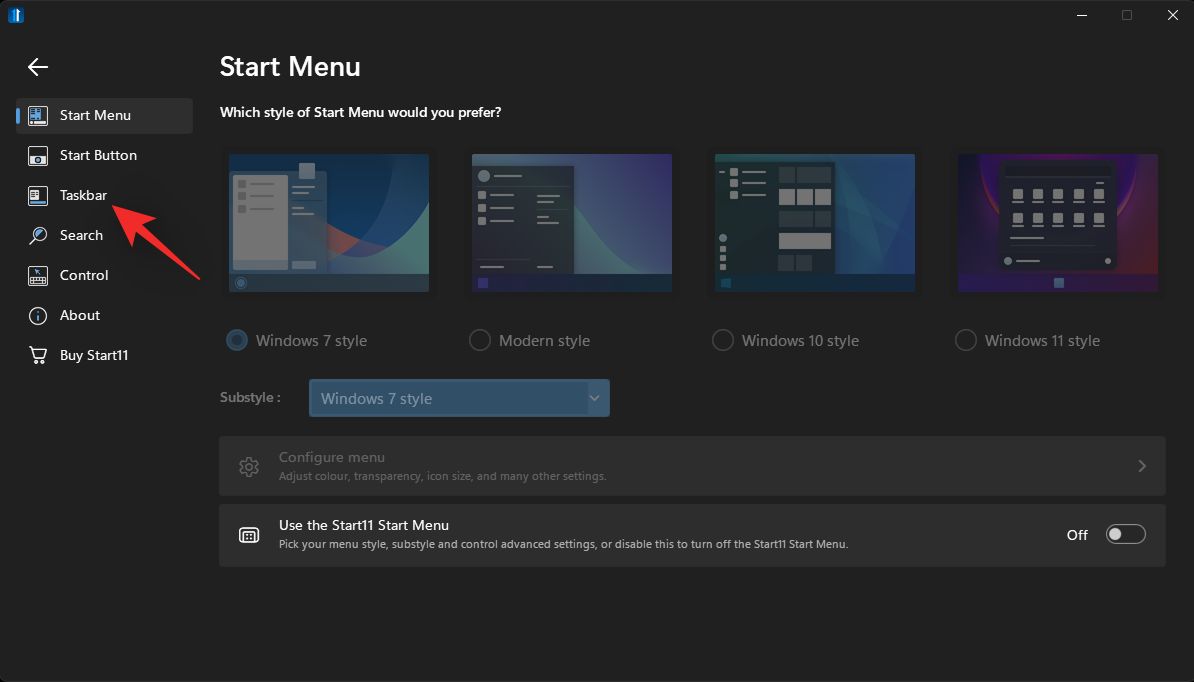
After installation, launch Start11 and click Taskbar.
Open Let Start11 enhance the taskbar toggle switch.
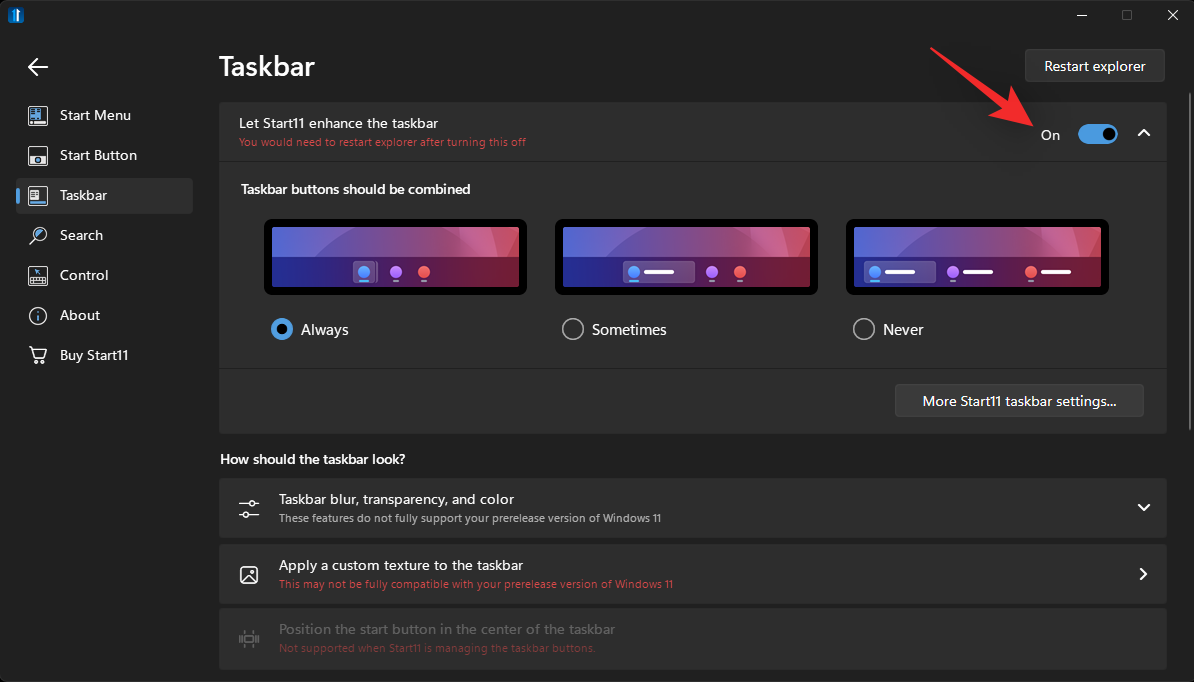
Click and select Never.

Click to restart the resource manager.
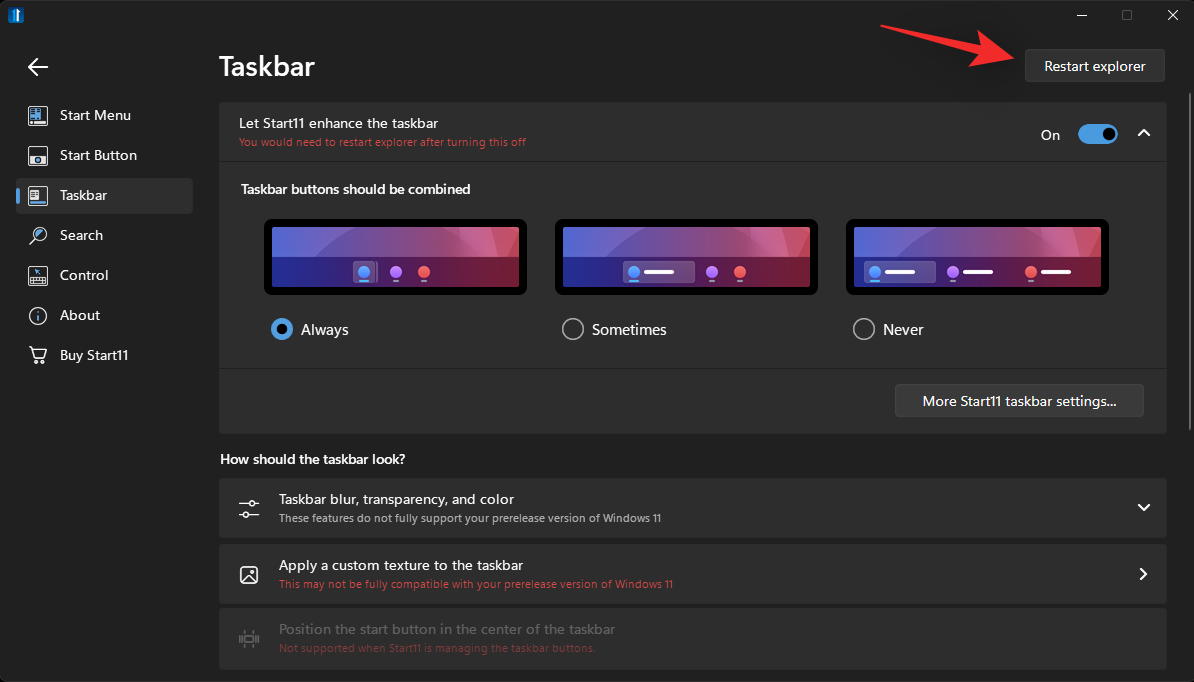
#You will notice that the icons are not yet ungrouped. Just minimize and maximize open windows and the changes will happen in your taskbar.
That's it! You will now use the taskbar to ungroup the icons.
Method 2: Ungroup Icons for Free
Explorer Patcher is another tool that can be used to get back the old Windows 10 taskbar as well as ungrouped icons in the taskbar. The tool is still in the early stages of release, but is very comprehensive and works well.
You can find icons including Wi-Fi, Bluetooth, Weather, and Search in the taskbar. Using the Explorer Patcher tool, you can ungroup icons on your PC.
- Explorer Patch | Download Link
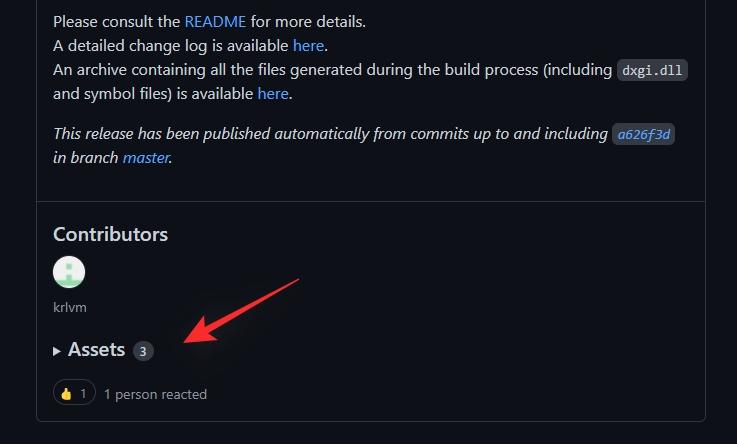
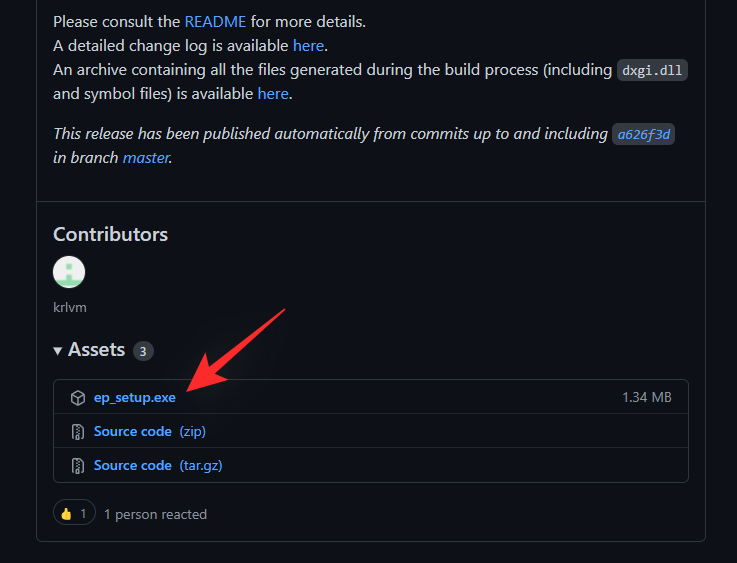
Visit the link above and click on the asset below Latest Release.
Click the ep_setup.exe file to download it to local storage.
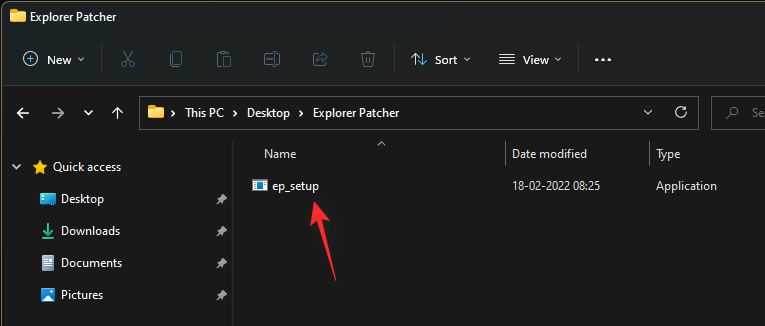
After downloading, double-click and run the application. Follow the on-screen instructions and Explorer Patcher will be installed on your computer in seconds.
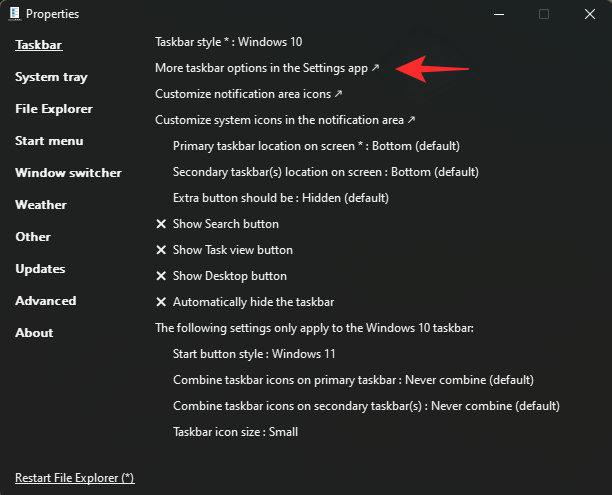
Your taskbar will now automatically revert to the old Windows 10 style, and the icons should now be automatically ungrouped. We can now customize your taskbar to suit your requirements. Right-click on the taskbar and select Properties in case the window does not start after the installation is complete.
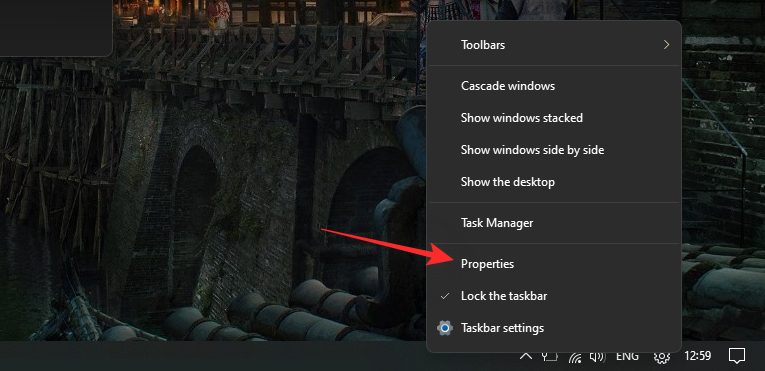
Note: Do not select Taskbar Settings. This option will redirect you to Windows taskbar settings.
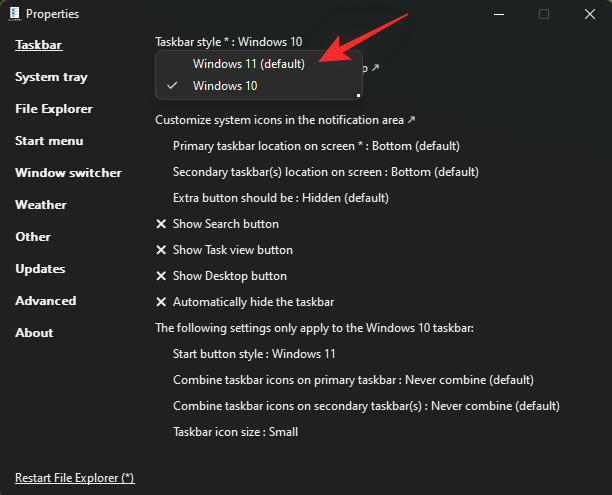
Make sure it says Windows 10 next to Taskbar style*:. If not, click on it and select Windows 10.
By default, your Start menu will be centered. This can be changed to fit your current left Start button. Click More taskbar options in the Settings app.
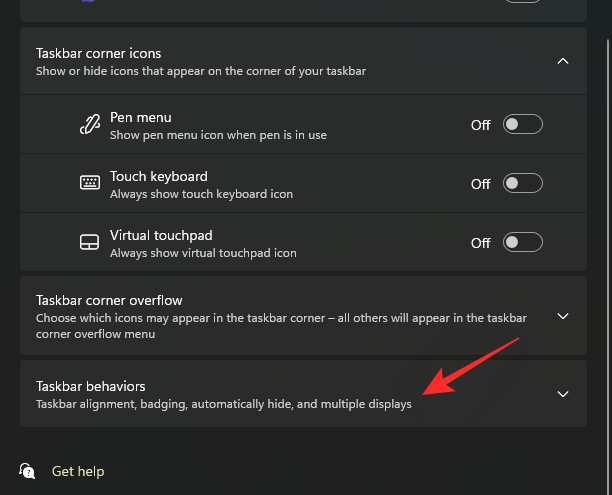
Now click on Taskbar Behaviors at the bottom.
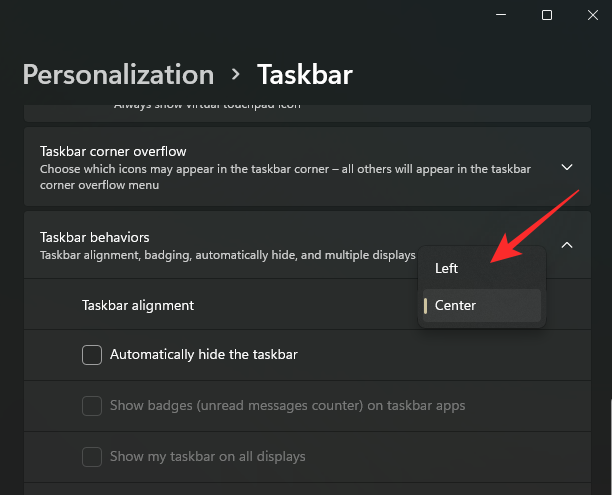
Click the drop-down menu next to Taskbar Alignment and select Left.
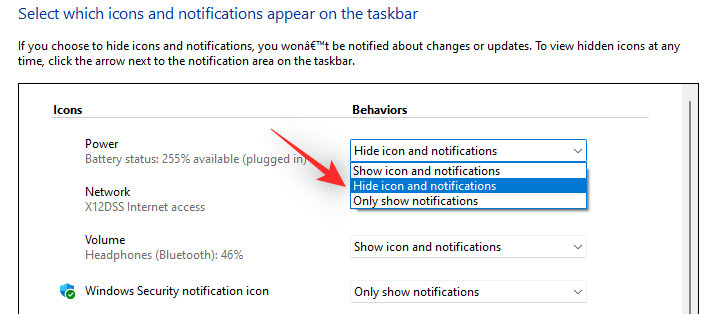
You can now test the Start menu, it should now launch on the left side of the screen. We will now customize the icon you want to see in the lower right corner of the taskbar. Return to the properties window we opened earlier and click Customize Notification Area Icon.
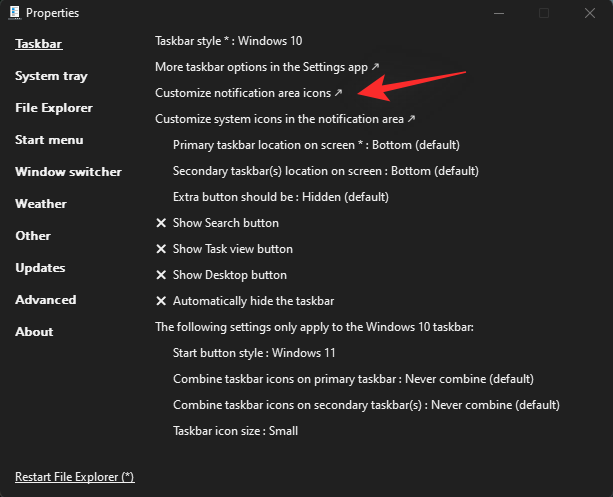
You will now see a list of third-party icons that have permission to appear in the taskbar. Click the drop-down menu next to the icon and select Hide Icons and Notifications to hide it completely from the taskbar.
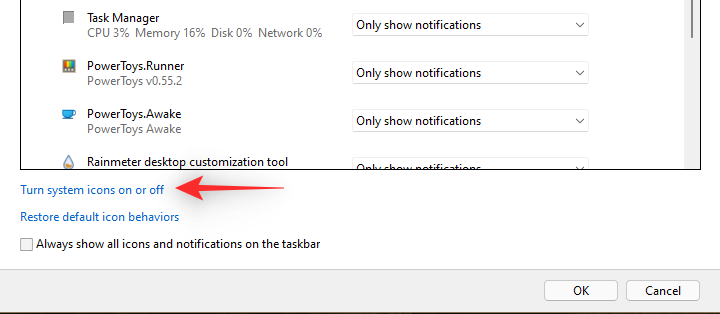
If you now wish to remove the system icon from the taskbar, click Turn system icons on or off.
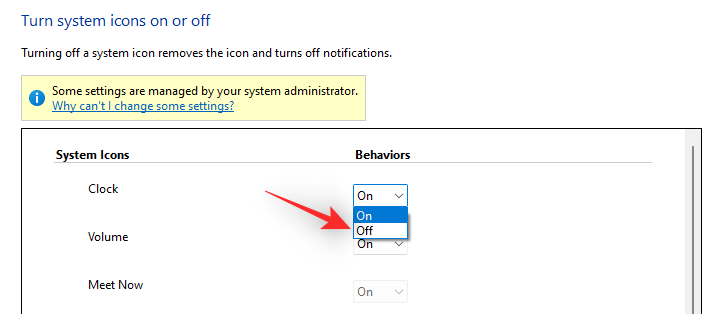
Click the drop-down menu next to the icon you want to disable and select Turn off.
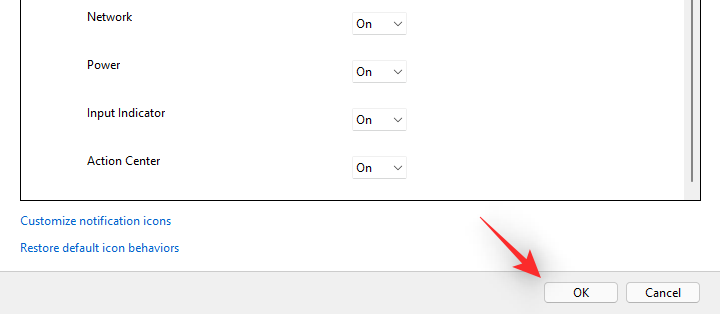
Click "OK" when finished.
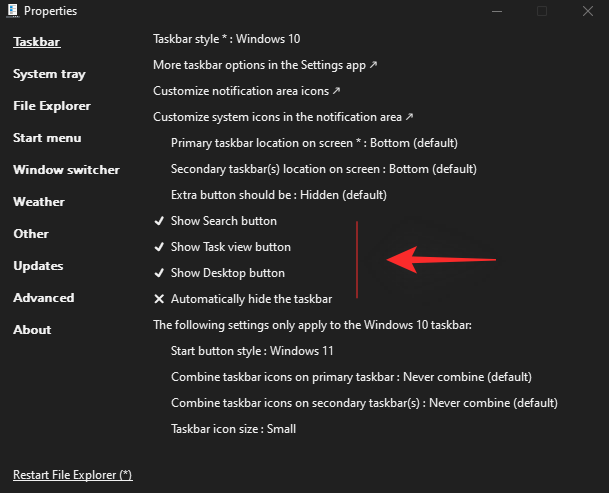
Click OK again. The Explorer patch will now automatically restart your Windows Explorer and the changes should now be reflected in your taskbar. Return to the Properties window and click any of these options to turn on their respective functionality for your taskbar.
- Show search button
- Show task view button
- Show desktop button
- Auto-hide taskbar
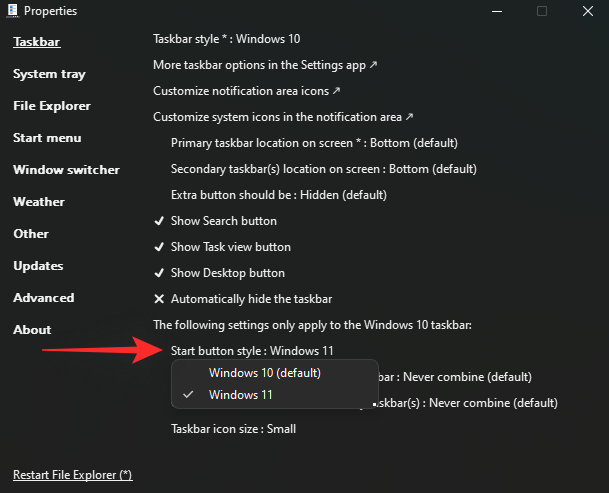
Click Start Button Style and select your preferred Start Button icon.
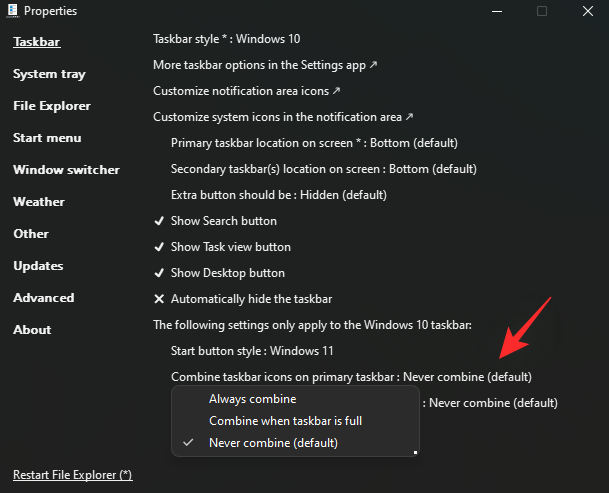
Click the Merge taskbar icon on the main taskbar: Then select Never merge (default) .
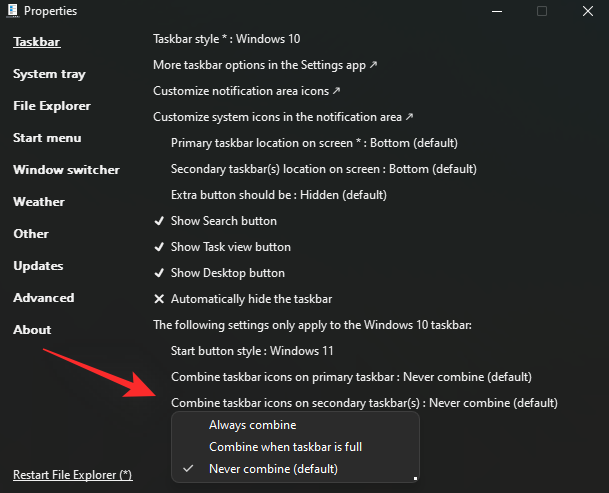
Then do the same for the next option if you have a multi-monitor setup.
 Finally, click and select your icon from Taskbar Icon Size Size: .
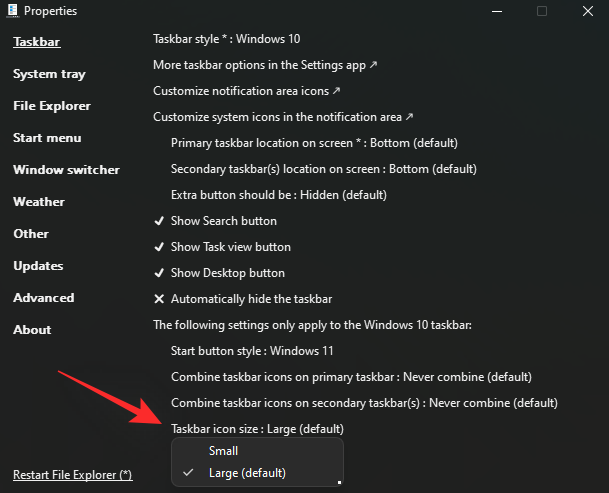
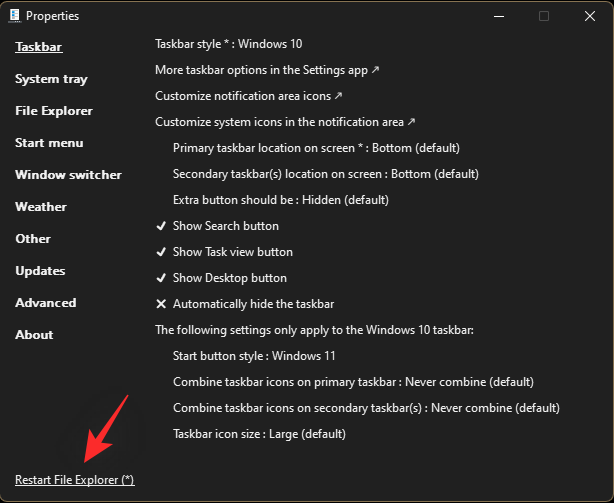
Click Restart File Explorer (*) and Windows Explorer will restart on your system. All changes should now be reflected on your PC, and your taskbar icons should now be ungrouped.
This is how you can ungroup taskbar icons on Windows 11 for free.

At this point, we recommend that you review the other options in the Properties window. Explorer Patcher modifies your context menu and UI by default to match the overall look and feel of your default taskbar. You may not like some of these changes, so you can use the left sidebar to customize Explorer Patcher's changes to suit your preferences.
Method 3: Manually Ungroup Icons
This will require some workarounds and registry hacks, but in the end, you should end up with a taskbar that looks like this. Each icon can be accessed by turning search, task view, and more on and off.
The only thing missing is the clock, and if that's a deal breaker for you, your only options at this point are to try StartAllBack or Explorer Patcher. However, you can get the clock in the taskbar using the workaround mentioned below.
Note: This tutorial still requires a third-party application (OpenShell). If you want to circumvent that requirement, unfortunately, you'll lose your entire Start menu.
Step 1: Install OpenShell
- Open Shell | Download Link
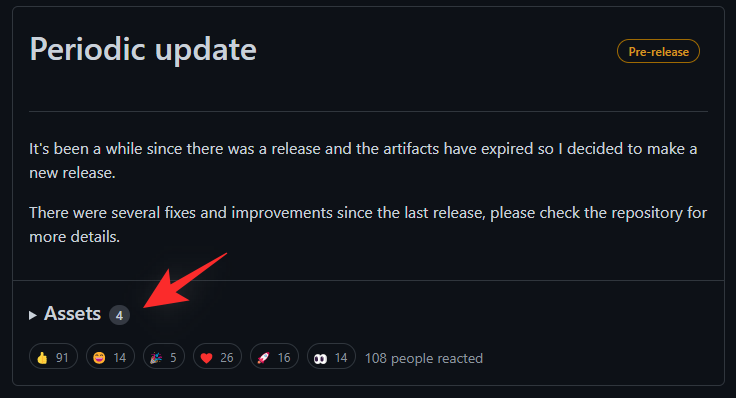
Visit the link above and click "Assets" below the latest version .
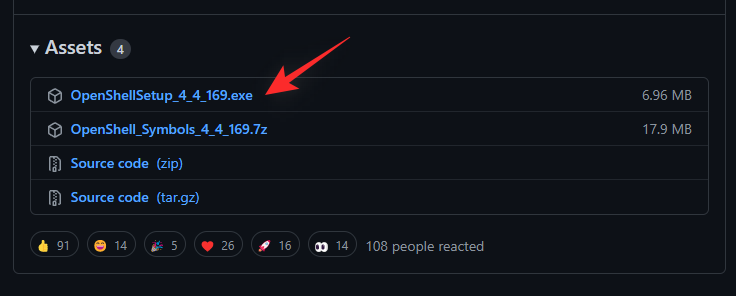
Now click and download the OpenShellSetup.exe file at the top.
#After downloading, double-click and launch the application on your system.

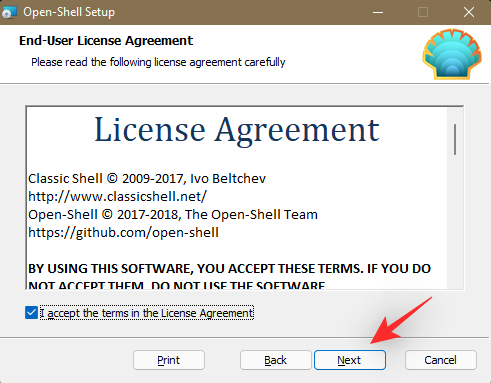
The setup will now be initiated on your system. Click Next to get started.

Check the checkbox to accept the license agreement and click Next when finished.
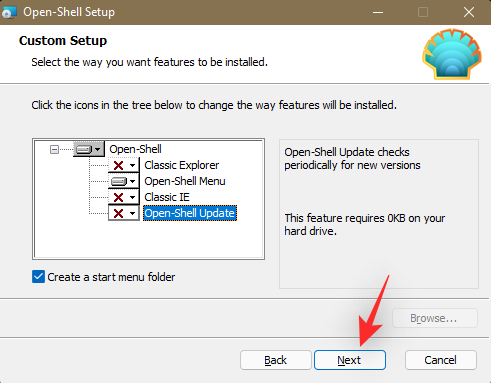
We only need to install the Open-Shell menu component. The program hasn't been updated in a while, so most of the other options have been deprecated and don't currently work. Click the drop-down menu next to the following component and select The entire feature will be unavailable.
- Classic Explorer
- Classic IE
- Open Shell Update
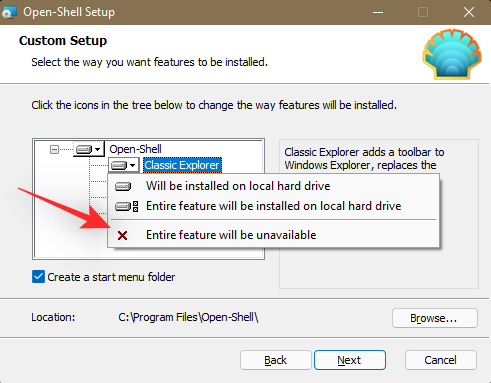
Complete Then click Next.
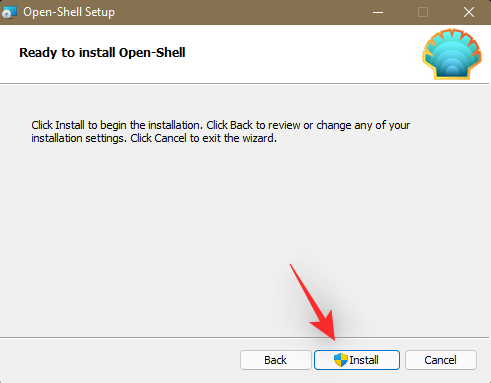
Click Install to start the installation.
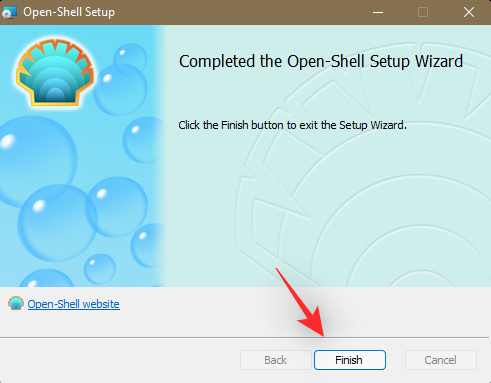
Click Finish after the installation is complete.
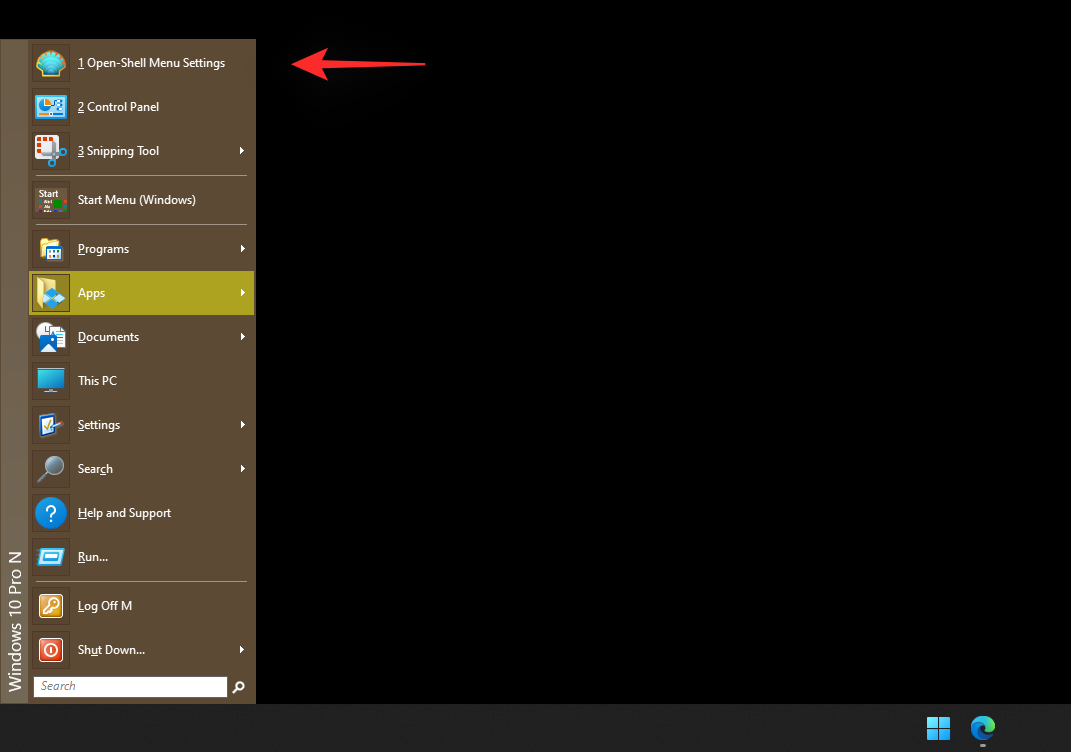
Press the Windows icon on your keyboard to test Open Shell. After pressing this key, the Open-Shell start menu should be launched. Click at the top to open the Shell menu settings.
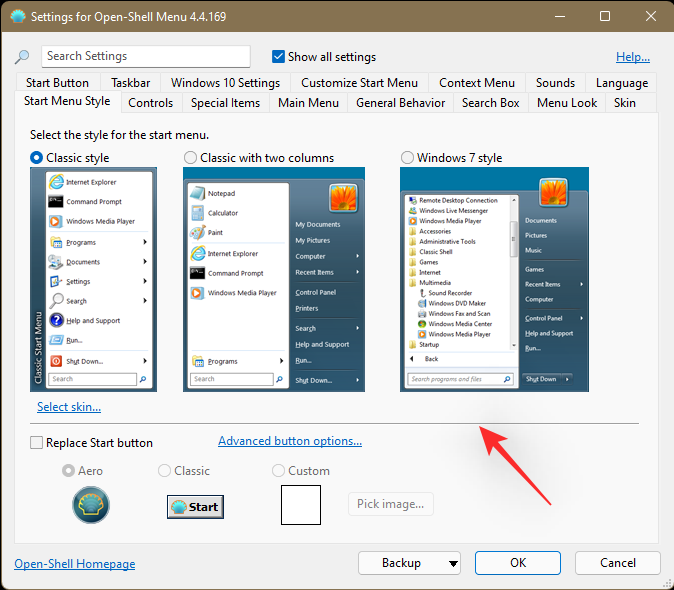
#Select the desired Start menu from the on-screen options. Click OK when finished to save your preferences.
We can now set up Windows to ungroup icons. This change won't be reflected immediately, but should happen when your classic taskbar is eventually restored.
We recommend that you do this to avoid having to restart Windows Explorer several times every time your PC restarts. Please follow the next section to help you complete the process.
Step 2: Ungroup taskbar icons
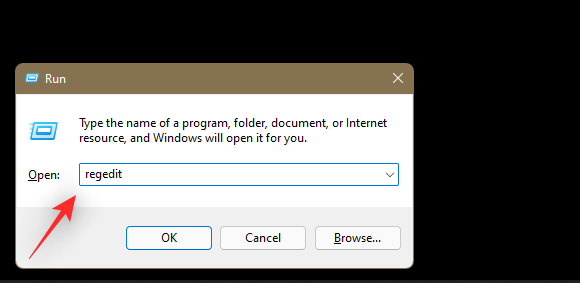
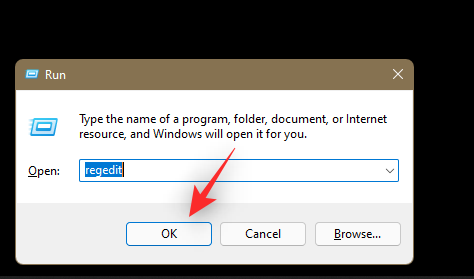
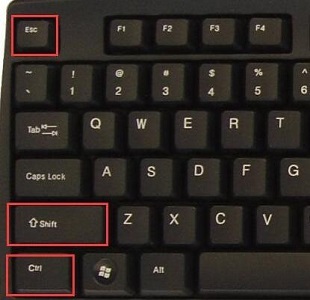
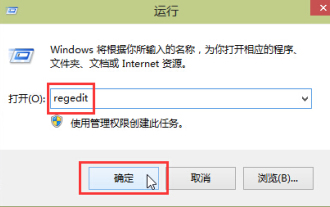
Press Windows Rkeyboard, type the following, then pressCtrl Shift Enterkeyboard .
regedit
#Now navigate to the following path. You can also copy-paste the same content in the address bar at the top.
HKEY_CURRENT_USER\Software\Microsoft\Windows\CurrentVersion\Policies\Explorer
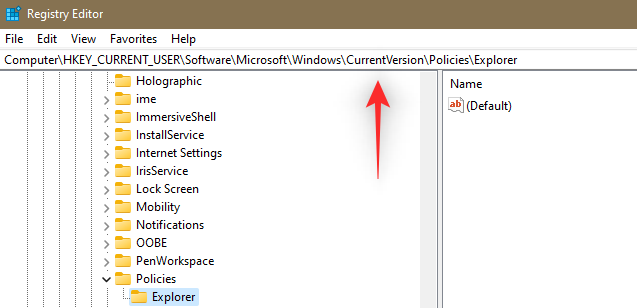
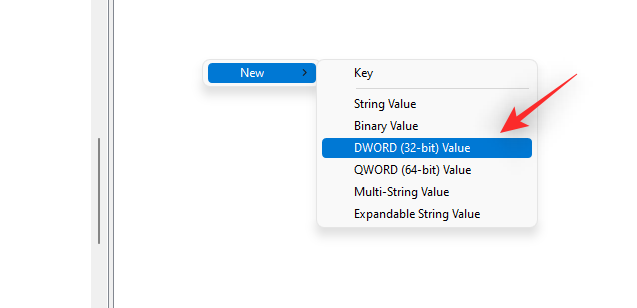
Select the Explorer on the left by clicking the same way. Now right-click on your right, select New, and click DWORD (32-bit) Value.
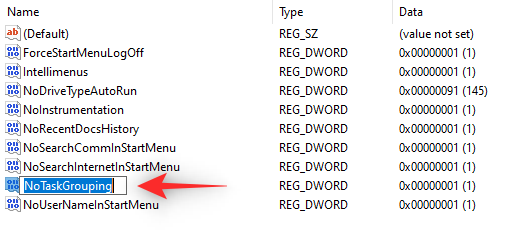
Name the values ??as follows and press Enter to apply the changes.
NoTaskGrouping
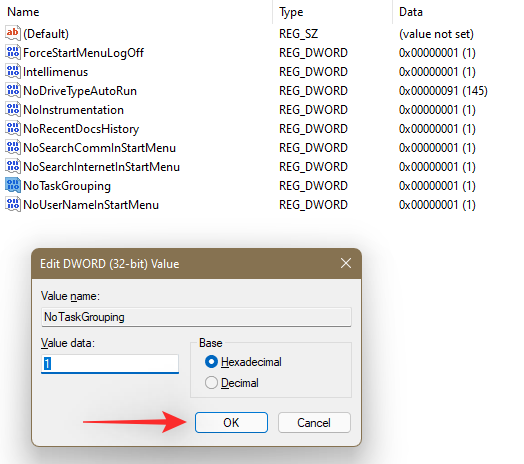
Double-click the newly created DWORD value and enter 1 as its value data .
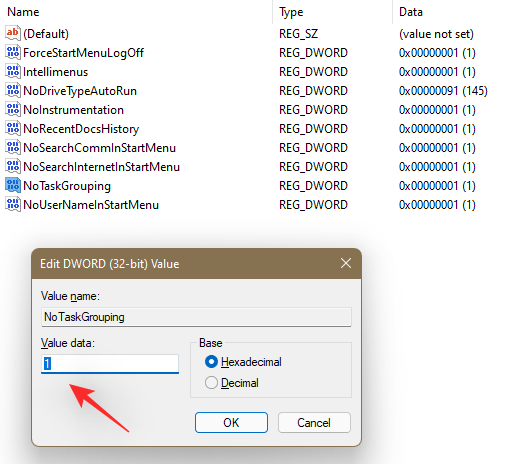
Finally, click OK.
We can now restore your classic taskbar. To ensure that the changes occur as expected, do not restart your PC or Windows Explorer.
Step 3: Restore the Classic Taskbar
We will now restore the Classic Taskbar on your PC. Please follow the steps below to help you through the process.
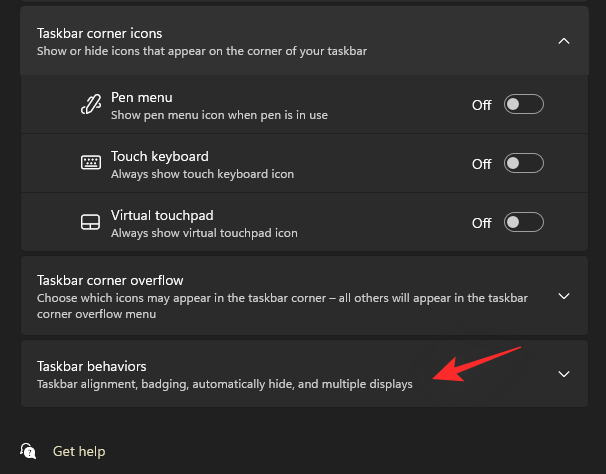
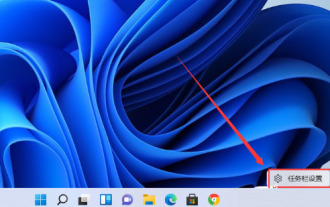
Right-click on your taskbar and select Taskbar Settings.

Scroll down and click Taskbar Behavior.
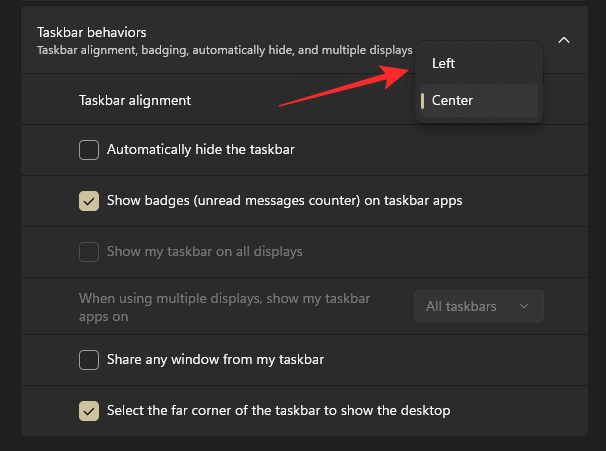
Click the drop-down menu next to Taskbar Alignment and select Left.
Close the Settings app now and press Windows R. Enter the following and press Ctrl Shift Enter on your keyboard.
regedit
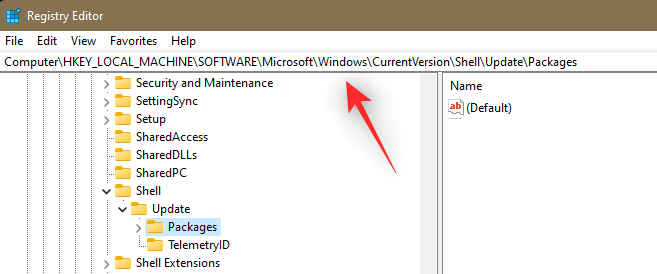
#Now use the keys on the left to navigate to the following path. You can also copy and paste the same content in the address bar at the top of the screen.
HKEY_LOCAL_MACHINE\SOFTWARE\Microsoft\Windows\CurrentVersion\Shell\Update\Packages
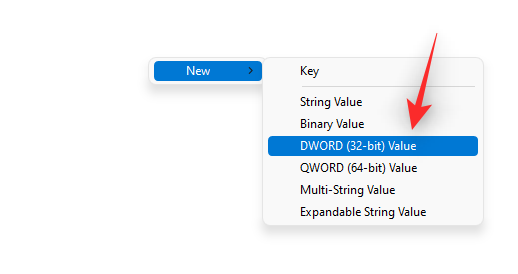
Make sure the ## on the left is selected #Packages, right-click on the right side, select New, and then select DWORD (32-bit) Value.
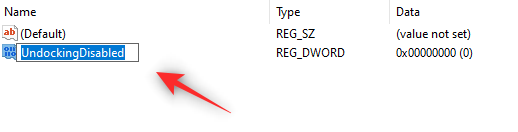
Enter on your keyboard.
UndockingDisabled
value data to 1 .
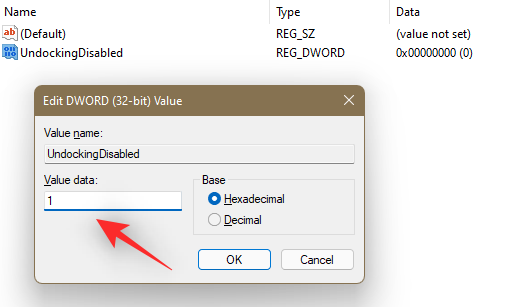
OK when finished.

Ctrl Shift Esc on your keyboard to launch Task Manager. Click the name at the top to sort the processes alphabetically.
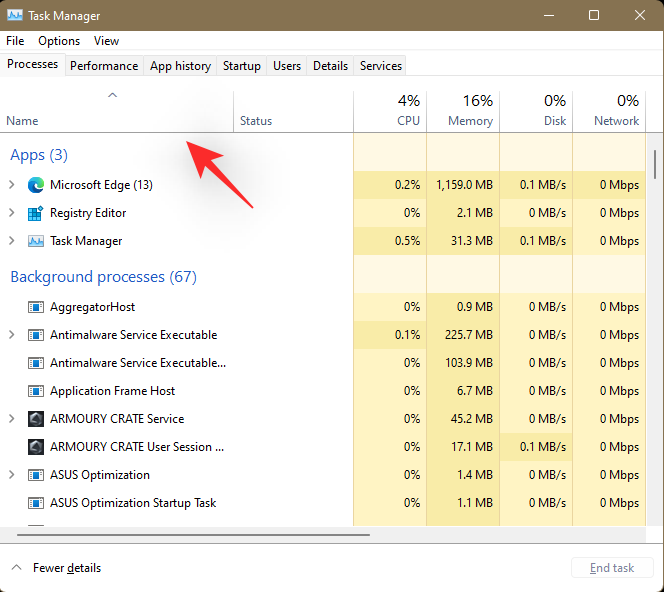
Scroll to the bottom and click and select Windows Explorer. After selecting, click in the lower right corner to restart.
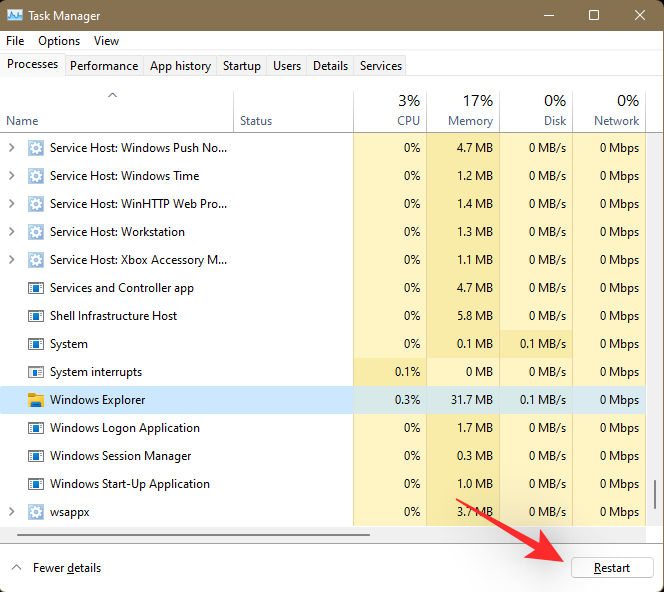
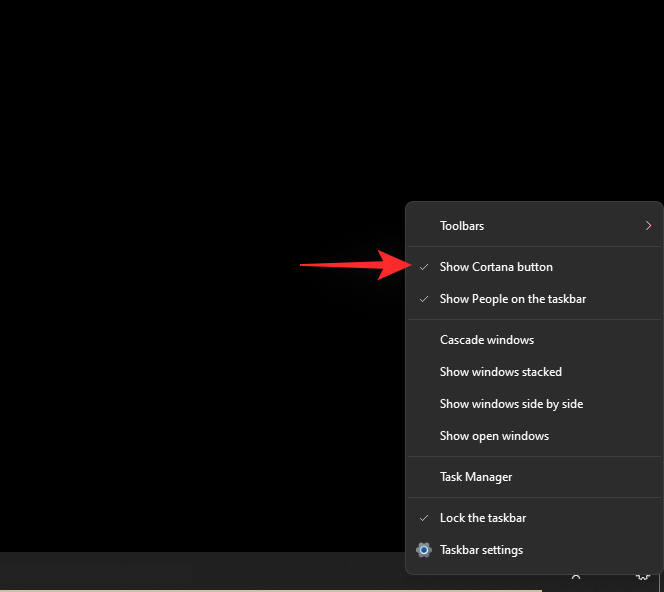
#Once your Explorer restarts, you should have the classic taskbar on your PC. Right-click the taskbar and click Show Cortana button. Cortana doesn't have access to this icon, so there's no point in enabling it.
Your classic taskbar is now restored. After a few seconds, the icons in the taskbar will automatically regroup once Windows recognizes and honors the changes to its registry values.

However, if this does not happen, restart your Windows Explorer as we did above and the changes should be reflected in your taskbar .
Step 4: Restore the Clock
You'll notice that you can access the Action Center by clicking the up arrow in the lower right corner. The only thing you lose is the clock. You can restore the same content by using the dedicated widget on the desktop or using the Rainmeter skin in the taskbar.
We recommend using the Rainmeter skin as it is always visible and allows more control when customizing its appearance. You can adjust the skin's position on a pixel-by-pixel basis, which should allow you to align it perfectly in your taskbar.
Use this comprehensive tutorial from us to help you set up Rainmeter skin on your taskbar. We have picked out some clock rainmeter skins for you which can be found below. We hope you find a product you love and that matches your aesthetic.
Here is my current setup to help you with this process.
That's it! You should now have a work taskbar and Start menu in Windows 11, and your icons are no longer grouped.
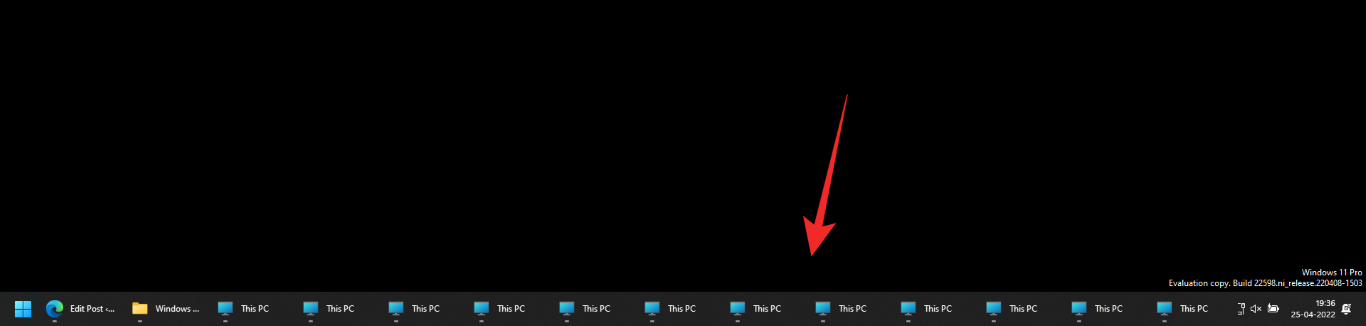
My icon is missing from the taskbar; what should I do?
This is a common problem when manually ungrouping icons, as shown below.

Normally, a few minutes after startup, the taskbar will automatically refresh and start displaying icons. However, if this does not happen, then you can use the following trick to trigger the same action. Please follow the steps to help you through the process.
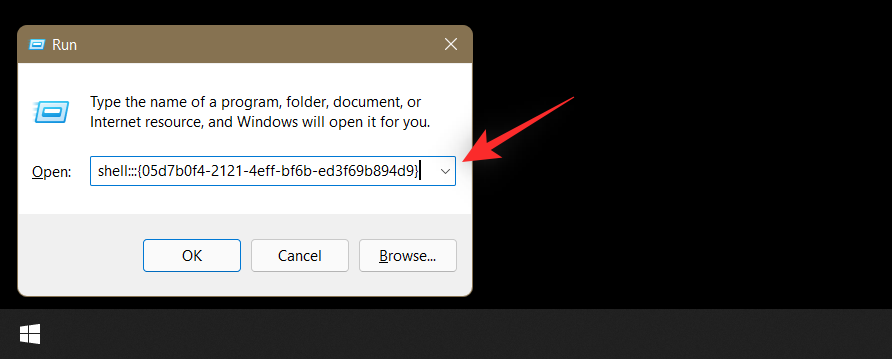
Press Windows R on your keyboard to launch the Run dialog box.
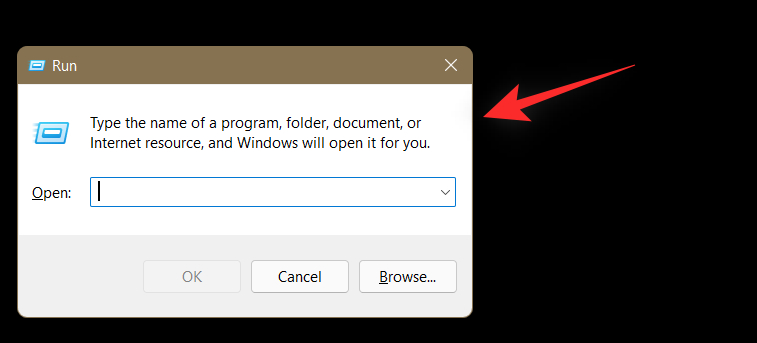
Copy and paste the following into the Run dialog box and hit Enter on your keyboard.
shell:::{05d7b0f4-2121-4eff-bf6b-ed3f69b894d9}

The hack used in this workaround modifies the behavior of Windows Explorer as well as some third-party tweaks. Although this solution may result in compromised functionality of some icons and introduce some bugs and glitches, it will not cause permanent damage to your operating system or PC.
Also, this registry hack can be easily restored using the following tutorial, so you can safely use this hack to disable icon grouping in Windows 11.
Why did Microsoft remove "never merge"?
Many experts believe that although there is no official word, Microsoft may be pushing forward based on the current taskbar aesthetic. Since Windows 11 uses a centered taskbar with unlabeled icons, ungrouping them will just create a copy of the icon in the taskbar.
If you have multiple windows open on your desktop, adding tabs can fill up your taskbar very quickly. Another contributing factor could be the change in the behavior of Alt Tab now also showing open tabs. This new feature may in turn break the taskbar with ungrouped icons and all open tabs may end up showing up in the taskbar.
This is just speculation for now, if you wish to have this functionality restored then we recommend you submit a ticket to the support team using the link below.
- Microsoft Support
Will this tip work with future updates of Windows 11?
We highly suspect that the manual trick of ungrouping icons in the taskbar will stop working with future Windows updates. Windows 11 comes with some major changes and overhauls that may change how your Windows Explorer, Start menu, and taskbar processes are handled. This will eventually change the registry path, causing the above workaround to no longer work.
Paid apps, especially third-party apps, always make sure they are compatible with upcoming Windows updates. This is one of the reasons why the Insider Dev channel exists.
In the first few days of the new update's release, support may be available if you are using a third-party app. Just update your apps to the latest version and everything will be back to normal.
The above is the detailed content of How to Ungroup Icons on Windows 11 Taskbar Using Registry Hacking (and 2 More Methods). For more information, please follow other related articles on the PHP Chinese website!

Hot AI Tools

Undress AI Tool
Undress images for free

Undresser.AI Undress
AI-powered app for creating realistic nude photos

AI Clothes Remover
Online AI tool for removing clothes from photos.

Clothoff.io
AI clothes remover

Video Face Swap
Swap faces in any video effortlessly with our completely free AI face swap tool!

Hot Article
Hot Tools

Notepad++7.3.1
Easy-to-use and free code editor

SublimeText3 Chinese version
Chinese version, very easy to use

Zend Studio 13.0.1
Powerful PHP integrated development environment

Dreamweaver CS6
Visual web development tools

SublimeText3 Mac version
God-level code editing software (SublimeText3)


 How to disable taskbar thumbnail preview in Win11? Turn off the taskbar icon display thumbnail technique by moving the mouse
Feb 29, 2024 pm 03:20 PM
How to disable taskbar thumbnail preview in Win11? Turn off the taskbar icon display thumbnail technique by moving the mouse
Feb 29, 2024 pm 03:20 PM
This article will introduce how to turn off the thumbnail function displayed when the mouse moves the taskbar icon in Win11 system. This feature is turned on by default and displays a thumbnail of the application's current window when the user hovers the mouse pointer over an application icon on the taskbar. However, some users may find this feature less useful or disruptive to their experience and want to turn it off. Taskbar thumbnails can be fun, but they can also be distracting or annoying. Considering how often you hover over this area, you may have inadvertently closed important windows a few times. Another drawback is that it uses more system resources, so if you've been looking for a way to be more resource efficient, we'll show you how to disable it. but
 How to expand the stacked display of the Win11 taskbar? Tutorial on stacking and expanding the Win11 taskbar
Jan 29, 2024 am 11:33 AM
How to expand the stacked display of the Win11 taskbar? Tutorial on stacking and expanding the Win11 taskbar
Jan 29, 2024 am 11:33 AM
When we use win11 system, we will find that our taskbar windows are merged. Many users don't like this operation very much. So how to expand the win11 taskbar stacking? Users can directly click on the taskbar settings under the right button, and then directly find the taskbar corner overflow option in the right menu to operate. Let this site carefully introduce to users how to expand the win11 taskbar stack. How to expand taskbar stacking in Windows 11 Method 1. 1. Right-click on a blank space on the taskbar and select Taskbar Settings. 3. After clicking the taskbar corner overflow, turn on the switch for the application icon to be displayed. Method two: 1. We need to use a software to achieve this, search, download and install star by ourselves
 How to make the Win11 taskbar black? Introduction to how to set the black taskbar in Win11
Apr 22, 2024 pm 06:40 PM
How to make the Win11 taskbar black? Introduction to how to set the black taskbar in Win11
Apr 22, 2024 pm 06:40 PM
Some friends also want the taskbar to turn black after changing the dark wallpaper on their computers, but they don’t know how to do it. Let’s take a look at the specific methods below! 1. Right-click an empty area in the taskbar and select "Taskbar Settings." 2. In the taskbar settings window, find the "Appearance" tab and click it. 3. Under the "Appearance" tab, find the "Taskbar Background" option and click the drop-down menu. 4. Select "Black". 5. Close the "Taskbar Settings" window. Taskbar beautification Xiaozhi Eye Protector is a very easy-to-use win11 transparent taskbar tool. It supports taskbar transparency, taskbar beautification, and multiple styles to beautify the taskbar interface, making your computer interface more beautiful. Xiaozhi Eye Protector Eye Baby (click to download now) Xiaozhi Eye Protection
 What should I do if the Win7 taskbar does not display the icon? How to solve the problem of the computer taskbar icon disappearing
Jun 09, 2024 pm 01:49 PM
What should I do if the Win7 taskbar does not display the icon? How to solve the problem of the computer taskbar icon disappearing
Jun 09, 2024 pm 01:49 PM
Recently, many users using Win7 system have found that the icons in the taskbar suddenly disappeared, which makes the operation very inconvenient and they do not know how to solve the problem. This article will introduce to you how to solve the problem of disappearing taskbar icons in Win7 system. Bar! Cause Analysis When encountering such a situation, there are generally two situations: one is that the taskbar on the computer does not really disappear, but is just hidden, and the other is that the taskbar does disappear. Method 1: 1. There is a situation that you need to confirm first, that is, when the mouse is placed at the bottom of the screen, the taskbar will be displayed. You can directly click the mouse on the taskbar and select "Properties". 2. In the dialog box that opens, click & on the "Hide taskbar" option.
 How to solve the problem that the win11 taskbar does not respond when clicked/cannot be used
May 09, 2024 pm 06:43 PM
How to solve the problem that the win11 taskbar does not respond when clicked/cannot be used
May 09, 2024 pm 06:43 PM
After upgrading to Windows 11 system, many users encountered the problem that the taskbar cannot be clicked, which has a great impact on life and work. So how to solve it specifically? Let’s take a look below! Method 1 1. First, we press the Ctrl+Shift+Esc shortcut keys on the keyboard to open the Task Manager. 2. Then click File in the upper left corner and select Run New Task. 3. After opening it, enter control and press Enter to enter the control panel. 4. Find the time and area and choose to change the date and time. 5. Change the time to September 4 or later, turn off automatic time synchronization after the setting is completed, and then restart the computer. 6. After restarting, re-enter the time settings and come to the internet time selection.
 How to reduce the height of the taskbar in win11? Tutorial on resizing the taskbar in Windows 11
Feb 29, 2024 pm 12:37 PM
How to reduce the height of the taskbar in win11? Tutorial on resizing the taskbar in Windows 11
Feb 29, 2024 pm 12:37 PM
When we use win11, we will find that the height of the taskbar is a bit high, which feels a bit unsightly to some users. So how to reduce the height of the win11 taskbar? Users can directly click the Registry Editor under the Start menu, and then find the Advanced folder to operate. Let this site carefully introduce to users how to adjust the taskbar size in Windows 11. How to resize the taskbar in Windows 11 First, we need to open the Registry Editor. You can open the registry editor by clicking the Start menu and entering "regedit" in the search box, or by pressing the Win+R key combination to open the Run function and entering "regedit".
 How to set the Win11 taskbar to be fully transparent? Detailed guide to setting up 100% transparency for the Win11 taskbar
May 09, 2024 pm 01:22 PM
How to set the Win11 taskbar to be fully transparent? Detailed guide to setting up 100% transparency for the Win11 taskbar
May 09, 2024 pm 01:22 PM
Windows 11 is the latest operating system launched by Microsoft. It adopts a new interface design and interaction method. Many users will habitually set the taskbar to be fully transparent. So how should they do it? Let’s take a look below! Basic settings 1. Right-click a blank space on the taskbar and select "Taskbar Settings". 2. In the "Personalization" tab, find the "Theme" option. 3. Scroll to the bottom and find the "Transparency" option. 4. Adjust the "Transparency" slider to the far right to set the taskbar to be fully transparent. The third-party tool Xiaozhi Eye Protection is an efficient eye protection software that effectively filters screen blue light. Compared with Eye Protection Wizard and Eye Protection Guardian, we provide a variety of eye protection color adjustments to meet the needs of color-sensitive groups at all times of the day. Eye protection requirements
 How to improve computer startup speed by modifying Windows 10 registry
Apr 19, 2024 am 08:01 AM
How to improve computer startup speed by modifying Windows 10 registry
Apr 19, 2024 am 08:01 AM
In the process of using the Windows 10 operating system, many users find that it takes a long time to start up their computers, which affects the user experience. In order to optimize the boot speed, some people have suggested that the purpose can be achieved by modifying the system registry. In response to this demand, this article will provide an in-depth analysis of how to effectively improve computer startup speed by properly adjusting Windows 10 registry settings. Let’s take a look below. Operation method 1. Use the "win+R" shortcut key to start running, enter "regedit", and click "OK" to open. 2. After entering the Registry Editor, click "HKEY_CURRENT_USERSoftwareMicrosoftWindowsCurren" in the left column