
 Common Problem
How to solve the problem of location services being grayed out in Windows 10/11?
Common Problem
How to solve the problem of location services being grayed out in Windows 10/11?
How to solve the problem of location services being grayed out in Windows 10/11?
Apr 26, 2023 pm 03:49 PM
Location services are an important feature for some applications on Windows, depending on the location of the system. So if you see the Location Services option grayed out on your system, you can't even toggle it manually. Usually, some system glitch causes this issue and you can easily fix it by following these simple solutions.
Fix 1 – Adjust the Registry
You can adjust the registry to fix this greyed out Location Services issue .
1. Press the Win key and type "Registry".
2. Then, click "Registry Editor" to open the Registry Editor on the system.

#3. You will delete a specific registry subdirectory. Usually, it won't affect your system at all. However, it is recommended that you perform a system backup.
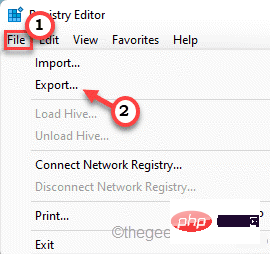
one. After opening the Registry Editor, click on "File" and click on the "Export" option to back up the registry.
3. After taking the backup, go this way -
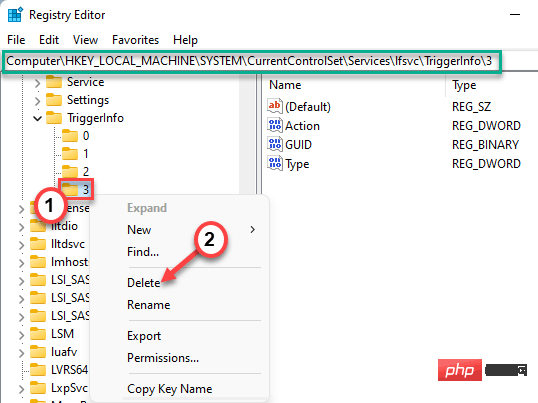
HKEY_LOCAL_MACHINE\SYSTEM\CurrentControlSet\Services\lfsvc\TriggerInfo
4. Now, in the left pane, right-click " 3" folder and click "Delete" to delete the folder.
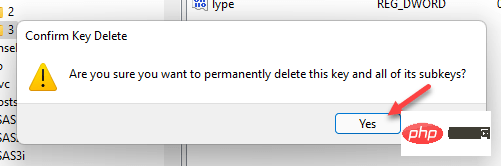
5. You will see a warning prompt. Click "is" to delete it from the system.
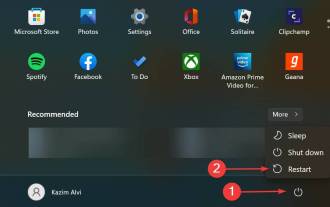
Afterwards, close this window and restart the system. After restarting, open the settings page and test if you can check if location services can be toggled.
Fix 2 – Using Group Policy
[Available for WINDOWS PRO and ENTERPRISE]
You can use local Group Policy settings to enable location services.
1. You must press the Win key and R key at the same time.
2. Write this and click " OK ".
gpedit.msc

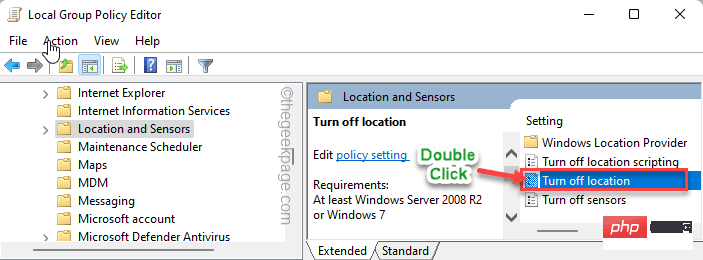
3. Once you open the utility page, proceed this way -
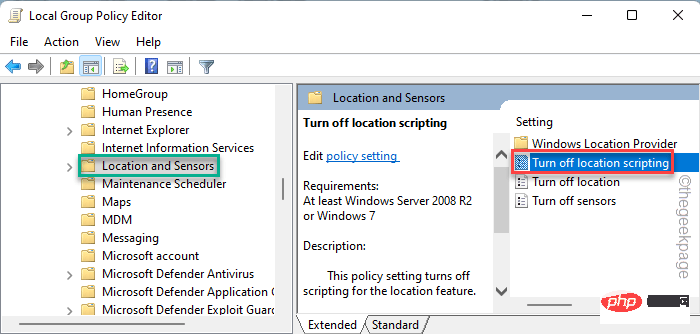
計算機配置 > 管理模板 > Windows 組件 > 位置和傳感器
4 . On the right side you will find three policy settings.
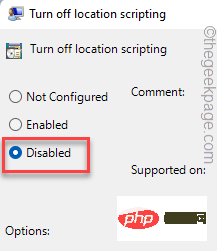
5. You must disable all of them. Therefore, just double-click the "Turn off location scripting" policy setting to access it.
6. Then, click the Disabled policy to disable the policy on the system.
7. Afterwards, click "Apply" and "OK" to save this modification.
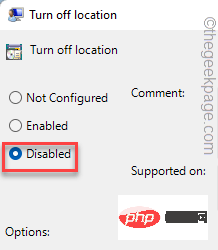
#8. With this, you must also disable the other two policies. Therefore, double-click the "Close Position" policy to edit it.
9. Set this policy to "Disable" just like the other policies.
10. Then, click "Apply" and "OK" again.
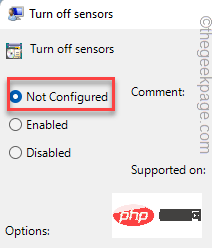
11. Finally, double-click the "Turn off the sensor" policy.

12. Next, select the “Not Configured” option.
13. Then, click "Apply" and "OK" to save the changes.
Close the Local Group Policy Editor page. Now you only reboot your machine once.
Afterwards, after rebooting, you can toggle and check if you can turn the location on or off.
Fix 3 – Automate geolocation services
You must automate geolocation services.
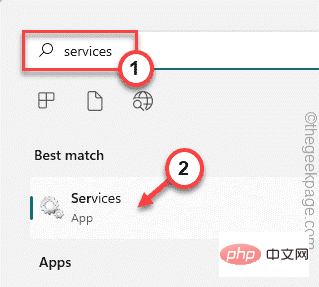
1. Simply press the Windows key and enter "Services".
2. Then, click on "Service" to access it.
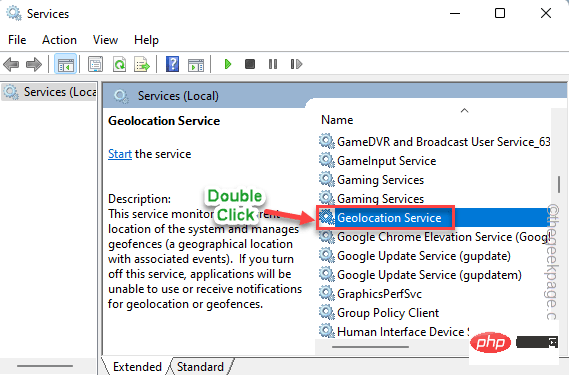
3. On the Services Utilities page, look for "Geolocation Service".
4. Then, double-click the service to access it.
#5. Next, set the "Service Status:" to "Automatic" from the drop-down menu.
6. If you find that the service has "stopped", you can just click "Start" to start it.
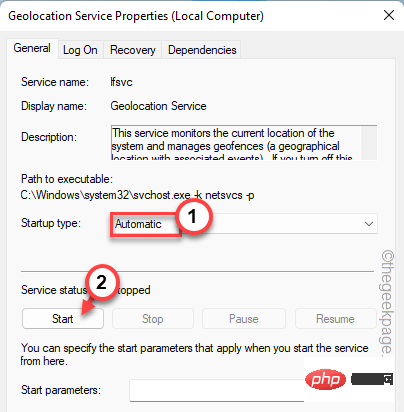
7. After that, click "Apply" and "OK" to save the changes.

After that, close the service page. Then, try enabling location services again.
The above is the detailed content of How to solve the problem of location services being grayed out in Windows 10/11?. For more information, please follow other related articles on the PHP Chinese website!

Hot AI Tools

Undress AI Tool
Undress images for free

Undresser.AI Undress
AI-powered app for creating realistic nude photos

AI Clothes Remover
Online AI tool for removing clothes from photos.

Clothoff.io
AI clothes remover

Video Face Swap
Swap faces in any video effortlessly with our completely free AI face swap tool!

Hot Article
Hot Tools

Notepad++7.3.1
Easy-to-use and free code editor

SublimeText3 Chinese version
Chinese version, very easy to use

Zend Studio 13.0.1
Powerful PHP integrated development environment

Dreamweaver CS6
Visual web development tools

SublimeText3 Mac version
God-level code editing software (SublimeText3)
Hot Topics


 How to disable driver signature enforcement in Windows 11
May 20, 2023 pm 02:17 PM
How to disable driver signature enforcement in Windows 11
May 20, 2023 pm 02:17 PM
Microsoft has built several security features into Windows to ensure your PC remains secure. One of them is driver signature enforcement in Windows 11. When this feature is enabled, it ensures that only drivers digitally signed by Microsoft can be installed on the system. This helps most of the users to a great extent as it protects them. But there is a downside to enabling driver signature enforcement. Suppose you find a driver that works for your device, but it is not signed by Microsoft, although it is completely safe. But you won't be able to install it. Therefore, you must know how to disable driver signing in Windows 11
 Fix: WD My Cloud doesn't show up on the network in Windows 11
Oct 02, 2023 pm 11:21 PM
Fix: WD My Cloud doesn't show up on the network in Windows 11
Oct 02, 2023 pm 11:21 PM
If WDMyCloud is not showing up on the network in Windows 11, this can be a big problem, especially if you store backups or other important files in it. This can be a big problem for users who frequently need to access network storage, so in today's guide, we'll show you how to fix this problem permanently. Why doesn't WDMyCloud show up on Windows 11 network? Your MyCloud device, network adapter, or internet connection is not configured correctly. The SMB function is not installed on the computer. A temporary glitch in Winsock can sometimes cause this problem. What should I do if my cloud doesn't show up on the network? Before we start fixing the problem, you can perform some preliminary checks:
 How to Fix Error Code 1132 in Zoom on Windows PC
May 30, 2023 am 11:08 AM
How to Fix Error Code 1132 in Zoom on Windows PC
May 30, 2023 am 11:08 AM
Zoom's video conferencing capabilities have made it popular among users while working from home. Many Zoom desktop client users have reported seeing error code 1132 along with an “Unknown error has occurred” message on their Windows PCs. Usually, this error code pops up when users try to log into their account and join any meeting in Zoom. In the error window, the user has the option to open a browser and join the meeting. However, some users reported that they were unable to open the meeting even on the browser. Windows firewall settings, outdated Zoom installation, or Zoom blacklisting your account could be some of the possible reasons for this error. Are you encountering an error code while using the Zoom app
 How to disable display scaling for high DPI settings in Windows 11 or 10
May 22, 2023 pm 10:11 PM
How to disable display scaling for high DPI settings in Windows 11 or 10
May 22, 2023 pm 10:11 PM
The default display scaling feature on Windows 10 or later is a core component of the Windows operating system. But sometimes, this feature of certain apps can cause compatibility issues, unreadable text, blurry logos, and ultimately, app crashes. This can be a huge headache if you're dealing with 2160p or higher resolutions. There are many ways to disable the default display scaling feature on high DPI settings. We've selected the best ones and detailed step-by-step instructions for each process. How to Disable Display Scaling on High DPI Settings There is a way, all you have to do is disable high DPI scaling for a single application, and there is a way to do it for the entire Window
 Fix: Windows Driver Foundation missing error
Jun 02, 2023 pm 09:15 PM
Fix: Windows Driver Foundation missing error
Jun 02, 2023 pm 09:15 PM
It's really frustrating when your Windows PC lags or runs slowly while playing games or performing resource-intensive tasks. Your PC may have all the processing power to handle these tasks, but if certain drivers fail to load, then your PC will experience multiple issues. One such error is WindowsDriverFoundation missing issue. When this error pops up, you should know that some important system-related drivers fail to load on your Windows PC. Since drivers are one of the most important components that allow the hardware to communicate with your PC, any issues with the drivers can cause the hardware process to malfunction. Several users reported that Window
 0x80070246 Windows Update Error: 6 Fixes
May 20, 2023 pm 06:28 PM
0x80070246 Windows Update Error: 6 Fixes
May 20, 2023 pm 06:28 PM
According to several Windows 10 and Windows 11 users, they encountered error 0x80070246 while trying to install Windows updates. This error prevents them from upgrading their PC and enjoying the latest features. Thankfully, in this guide, we have listed some of the best solutions to help you fix Windows update installation error 80070246x11 on Windows0PC. We'll also discuss what might be causing the problem in the first place. Let's jump right into it. Why am I getting Windows Update installation error 0x80070246? There may be multiple reasons why you are receiving Windows 11 installation error 0x80070246 on your PC.
 Tiny10 makes Windows 10 durable on (very old) PCs
May 22, 2023 pm 04:02 PM
Tiny10 makes Windows 10 durable on (very old) PCs
May 22, 2023 pm 04:02 PM
Tiny10 is one developer's attempt to make Microsoft's Windows 10 operating system usable on both older PC systems and modern systems. When Microsoft released Windows 10 in 2015, it ensured that the operating system had the same system requirements as previous versions of Windows. That changes with the release of Windows 11 in 2021. Still, Windows 10 felt noticeably heavier than previous Windows versions, and users began looking for ways to improve the usability of the operating system. Faster hard drive, more memory, faster and more powerful CP
![Event ID 157: Disk has been removed unexpectedly [Fixed]](https://img.php.cn/upload/article/000/887/227/168576249277516.jpg?x-oss-process=image/resize,m_fill,h_207,w_330) Event ID 157: Disk has been removed unexpectedly [Fixed]
Jun 03, 2023 am 11:21 AM
Event ID 157: Disk has been removed unexpectedly [Fixed]
Jun 03, 2023 am 11:21 AM
Disk has been accidentally deleted is an error in the system event log on Windows devices. This is an unusual issue on the virtual disk that all XBOX Live PC and Microsoft PC installations rely on. Typically, this problem occurs when something disrupts the system's communication with the disk. Event ID157 in Event Viewer The disk has been accidentally deleted, preventing the user from installing the game using the specified virtual drive. This virtual drive will not be visible in File Explorer like other drives. You may also encounter VMWare issues where the disk has been accidentally deleted. The solution below will fix the problem, but you must make changes directly in VMWare's emulated operating system. Depend on