


How long can you set a timer on your iPhone camera?
When you access the timer options in the iPhone's Camera app, you'll be given the option to choose between two modes: 3 seconds (3s) and 10 seconds (10s). The first option lets you take a quick selfie from the front or rear camera while you're holding your iPhone. The second option is useful in scenes where you can mount your iPhone on a tripod from a distance to click group photos or selfies.
How to Set a Timer on an iPhone Camera
While setting a timer on an iPhone camera is a fairly simple process, the exact steps vary depending on the iPhone model you are using.
Case 1: On iPhone XS/XR and newer models
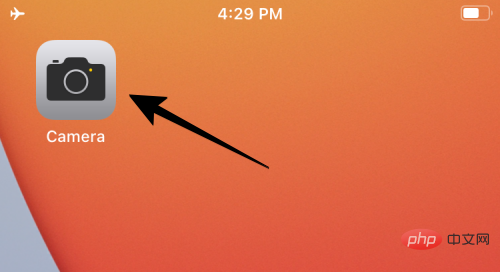
If you have an iPhone XS/XR or newer model, you can find " Timer" option. To set a timer on these iPhones, open the Camera app on iOS.
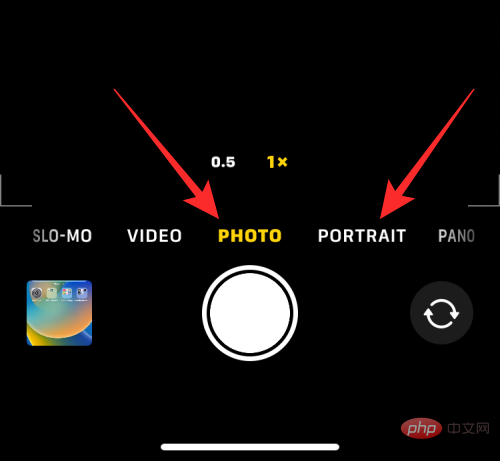
#When the camera is on, make sure you are in Photo or Portrait mode by tapping on those modes at the bottom. By default, the Camera app opens in Photo Mode, but it may be different if you keep the Camera app's settings.
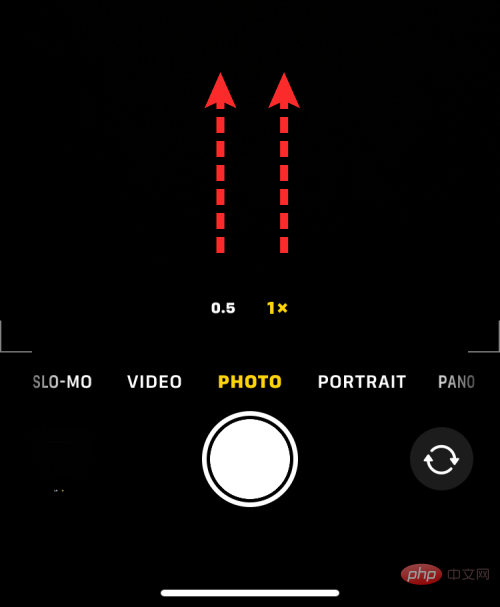
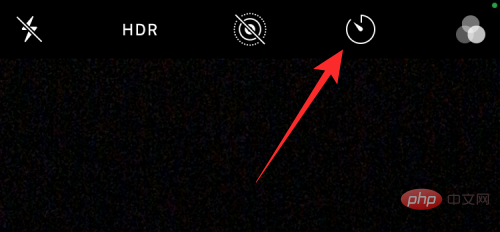
When you are in photo or portrait mode, tap the up arrow at the top of the screen to open additional options.

These options can also be accessed by sliding the viewfinder upward within any of these modes.
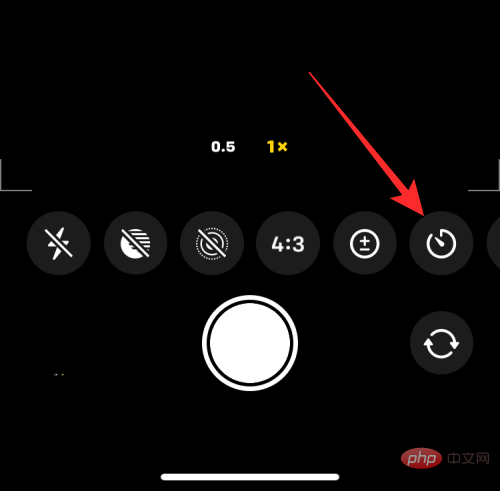
In the options that appear at the bottom, click on the Timer icon (the icon marked with a bell symbol).
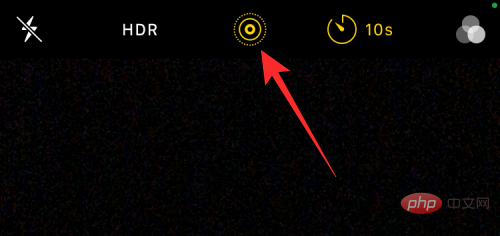
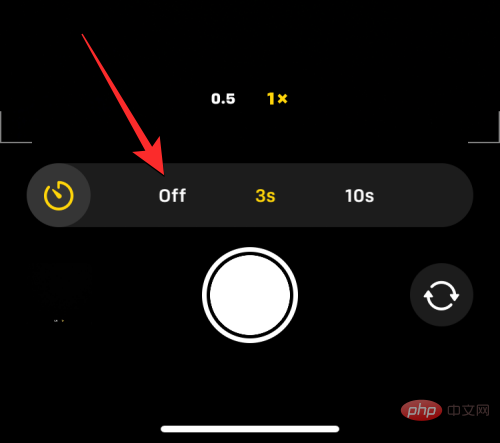
#When you click on the Time icon, you will see new options appear at the bottom. From here, select 3 seconds or 10 seconds to set the timer, depending on how fast you want to shoot.

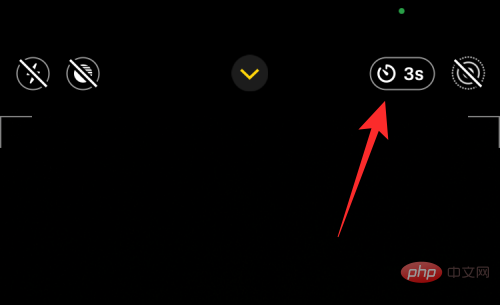
The selected timer option will be displayed in the upper right corner to help you ensure you choose correctly.
#After setting the timer, you can point yourself towards the camera. If this is a group selfie, you may want to place your iPhone against a wall or mount it on a tripod.
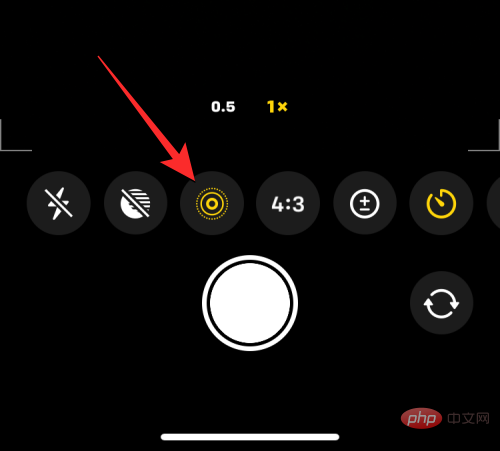
NOTE: You can disable Live Photos mode on your iPhone by tapping the Live Photos icon (the icon marked with concentric circles) if It is highlighted in yellow) to take multiple photos in time-lapse mode. This icon will be in the top right corner or at the bottom of the hidden menu where you can access the Timer option.
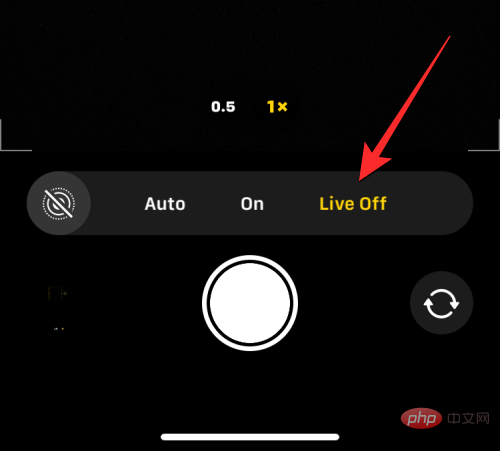
If Live Photo appears as enabled in the hidden camera menu, select Live Off after tapping the Live Photo icon.
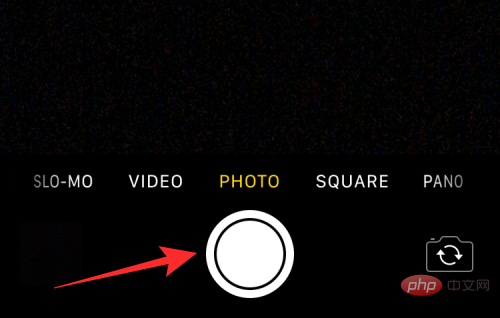
When you are ready to shoot, click the shutter button at the bottom.
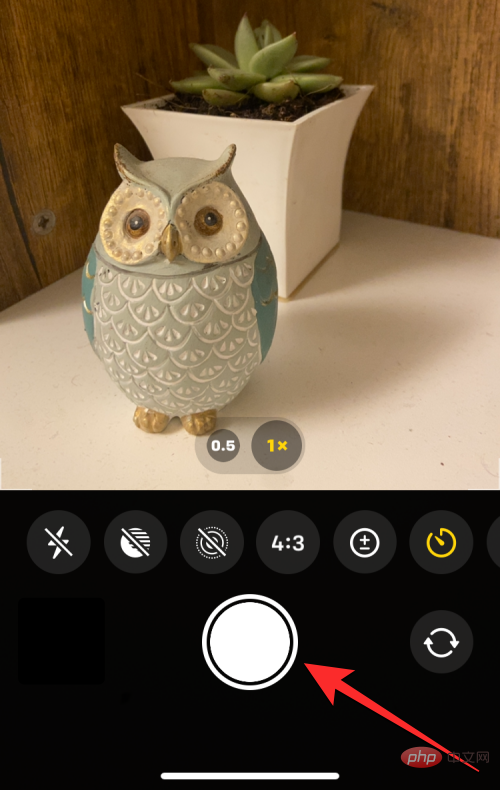
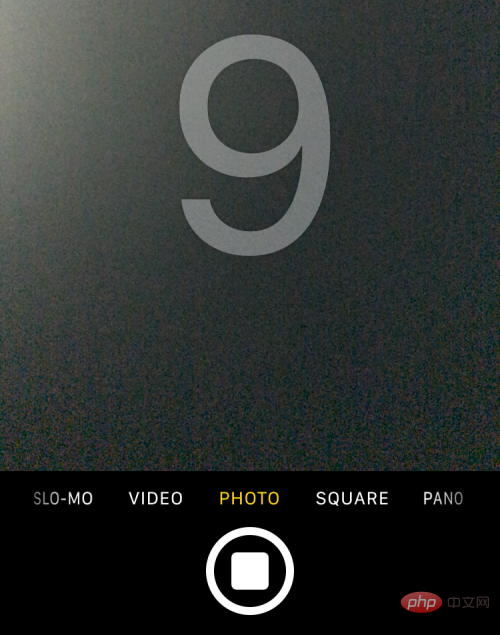
#You will now see a countdown appear in the lower right corner of the screen. If you take a photo from the main (rear) camera, your iPhone's flash will also flash to tell you the count so you can be ready to pose at the right time.
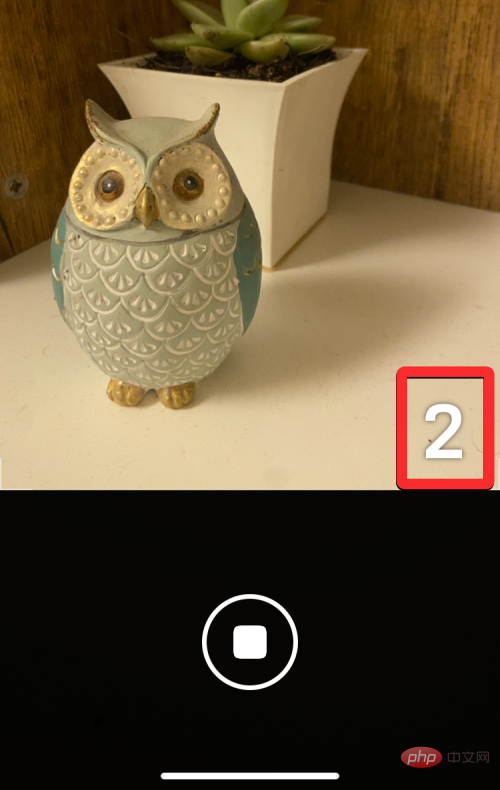
#When the countdown ends, your iPhone will snap one or more pictures, depending on whether you enabled Live Photos for the picture.
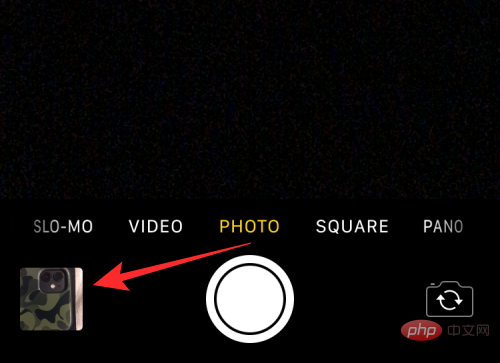
When capturing a time-lapse shot, you will see its thumbnail appear in the lower left corner. To see the photo you took, you can click on this Thumbnail to see how the photo was taken.
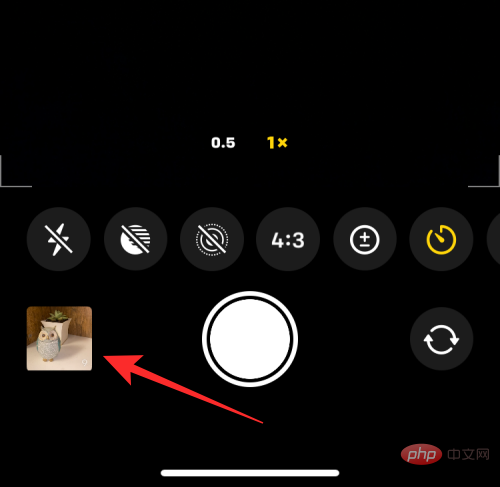
#You can repeat these steps to take more time-lapse photos on iPhone.
Case 2: On iPhone X and older models
The above method works on modern iPhones. If you have an iPhone X, iPhone 8, or earlier, you can easily access the timer option on the iOS Camera. To take a time-lapse photo on iPhone X or earlier, open the Camera app on iOS.
When the camera opens, tap the Photos tab at the bottom to capture a time-lapse shot. Timer options are not accessible in other camera modes.
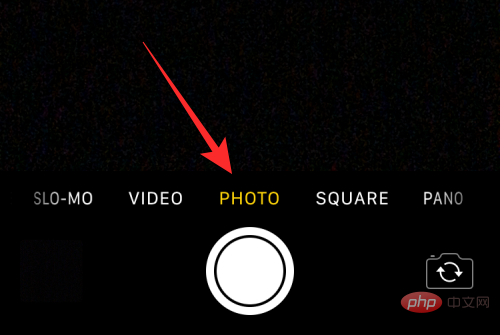
In Photo or Portrait mode, tap the timer icon (the one marked with a bell) at the top of the screen.
#When you do this, you'll see additional options at the top to set the timer. Here, select 3 seconds or 10 seconds depending on how long you want to wait for iPhone to take the photo.

#The timer you set will appear in the upper right corner letting you know the time you selected.

#After setting the timer, you can point yourself towards the camera. If this is a group selfie, you may want to place your iPhone against a wall or mount it on a tripod.
NOTE: You can disable it by clicking on the Live Photos icon (the icon marked with concentric circles) at the top Live Photo mode on iPhone (if it's highlighted in yellow to take multiple photos in time-lapse mode).
When you are ready to shoot, click the shutter button at the bottom.
You will now see a countdown appear in the center of the screen. If you take a photo from the main (rear) camera, your iPhone's flash will also flash to tell you the count so you can be ready to pose at the right time.
When the countdown ends, your iPhone will snap one or more pictures, depending on whether you enabled Live Photos for the picture.
When capturing a time-lapse shot, you will see its thumbnail appear in the lower left corner. To see the photo you took, you can click on this Thumbnail to see how the photo was taken.
You can repeat these steps to take more time-lapse photos on iPhone.
How many photos can be saved during timed shooting?
Ideally, when you take a photo on your iPhone, the camera app takes a series of photos in burst mode the moment you press the shutter button. When using time-lapse shooting, the number of photos taken by the iPhone camera will depend on whether Live Photos is enabled.
Live Photo is a feature in the Camera app that lets your iPhone capture the moment before and after you press the shutter button, so you can choose the best moment from a series of photos or videos you've captured. While Live Photo captures video with audio during regular shooting, time-lapse shooting in Live Photo mode works differently.
- When you turn on Live Photos during a time-lapse shot, your iPhone will only take a single photo.
- When you turn off Live Photos during a timed shooting session, your iPhone will take 10 photos in burst mode.
Thumbnail in the lower left corner of the Camera app or by opening your iPhone on the Photos app to access them.

To stop the counter midway through a time-lapse shot, tap the Stop button at the bottom. This button will appear instead of the Shutter button in the Camera app.
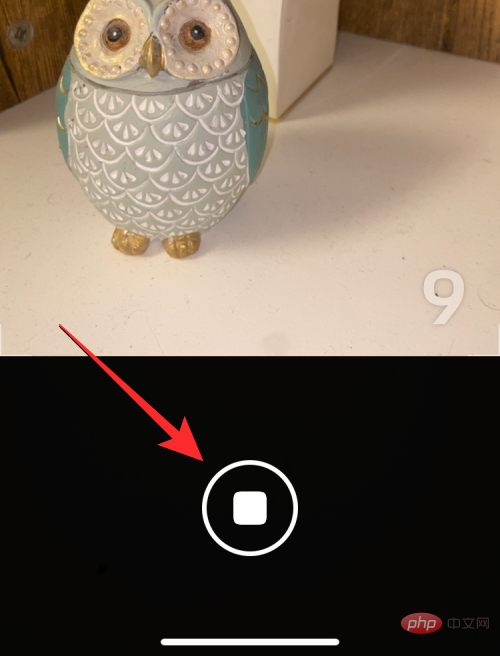
#When you stop time-lapse shooting midway, the screen will return to the state before you pressed the shutter button. You can resize the frame, change the scene, and tap the shutter button again to restart the countdown.
How to turn off the timer for your iOS camera
When you set a timer for taking photos in the Camera app, the Camera app retains this setting for the next time Use when you want to capture something on your iPhone. This means that if you previously enabled a timer, the selected timer will be reactivated by default whenever you open the camera app again to click another photo. To avoid waiting for a timed countdown, you need to manually disable the timer on your iPhone so that subsequent clicks are regular photos captured when you click the shutter button.
On iPhone XS/XR and newer models
To turn off the timer on these iPhones, open the Camera app and tap the # that says the previously set time ##Timer options (indicated by a clock symbol with either 3 seconds or 10 seconds).
Close.
(indicated by a clock symbol with either 3 seconds or 10 seconds).
From the options that appear at the top, select Off
.
#The previously configured timer will now be disabled and any photo you click now will be captured when you click the shutter button.
What modes and timers can you use on the camera app?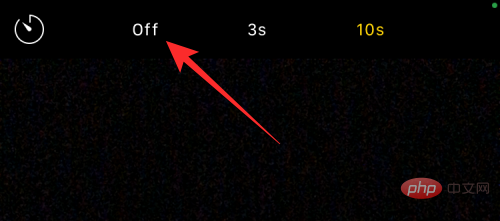 You can take time-lapse photos on iPhone only if you take a still photo of the moment in the iOS Camera app.
or
portrait modewithin the app. You can select these modes by tapping the corresponding mode tab at the bottom or by swiping left or right on the camera viewfinder.
When you take a panorama photo, you cannot use the timer option, which requires you to manually move your iPhone left and right to take longer photos. This also applies to capturing video, as the timer option is not available when you are in video, time-lapse or slow motion mode in the camera app. Since you can cut out unnecessary parts from the video after it is captured, there is no point in adding a timer to capture the video as you can always edit them to remove the beginning part. The timer option works when taking a photo from any camera on your iPhone, regardless of its location. This means you can capture time-lapse shots from the front (selfie) camera, main (wide-angle) lens, ultra-wide-angle lens, and telephoto lens.
Why and when should you use a timer on your camera?
Time-lapse photography comes in handy when you plan to capture a moment, not when the moment is right in front of you. The best time to use the timer option is during
Group Selfie. Since you don't need to shoot at the right time, setting a timer will allow others in the frame to be ready to shoot when the countdown reaches zero. You can even use your iPhone's main camera (the camera on the back) to take higher-quality photos than your average selfie.
Using time-lapse group selfies allows you, the photographer, to be prepared and in the frame of the group selfie. You can also prevent camera shake or blurring that can occur when manually clicking these pictures, since you no longer need to press the volume down or shutter button. Since Time Lapse without Live Photo captures a burst, you can choose the best moment from up to 10 pictures.
You can also use the timer option to take more beautiful selfies from the front and rear cameras. Since you no longer need to manually press the shutter button to click photos, you can point the camera at you or place it on a stable surface to click selfies and pose at the right time.
Other scenarios that may benefit from time-lapse photography are when you want to take long exposure photos or macro photos. In both cases, your iPhone needs to be very stable and focused on the subject at hand. Using the timer option in this situation can help eliminate the blur that can occur when taking pictures using the volume down or shutter button.
I can’t find the timer option on my iOS camera. Why?
When you take a photo in Photo or Portrait mode on your iPhone camera, the timer option appears. The feature is available on iPhone 5 or later running iOS 8 or later. If you can't find this option, that's because:
- The timer option is hidden in the camera app. On iPhone XR/XS or newer, you'll need to tap the up arrow or swipe up on the viewfinder to make the timer option visible.
- Time-lapse shooting cannot be used when taking panoramic photos in Pano mode.
- You cannot use the timer option when shooting video on any of the following modes (video, time-lapse, or slow motion).
- You can't take time-lapse photos on iPhone 4 or older.
- Your iPhone has not or cannot be updated to iOS 8 or later.
To take a time photo on a supported iPhone, make sure you're in Photo or Portrait mode, swipe up on the viewfinder to access the timer options, and set it to your preferred duration.
The above is the detailed content of How to set a timer on your iPhone camera. For more information, please follow other related articles on the PHP Chinese website!

Hot AI Tools

Undress AI Tool
Undress images for free

Undresser.AI Undress
AI-powered app for creating realistic nude photos

AI Clothes Remover
Online AI tool for removing clothes from photos.

Clothoff.io
AI clothes remover

Video Face Swap
Swap faces in any video effortlessly with our completely free AI face swap tool!

Hot Article
Hot Tools

Notepad++7.3.1
Easy-to-use and free code editor

SublimeText3 Chinese version
Chinese version, very easy to use

Zend Studio 13.0.1
Powerful PHP integrated development environment

Dreamweaver CS6
Visual web development tools

SublimeText3 Mac version
God-level code editing software (SublimeText3)
Hot Topics


 Huobi app download huobi latest official website address
Jun 24, 2025 pm 06:30 PM
Huobi app download huobi latest official website address
Jun 24, 2025 pm 06:30 PM
Huobi App download requires selecting the corresponding method according to the operating system. iOS users should use overseas Apple ID to log in to the App Store to search and install, while Android users download the APK file through the official website and allow the installation of applications from unknown sources. To ensure security, you must master the methods of identifying the authenticity of the official website: check the official website, check the HTTPS security certificate, follow the official announcement channels, avoid clicking on unknown links, and confirm the source of the verification code. In addition, when using the App, you should pay attention to setting a strong password and enabling two-factor verification, regularly update the version, understand transaction risks, beware of fraud, backup mnemonics and private keys, and contact the official customer service if you encounter problems.
 Download the Binance App Ultimate Tutorial on Apple Mobile (iOS)
Jun 18, 2025 pm 08:06 PM
Download the Binance App Ultimate Tutorial on Apple Mobile (iOS)
Jun 18, 2025 pm 08:06 PM
Binance App Download Tutorial: Install it on iOS devices through TestFlight and other methods to ensure safe transactions.
 OEX official website entrance ios directly enter OEX platform official website Apple login portal
Jul 03, 2025 pm 02:06 PM
OEX official website entrance ios directly enter OEX platform official website Apple login portal
Jul 03, 2025 pm 02:06 PM
The OEX platform is a highly-watched digital asset trading platform, providing users with a safe, convenient and efficient trading experience. Here, you can conveniently buy, sell and trade various mainstream digital currencies such as Bitcoin and Ethereum, and enjoy the rich financial derivative services provided by the platform.
 Download the latest version of Bi'an Exchange. Download tutorial of Bi'an Exchange.
Jun 24, 2025 pm 06:57 PM
Download the latest version of Bi'an Exchange. Download tutorial of Bi'an Exchange.
Jun 24, 2025 pm 06:57 PM
To download the latest version of Bian Exchange, you need to obtain the TestFlight invitation link through the official website, download the TestFlight application, install the Bian App through the link, trust the developer certificate, and finally start using it; the specific steps are: 1. Visit the Bian official website to obtain the TestFlight invitation link; 2. Download and install the TestFlight application on Apple devices; 3. Open the TestFlight click the invitation link or scan the QR code to install it; 4. Enter the settings to trust the Bian developer certificate; 5. After completing the above steps, you can start using the Bian Exchange for digital asset trading.
 Download the latest version of Yiou Exchange, download tutorial of Yiou Exchange, Apple
Jun 24, 2025 pm 06:48 PM
Download the latest version of Yiou Exchange, download tutorial of Yiou Exchange, Apple
Jun 24, 2025 pm 06:48 PM
The latest version of Yiou Exchange (OKX) can be downloaded through the official website, app store and invitation links. Apple device users can complete the installation according to the steps. 1. Official website download: Visit OKX official website and select the corresponding system version to download; 2. App store download: Android users can search and download on Google Play, iOS users need to switch to the Apple ID area to the allowed area to be listed; 3. Invite link download: jump to download through the link shared by others or QR code. The steps for downloading Apple device users include: registering an overseas Apple ID, switching the App Store area, searching and downloading OKX, logging in to your account after installation and completing security settings, and be sure to ensure that the application source is reliable and complying with it.
 How to download the iOS version of Ethereum App? Instructions for use of Ethereum official website app
Jul 04, 2025 am 11:48 AM
How to download the iOS version of Ethereum App? Instructions for use of Ethereum official website app
Jul 04, 2025 am 11:48 AM
The official Ethereum app does not exist, iOS users can manage ETH through cryptocurrency wallets or exchange apps. Recommended mainstream apps include: 1. Binance, powerful and integrated Web3 wallet, suitable for trading and DeFi; 2. OkX, with smooth experience and Web3 integration, supporting DeFi and NFT; 3. MetaMask, as the core non-custodial wallet, is a necessary tool for connecting DeFi and NFT platforms; 4. Huobi (HTX), provides rich trading pairs and financial derivatives, suitable for old users; 5. Trust Wallet, simple interface, suitable for new non-custodial wallets; 6. Gate.io, suitable for exploring emerging currencies
 How to create a contact group on iPhone
Jul 13, 2025 am 01:17 AM
How to create a contact group on iPhone
Jul 13, 2025 am 01:17 AM
iPhone does not support creating contact groups directly in the address book application, but similar functions can be achieved through the following methods: 1. Use the "Group" function in the address book application, click "Edit" > "Add Group" to create a custom group; 2. Add each contact to the corresponding group by editing it; 3. If you need to send a group message, you can create a new multi-person conversation in the information application; 4. Use iCloud or Gmail to synchronize tagged groups to facilitate the management of a large number of contacts on the computer. These methods are used in conjunction with efficient management of contact groups.
 How to check if an iPhone is unlocked
Jul 15, 2025 am 01:17 AM
How to check if an iPhone is unlocked
Jul 15, 2025 am 01:17 AM
TocheckifaniPhoneisunlocked,1)gotoSettings>Cellular>CellularDataOptionsandlookforlabelslike“Unlocked”or“NoSIMrestrictions,”2)insertadifferentcarrier’sactiveSIMcardandseeifthephoneacceptsit,3)usetheIMEInumberononlinetoolslikeIMEI.infotocheckunlo