
 PHP Framework
Workerman
Let's talk about how to use Workerman to implement instant chat function
PHP Framework
Workerman
Let's talk about how to use Workerman to implement instant chat function
Let's talk about how to use Workerman to implement instant chat function
Feb 03, 2021 pm 06:26 PM
This article will introduce to you how to use workerman to implement instant chat. It has certain reference value. Friends in need can refer to it. I hope it will be helpful to everyone.

workerman Tutorial"
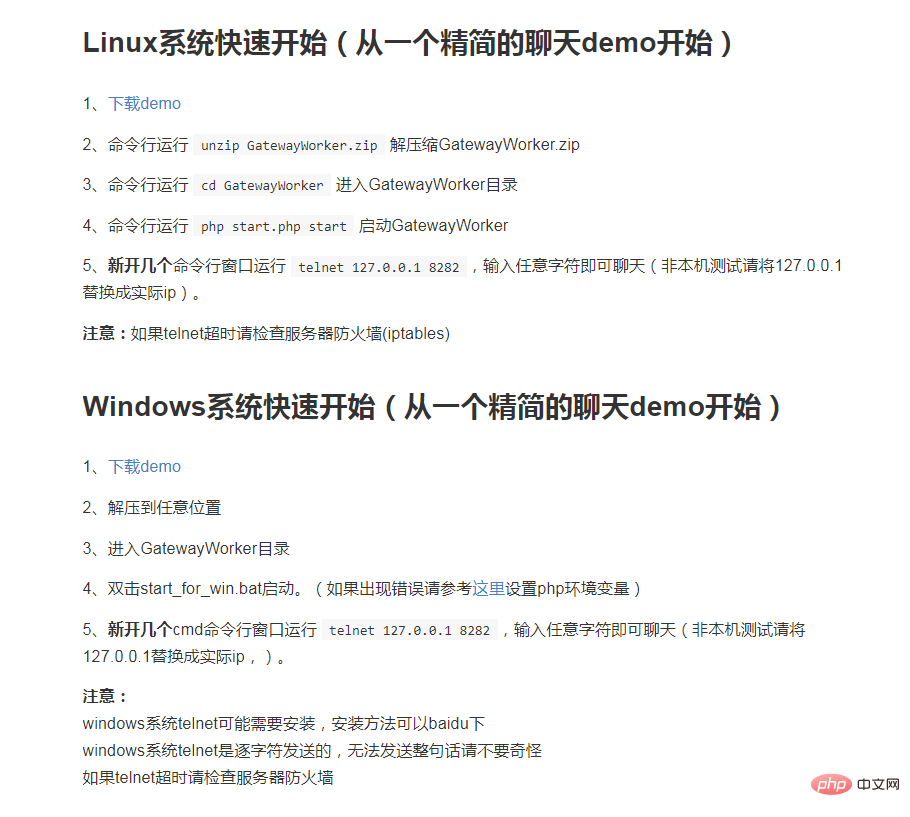
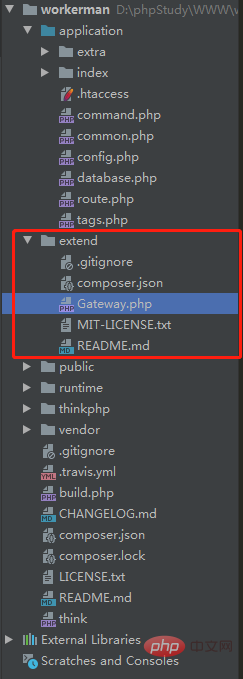
Development documentation: http://doc2.workerman.net/Download the server-side installation file:

<?php
/**
* This file is part of workerman.
*
* Licensed under The MIT License
* For full copyright and license information, please see the MIT-LICENSE.txt
* Redistributions of files must retain the above copyright notice.
*
* @author walkor<walkor@workerman.net>
* @copyright walkor<walkor@workerman.net>
* @link http://www.workerman.net/
* @license http://www.opensource.org/licenses/mit-license.php MIT License
*/
use \Workerman\Worker;
use \Workerman\WebServer;
use \GatewayWorker\Gateway;
use \GatewayWorker\BusinessWorker;
use \Workerman\Autoloader;
// 自動加載類
require_once __DIR__ . '/../../vendor/autoload.php';
// gateway 進程,這里使用Text協(xié)議,可以用telnet測試
$gateway = new Gateway("websocket://0.0.0.0:8282");
// gateway名稱,status方便查看
$gateway->name = 'YourAppGateway';
// gateway進程數(shù)
$gateway->count = 4;
// 本機ip,分布式部署時使用內(nèi)網(wǎng)ip
$gateway->lanIp = '127.0.0.1';
// 內(nèi)部通訊起始端口,假如$gateway->count=4,起始端口為4000
// 則一般會使用4000 4001 4002 4003 4個端口作為內(nèi)部通訊端口
$gateway->startPort = 2900;
// 服務(wù)注冊地址
$gateway->registerAddress = '127.0.0.1:1238';
// 心跳間隔
$gateway->pingInterval = 60;
// 心跳數(shù)據(jù)
$gateway->pingData = '{"type":"ping"}';
/*
// 當(dāng)客戶端連接上來時,設(shè)置連接的onWebSocketConnect,即在websocket握手時的回調(diào)
$gateway->onConnect = function($connection)
{
$connection->onWebSocketConnect = function($connection , $http_header)
{
// 可以在這里判斷連接來源是否合法,不合法就關(guān)掉連接
// $_SERVER['HTTP_ORIGIN']標(biāo)識來自哪個站點的頁面發(fā)起的websocket鏈接
if($_SERVER['HTTP_ORIGIN'] != 'http://kedou.workerman.net')
{
$connection->close();
}
// onWebSocketConnect 里面$_GET $_SERVER是可用的
// var_dump($_GET, $_SERVER);
};
};
*/
// 如果不是在根目錄啟動,則運行runAll方法
if(!defined('GLOBAL_START'))
{
Worker::runAll();
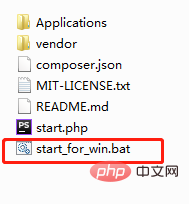
} Line 24, change the tcp protocol to websocket protocol; Lines 38 and 40, set the server direction The heartbeat time sent by the client to detect whether the client is connected. If not connected, it will be disconnected. The following content is commented out by default. You can open or modify it according to your needs. Run the start_for_win.bat file again: 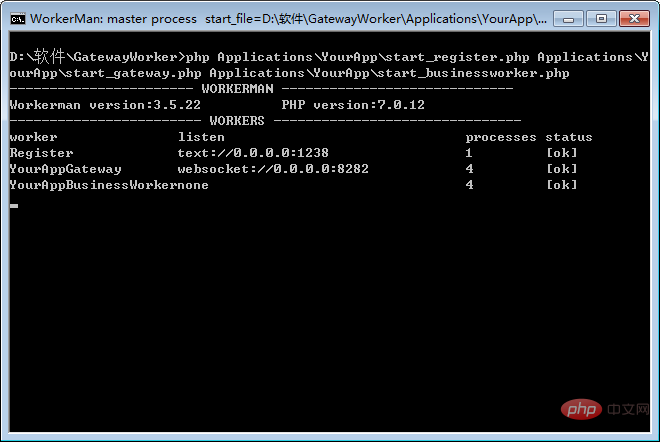
<!DOCTYPE html>
<html>
<head>
<meta charset="UTF-8">
<meta name="viewport" content="width=device-width, initial-scale=1.0">
<meta http-equiv="X-UA-Compatible" content="ie=edge">
<title></title>
</head>
<body>
<ul id="msgUl">
<li>ws://127.0.0.1:8282</li>
</ul>
<input type="" name="" id="sendValue" value="" />
<button type="button" id="sendButton">發(fā)送</button>
<div style="margin-top: 100px">
{volist name="msg" id="vo" empty="這里沒有數(shù)據(jù)" key ='s'}
<br/>
<span>{$vo.user_name}:</span>
<span>{$vo.msg}</span>
<span>{$vo.createtime}</span>
<br/>
{/volist}
</div>
<script src="http://www.zhihuapinpai.com/static/index/js/jquery-1.11.3.min.js"></script>
<script>
// var ws = new WebSocket("ws://123.56.216.232:8282");
var ws = new WebSocket("ws://127.0.0.1:8282");
ws.onopen = function() {
$('#msgUl').append('<li>已連接上...</li>')
sendValue();
};
ws.onmessage = function(evt) {
$('#msgUl').append('<li>接收到:' + evt.data + '</li>')
var obj = JSON.parse(evt.data);
if (obj.type == 'onConnect') {
// 連接成功
$('#msgUl').append('<li>client_id:' + obj.client_id + '</li>')
$.ajax({
type:"POST",
url:"/index.php/api/Index/user_bind",
data:{
client_id:obj.client_id
},
dataType: "html",
success: function(data){
console.log('成功')
}
});
} else if (obj.type == 'ping') {
// 心跳檢測 不做任何處理
} else if (obj.type == 'chatGroup') {
// 群組聊天
$('#msgUl').append('<li>接收到:' + evt.data + '</li>')
}
};
ws.onclose = function() {
// console.log('連接已關(guān)閉...');
$('#msgUl').append('<li>連接已關(guān)閉...</li>')
};
function sendValue() {
$('#sendButton').click(function() {
var thisValue = $('#sendValue').val();
if (thisValue) {
ws.send(thisValue);
$('#msgUl').append('<li>發(fā)送數(shù)據(jù):' + thisValue + '</li>')
$.get("/index.php/api/Index/send_msg/msg/"+thisValue,function (data,status) {
console.log('成功:'+thisValue)
});
}
})
}
</script>
</body>
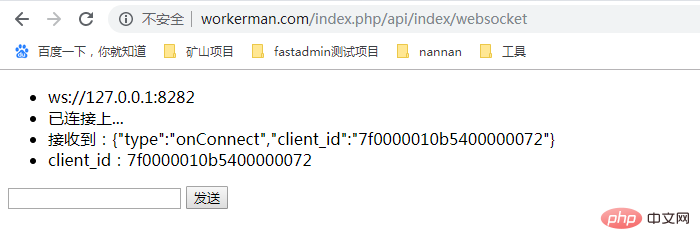
</html> Lines 42-52 pass the client_id to the background and bind it to the user in the user table. Backend code: <?php
namespace app\api\controller;
use think\Controller;
use GatewayClient\Gateway;
use think\Db;
class Index extends Controller
{
public function websocket(){
$where=[];
$user_id=1;
$where['from_id|to_id']=$user_id;
$msg=Db::name('msg')->where($where)->select();
foreach ($msg as $key=>$val){
$msg[$key]['createtime']=date('Y-m-d H:i:s',$val['createtime']);
$msg[$key]['user_name']=Db::name('user')->where(['id'=>$val['from_id']])->value('name');
}
$this->assign('msg',$msg);
return view();
}
//綁定用戶
public function user_bind($user_id=1){
//$user_id=1; //發(fā)送人用戶id
$client_id = input('post.client_id');
// $user=Db::name('user')->where(['id'=>$user_id])->find();
Gateway::bindUid($client_id, 1);
return $client_id;
}
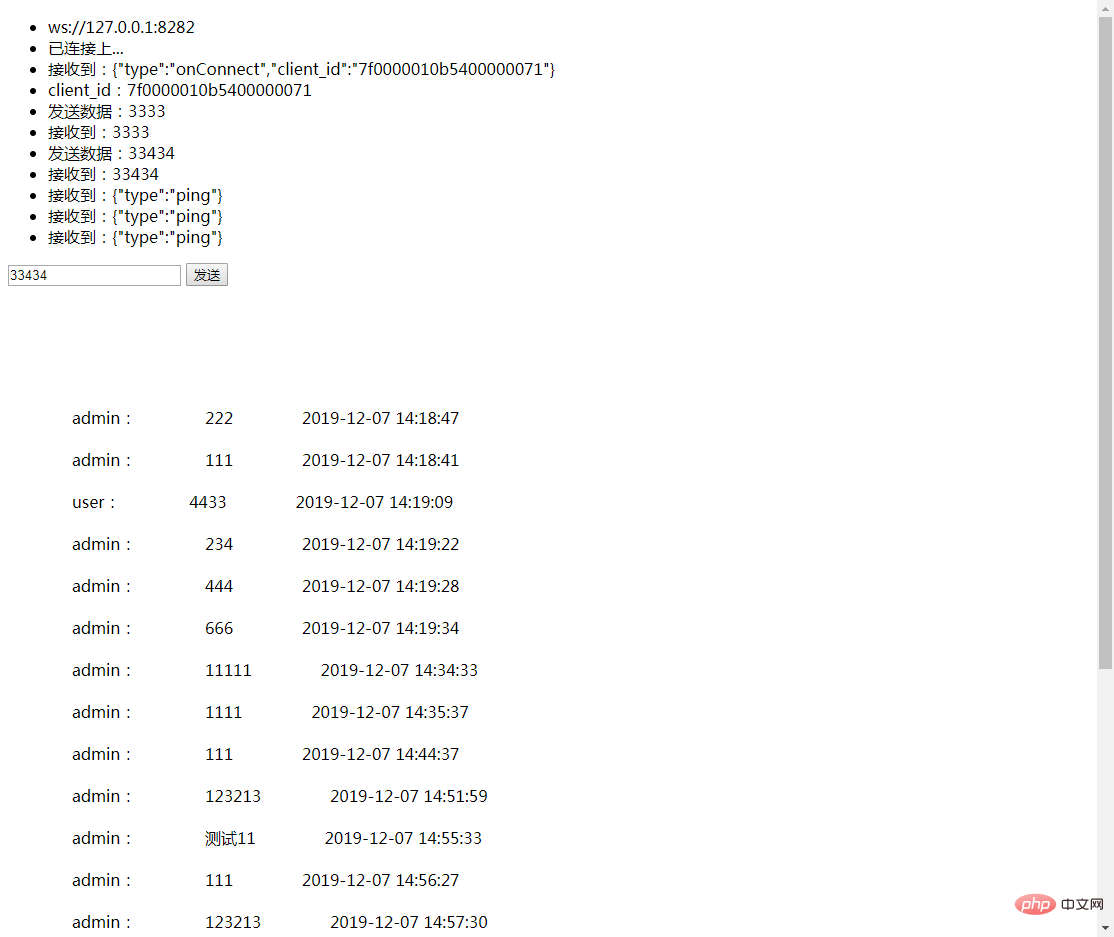
//發(fā)送信息
public function send_msg(){
$msg=input('msg');
if($msg){
$data=[
'msg'=>$msg,
'from_id'=>1,
'to_id'=>2,
'createtime'=>time()
];
Db::name('msg')->insert($data);
Gateway::sendToUid(1,$msg);
Gateway::sendToUid(2,$msg);
}
return 'success';
}
}Send the message and store it in the database, and the page will be displayed.
Programming Video! !
The above is the detailed content of Let's talk about how to use Workerman to implement instant chat function. For more information, please follow other related articles on the PHP Chinese website!

Hot AI Tools

Undress AI Tool
Undress images for free

Undresser.AI Undress
AI-powered app for creating realistic nude photos

AI Clothes Remover
Online AI tool for removing clothes from photos.

Clothoff.io
AI clothes remover

Video Face Swap
Swap faces in any video effortlessly with our completely free AI face swap tool!

Hot Article
Hot Tools

Notepad++7.3.1
Easy-to-use and free code editor

SublimeText3 Chinese version
Chinese version, very easy to use

Zend Studio 13.0.1
Powerful PHP integrated development environment

Dreamweaver CS6
Visual web development tools

SublimeText3 Mac version
God-level code editing software (SublimeText3)


 Implement file upload and download in Workerman documents
Nov 08, 2023 pm 06:02 PM
Implement file upload and download in Workerman documents
Nov 08, 2023 pm 06:02 PM
To implement file upload and download in Workerman documents, specific code examples are required. Introduction: Workerman is a high-performance PHP asynchronous network communication framework that is simple, efficient, and easy to use. In actual development, file uploading and downloading are common functional requirements. This article will introduce how to use the Workerman framework to implement file uploading and downloading, and give specific code examples. 1. File upload: File upload refers to the operation of transferring files on the local computer to the server. The following is used
 Which one is better, swoole or workerman?
Apr 09, 2024 pm 07:00 PM
Which one is better, swoole or workerman?
Apr 09, 2024 pm 07:00 PM
Swoole and Workerman are both high-performance PHP server frameworks. Known for its asynchronous processing, excellent performance, and scalability, Swoole is suitable for projects that need to handle a large number of concurrent requests and high throughput. Workerman offers the flexibility of both asynchronous and synchronous modes, with an intuitive API that is better suited for ease of use and projects that handle lower concurrency volumes.
 How to implement the basic usage of Workerman documents
Nov 08, 2023 am 11:46 AM
How to implement the basic usage of Workerman documents
Nov 08, 2023 am 11:46 AM
Introduction to how to implement the basic usage of Workerman documents: Workerman is a high-performance PHP development framework that can help developers easily build high-concurrency network applications. This article will introduce the basic usage of Workerman, including installation and configuration, creating services and listening ports, handling client requests, etc. And give corresponding code examples. 1. Install and configure Workerman. Enter the following command on the command line to install Workerman: c
 How to implement the timer function in the Workerman document
Nov 08, 2023 pm 05:06 PM
How to implement the timer function in the Workerman document
Nov 08, 2023 pm 05:06 PM
How to implement the timer function in the Workerman document Workerman is a powerful PHP asynchronous network communication framework that provides a wealth of functions, including the timer function. Use timers to execute code within specified time intervals, which is very suitable for application scenarios such as scheduled tasks and polling. Next, I will introduce in detail how to implement the timer function in Workerman and provide specific code examples. Step 1: Install Workerman First, we need to install Worker
 How to implement the reverse proxy function in the Workerman document
Nov 08, 2023 pm 03:46 PM
How to implement the reverse proxy function in the Workerman document
Nov 08, 2023 pm 03:46 PM
How to implement the reverse proxy function in the Workerman document requires specific code examples. Introduction: Workerman is a high-performance PHP multi-process network communication framework that provides rich functions and powerful performance and is widely used in Web real-time communication and long connections. Service scenarios. Among them, Workerman also supports the reverse proxy function, which can realize load balancing and static resource caching when the server provides external services. This article will introduce how to use Workerman to implement the reverse proxy function.
 Workerman development: How to implement real-time video calls based on UDP protocol
Nov 08, 2023 am 08:03 AM
Workerman development: How to implement real-time video calls based on UDP protocol
Nov 08, 2023 am 08:03 AM
Workerman development: real-time video call based on UDP protocol Summary: This article will introduce how to use the Workerman framework to implement real-time video call function based on UDP protocol. We will have an in-depth understanding of the characteristics of the UDP protocol and show how to build a simple but complete real-time video call application through code examples. Introduction: In network communication, real-time video calling is a very important function. The traditional TCP protocol may have problems such as transmission delays when implementing high-real-time video calls. And UDP
 How to use Workerman to build a high-availability load balancing system
Nov 07, 2023 pm 01:16 PM
How to use Workerman to build a high-availability load balancing system
Nov 07, 2023 pm 01:16 PM
How to use Workerman to build a high-availability load balancing system requires specific code examples. In the field of modern technology, with the rapid development of the Internet, more and more websites and applications need to handle a large number of concurrent requests. In order to achieve high availability and high performance, the load balancing system has become one of the essential components. This article will introduce how to use the PHP open source framework Workerman to build a high-availability load balancing system and provide specific code examples. 1. Introduction to Workerman Worke
 Implement the file transfer function in Workerman documents
Nov 08, 2023 pm 03:39 PM
Implement the file transfer function in Workerman documents
Nov 08, 2023 pm 03:39 PM
Workerman is a high-performance asynchronous event-driven framework developed based on PHP. It can easily realize the development of long connections under the TCP/UDP protocol. In addition, Workerman also provides the function of realizing file transfer, which can be used in scenarios such as large file transfer and data backup. This article will introduce how to implement the file transfer function in Workerman and provide specific code examples. 1. File upload function To implement the file upload function, the client needs to send the file to be uploaded to the server, and the server verifies
