


To format the hard disk, you must first back up the data and confirm the hard disk type and interface. 1. Select the file system according to the purpose: NTFS is suitable for Windows, exFAT is suitable for cross-platform use, APFS/HFS is used for Mac, EXT4 is used for Linux; 2. Use system tools to operate: Windows is managed through disk, and Mac is formatted through disk tools; 3. Notes include ensuring stable connections, avoiding disk usage, special protection mechanisms for handling branded hard disks, and understanding the problem of rapid formatting without thoroughly erasing data. The entire process needs to be handled with caution to prevent data loss or format errors.

Formatting a hard drive is a common operation, especially when you want to clean up data, install the system, or adapt the hard drive to different devices. Simply put, it is to restore the hard disk to a "blank state" and set up a suitable file system. However, before the operation, you must confirm the backup of important data, otherwise it will be gone.

Confirm the hard disk type and interface
Different types of hard disks (such as mechanical hard disk HDD, solid-state hard disk SSD) and different interfaces (SATA, USB, M.2, etc.) may affect the formatting method. If it is an external USB drive or a mobile hard drive, it can usually be operated directly by connecting to the computer; if it is an internal hard drive, it may need to enter the BIOS or use special tools.
- Under Windows, you can view hard disk information through disk management.
- Mac users can use "Disk Tool" to identify the hard disk model and format
- Some old hard drives may not support new file systems, so please pay attention to compatibility.
Select the right file system
A key step in formatting is to select a file system, common ones include:
- NTFS : Windows default format, supports large files and large-capacity hard disks
- FAT32/exFAT : Highly versatile, suitable for USB and mobile hard drives, especially cross-platform use (such as plugging in both Windows and Mac)
- APFS/HFS : Apple's main file system
- EXT4 : Linux system is commonly used. If ordinary users do not install dual systems or do development, they will basically not use it.
It is important to choose the right format according to the purpose. For example, if you want to make a Windows boot disk, you must choose NTFS; if you want to share the hard disk between Mac and Windows, exFAT will be more suitable.

Use the system's own tools to operate
Most of the time, no additional software is required, and the system already provides formatting capabilities.
Steps on Windows:
- After inserting the hard disk, press Win R, enter
diskmgmt.mscto open disk management - Find your hard drive, right-click and select "Format"
- Select the file system, assign drive letters, volume labels, etc., and click OK
Steps on Mac:
- Open "Applications" → "Disk Utility" in "Utilities"
- Select the target hard disk in the left list
- Click "Erase", then select the format and name to start the operation
Note: If some hard disks have been partitioned before, they may need to delete the partition table first, then repartition and format.
Notes and FAQs
There may be some minor problems during the formatting process, such as prompting "The formatting cannot be completed" or "Access denied".
- Make sure that the hard drive is not physically damaged and the connection is stable
- If the system prompts "Disk is in use", you can try formatting in safe mode
- Some brands of hard disks come with their own protection mechanism, which may require the use of tools provided by the manufacturer to operate.
- Quick formatting is just to clear the index and will not erase the data completely. If you need to keep it confidential, it is recommended to overwrite it multiple times or use professional tools.
Basically that's it. The whole process is not complicated, but it is easy to ignore the two links of backup and format selection. Confirm several times before starting, so as to avoid regret afterwards.
The above is the detailed content of How to format a hard drive?. For more information, please follow other related articles on the PHP Chinese website!

Hot AI Tools

Undress AI Tool
Undress images for free

Undresser.AI Undress
AI-powered app for creating realistic nude photos

AI Clothes Remover
Online AI tool for removing clothes from photos.

Clothoff.io
AI clothes remover

Video Face Swap
Swap faces in any video effortlessly with our completely free AI face swap tool!

Hot Article
Hot Tools

Notepad++7.3.1
Easy-to-use and free code editor

SublimeText3 Chinese version
Chinese version, very easy to use

Zend Studio 13.0.1
Powerful PHP integrated development environment

Dreamweaver CS6
Visual web development tools

SublimeText3 Mac version
God-level code editing software (SublimeText3)


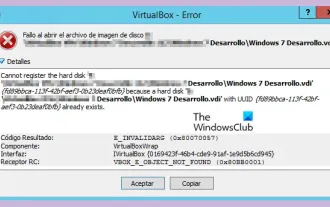 VBOX_E_OBJECT_NOT_FOUND(0x80bb0001)VirtualBox error
Mar 24, 2024 am 09:51 AM
VBOX_E_OBJECT_NOT_FOUND(0x80bb0001)VirtualBox error
Mar 24, 2024 am 09:51 AM
When trying to open a disk image in VirtualBox, you may encounter an error indicating that the hard drive cannot be registered. This usually happens when the VM disk image file you are trying to open has the same UUID as another virtual disk image file. In this case, VirtualBox displays error code VBOX_E_OBJECT_NOT_FOUND(0x80bb0001). If you encounter this error, don’t worry, there are some solutions you can try. First, you can try using VirtualBox's command line tools to change the UUID of the disk image file, which will avoid conflicts. You can run the command `VBoxManageinternal
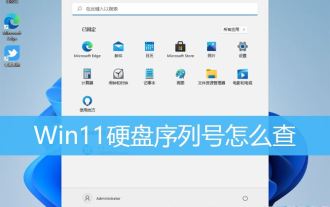 How many digits is the hard drive serial number? How to query the Win11 hard drive serial number
Feb 29, 2024 pm 09:04 PM
How many digits is the hard drive serial number? How to query the Win11 hard drive serial number
Feb 29, 2024 pm 09:04 PM
The hard disk serial number can be checked through the hard disk packaging box or the hard disk casing, or in the Win11 system. However, some users do not know the method. This article is a method for querying the Win11 hard disk serial number brought to you by this site. What is the number of digits in a hard drive serial number? A computer hard drive serial number is a unique identifier that identifies a specific hard drive. It is provided by the hard drive manufacturer and cannot be modified by the user. The hard disk serial number usually contains 10 to 20 digits and letters, and of course generally consists of 12 digits. It can be used to record hard disk parameters such as hard disk capacity, loading mode, and read and write speeds. In computer systems, hard drive serial numbers are usually used to identify and distinguish different hard drives, and in some cases are used for password protection, software authorization, etc. pass
 How to force hard disk format under Linux system
Feb 25, 2024 am 08:39 AM
How to force hard disk format under Linux system
Feb 25, 2024 am 08:39 AM
How to force format a hard drive in Linux When using a Linux system, sometimes we need to format the hard drive in order to repartition or clear the data in the hard drive. This article will introduce how to force format a hard disk in a Linux system and provide specific code examples. 1. Check the hard disk device First, we need to check the hard disk device information to determine the hard disk device to be formatted. You can view it with the following command: #fdisk-l This command will list all hard disk devices in the system
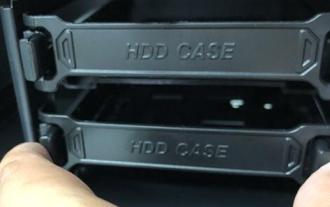 Tutorial on adding a new hard drive in win11
Jan 05, 2024 am 09:39 AM
Tutorial on adding a new hard drive in win11
Jan 05, 2024 am 09:39 AM
When buying a computer, we may not necessarily choose a large hard drive. At this time, if we want to add a new hard drive to win11, we can first install the new hard drive we purchased, and then add partitions to the computer. Tutorial on adding a new hard drive in win11: 1. First, we disassemble the host and find the slot of the hard drive. 2. After finding it, we first connect the "data cable", which usually has a fool-proof design. If it cannot be inserted, just reverse the direction. 3. Then insert the new hard drive into the hard drive slot. 4. After inserting, connect the other end of the data cable to the computer's motherboard. 5. After the installation is completed, you can put it back into the host and turn it on. 6. After booting, we right-click "This Computer" and open "Computer Management" 7. After opening, click "Disk Management" in the lower left corner 8. Then on the right you can
 4K alignment when using DiskGenius tool for hard disk partitioning
Jan 01, 2024 pm 02:37 PM
4K alignment when using DiskGenius tool for hard disk partitioning
Jan 01, 2024 pm 02:37 PM
4K alignment is a very important parameter in hard drives, but generally new hard drives do not have partitions and alignment. Today I will teach you how to use the DiskGenius partition tool to align 4K. It is recommended to choose mbr as the partition type, because this installation system is easier. Then select 3 partitions and let’s take a look at the specific operation process. Detailed steps for 4K alignment of the hard drive using the DiskGenius partition tool: 1. Insert the solid state drive into another computer, open the software in Figure 1, you can download it if it is not available, and then click on your solid state drive. It's just the gray one. New hard drives are gray and have no partitions. Then click on this quick partition. 2. It is recommended to choose mbr as the partition type, because it is easier to install the system. Then select
 How to change hard drive shutdown after idle time in Windows 11
May 16, 2023 am 08:58 AM
How to change hard drive shutdown after idle time in Windows 11
May 16, 2023 am 08:58 AM
While hard drives are more readily available and faster these days, they still end up consuming a lot of power, especially on laptops. The hard drive consumes more power and ends up draining the laptop's battery faster than it should, so users prefer to turn off the hard drive after idle time. This feature was introduced in Windows 10’s power management options and helps extend your laptop’s battery life. While it may be enabled automatically on systems with a Balanced Power Plan or a Power Saver Plan, you can also turn this feature on manually. This will shut down the hard drive whenever your PC is idle for the selected period of time. This, in turn, will automatically use less power, saving your laptop's battery life. However, when you want to use your PC again,
 How to cancel Linux hard drive formatting
Feb 19, 2024 pm 12:18 PM
How to cancel Linux hard drive formatting
Feb 19, 2024 pm 12:18 PM
How to cancel the formatting of a Linux hard disk and code examples Introduction: When using the Linux operating system, sometimes we need to cancel the formatting operation of the hard disk. This article will tell you how to unformat a Linux hard drive and provide specific code examples. 1. What is hard disk formatting? Hard disk formatting refers to the operation of organizing and managing the data on the hard disk in a specific format. In Linux systems, we usually use file systems to format hard drives. Common file systems include ext4, NTFS, etc. two,
 How to change the hard disk icon in win7 system
Jul 07, 2023 pm 11:43 PM
How to change the hard disk icon in win7 system
Jul 07, 2023 pm 11:43 PM
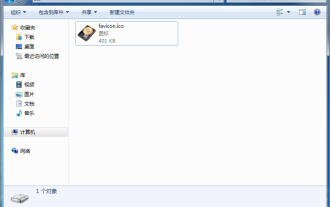
Have you seen enough hard disk partition icons in Windows 7 system? Today we will try to DIY a hard disk icon that you like. The following are detailed steps, I hope it will be helpful to everyone. First, you need to prepare a hard drive or your favorite icon file. The ico format icon is used here. 1. Open the disk you want to modify the hard disk partition icon, and then put the ico file into the root directory. I modify the D drive here. 2. Right-click in the root directory of drive D, create a blank text named autorun, and change its extension txt to inf. 3. Open the file, enter the following content and save: [autorun]icon=favicon.ico. 4. After restarting the computer normally, the D drive