

how to fix 'the disk is write-protected' on a win usb drive
Aug 02, 2025 am 10:57 AM
Check for a physical write protection switch on the USB drive and ensure it’s in the unlocked position. 2. Use DiskPart by running it as administrator, listing disks, selecting the correct USB disk, and clearing the readonly attribute. 3. Edit the Windows Registry by navigating to StorageDevicePolicies under Control, creating the key if needed, and setting the WriteProtect value to 0. 4. Scan the system with Windows Defender or Malwarebytes to remove any malware enforcing write protection. 5. Format the drive using Disk Management with NTFS or exFAT after ensuring other steps failed. If formatting fails, the drive may be counterfeit or permanently damaged, but most cases are resolved with DiskPart or registry fixes.

The "disk is write-protected" error on a Windows USB drive can be frustrating—especially when you need to copy, delete, or format files. This issue isn't always due to a physical switch; sometimes it's caused by software settings, malware, or corrupted configurations. Here’s how to fix it step by step.
1. Check for a Physical Write Protection Switch
Some USB drives (especially larger ones or those from brands like SanDisk) have a small physical switch on the side that enables or disables write protection.
- Look along the side of the USB drive for a tiny switch.
- If present, slide it to the "unlocked" position (usually up for write access).
- Reconnect the drive and test if you can now write to it.
? Note: Not all USB drives have this switch—many don’t. If yours doesn’t, move to the next step.


2. Use DiskPart to Remove Write Protection
Windows includes a command-line tool called DiskPart that can help remove write protection at the disk level.
Steps:
Press Win R, type
cmd, right-click Command Prompt, and choose Run as administrator.-
In the command window, type the following commands one at a time, pressing Enter after each:
diskpart
list disk
Identify your USB drive from the list (check size to confirm).
Select the disk (replace X with your USB disk number):
select disk X
Check the current attributes:
attributes disk
Clear the read-only attribute:
attributes disk clear readonly
Close DiskPart:
exit
Now try accessing the drive again. You should be able to format or write files.
?? Warning: Be very careful to select the correct disk—choosing the wrong one could damage your system or data.
3. Edit the Windows Registry (If DiskPart Didn’t Work)
Sometimes, group policies or malware set a registry key that forces write protection.
Steps:
Press Win R, type
regedit, and press Enter.Navigate to:
HKEY_LOCAL_MACHINE\SYSTEM\CurrentControlSet\Control\StorageDevicePolicies
If the
StorageDevicePolicieskey doesn’t exist, go to:HKEY_LOCAL_MACHINE\SYSTEM\CurrentControlSet\Control
Right-click on
Control→ New → Key, and name itStorageDevicePolicies.Inside
StorageDevicePolicies, look for a DWORD value namedWriteProtect.Double-click
WriteProtectand set its value to 0.-
If
WriteProtectdoesn’t exist, create it:- Right-click in the right pane → New → DWORD (32-bit) Value
- Name it
WriteProtect - Set value to 0
Close Registry Editor and restart your computer.
After rebooting, test the USB drive again.
? Always back up the registry before making changes, or export the key first.
4. Scan for Malware or Viruses
Some malware locks USB drives to prevent cleaning or spread via removable media.
- Run a full scan using Windows Defender or a trusted antivirus program.
- Use tools like Malwarebytes to check for infections that might be enforcing write protection.
After cleaning, retry writing to the drive.
5. Format the Drive (Last Resort)
If none of the above work, formatting may resolve the issue—but only if the system allows it.
Try formatting via Disk Management:
- Press Win X → Disk Management.
- Locate your USB drive.
- Right-click the partition and choose Format.
- Choose NTFS or exFAT, enable "Quick Format", and proceed.
If formatting fails with "media is write-protected", the drive may be failing or permanently locked (especially if it's counterfeit or damaged).
Final Notes
- Cheap or counterfeit USB drives often fake capacity and may become permanently write-protected when they fail.
- If the drive still won’t work after all steps, it may be hardware-failure related or end-of-life.
Try these fixes in order—they cover most common causes. In most cases, DiskPart or Registry edits resolve the issue.
Basically, it’s not always the drive—it’s often Windows or a hidden setting blocking access.
The above is the detailed content of how to fix 'the disk is write-protected' on a win usb drive. For more information, please follow other related articles on the PHP Chinese website!

Hot AI Tools

Undress AI Tool
Undress images for free

Undresser.AI Undress
AI-powered app for creating realistic nude photos

AI Clothes Remover
Online AI tool for removing clothes from photos.

Clothoff.io
AI clothes remover

Video Face Swap
Swap faces in any video effortlessly with our completely free AI face swap tool!

Hot Article
Hot Tools

Notepad++7.3.1
Easy-to-use and free code editor

SublimeText3 Chinese version
Chinese version, very easy to use

Zend Studio 13.0.1
Powerful PHP integrated development environment

Dreamweaver CS6
Visual web development tools

SublimeText3 Mac version
God-level code editing software (SublimeText3)
Hot Topics


 Ventoy secure boot settingsSecure Boot
Jun 18, 2024 pm 09:00 PM
Ventoy secure boot settingsSecure Boot
Jun 18, 2024 pm 09:00 PM
Ventoy is a USB boot tool that can directly boot ISO/WIM/IMG/VHD(x)/EFI and other types of files in the USB flash drive. It is very easy to use. Laptops have secure boot turned on by default. If they are not turned off or cannot be turned off, they cannot be booted from a USB device. Ventoy also supports secure boot. The principle is to inject a GRUB installation certificate into the current computer. As long as your computer After being injected once, any USB disk PE booted based on grub can pass. The official description of Ventoy is a GIF image. The playback speed is too fast and you may not be able to remember it. The editor has divided the GIF image to make it easier to understand. Ventoy secure boot has EnrollKey and Enro
 Colorful motherboard boot USB flash drive shortcut key
Mar 19, 2024 pm 12:55 PM
Colorful motherboard boot USB flash drive shortcut key
Mar 19, 2024 pm 12:55 PM
Hello everyone, today I will share a graphic tutorial from Xiaobai System official website (xiaobaixitong.com). Colorful motherboard is a computer motherboard brand with very good performance, and it has certain advantages in all aspects, and its price-performance ratio is also very high. So here comes the question, how to set the USB boot option for Colorful motherboard? Don’t worry, the editor will show you how to set up the USB disk boot option in Colorful. Teach you step by step how to set the U disk boot option for Colorful motherboard: First, insert the U disk into the computer, then turn on the computer and quickly and intermittently press the startup shortcut key to enter the BIOS setting interface (please note: usually it will be displayed below the computer brand logo Start hotkey hints). 2. Enter BIOS settings
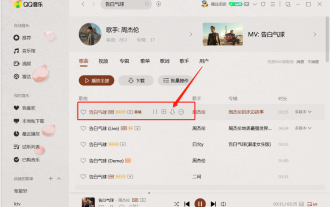 How to download qq music to USB flash drive? -How to download qq music to USB disk
Apr 01, 2024 am 10:11 AM
How to download qq music to USB flash drive? -How to download qq music to USB disk
Apr 01, 2024 am 10:11 AM
1. Open QQ Music software, enter the name of your favorite song in the search bar, and click the download button. 2. Open the folder where the downloaded songs are stored. 3. Copy the downloaded songs to the USB flash drive, and that’s it! Of course, you need to open the U disk first, then open the U disk in "My Computer" and paste it.
 Kingston USB flash drive: high-speed transmission, safe and portable, helping you improve work efficiency
Apr 17, 2024 pm 07:10 PM
Kingston USB flash drive: high-speed transmission, safe and portable, helping you improve work efficiency
Apr 17, 2024 pm 07:10 PM
Introduction: Kingston is a world-renowned storage device brand. Its high-quality USB flash drive products are famous for their high-speed transmission, safety and portability, and are deeply trusted by users from all walks of life. This article will introduce in detail the characteristics and usage of Kingston USB flash drives to help you improve efficiency in work and life. Tool materials: System version: Windows 11 Brand model: Kingston DataTravelerMax256GB Software version: exFAT format 1. High-speed transmission characteristics of Kingston U disk 1. Kingston DataTravelerMax uses the USB3.2Gen2x2 interface, with a maximum theoretical transmission speed of up to 2000MB/s, which is currently the best on the market One of the fastest USB flash drives on the Internet. Whether it is transferring documents, pictures, or high-definition videos
 How to download soda music to USB disk
Feb 24, 2024 pm 12:10 PM
How to download soda music to USB disk
Feb 24, 2024 pm 12:10 PM
Soda Music can download music to a USB flash drive, so how do you download it to a USB flash drive? Users need to click on the music, then click on the three dots on the right side of the music, and click on download. This introduction to the method of downloading to a USB disk can tell you how to operate it. The following is a detailed introduction, so take a look! Tutorial on using soda music. How to download soda music to USB flash drive. Answer: Click the three dots on the right side of the music in the music, and click download inside. The specific method: 1. First, click the music button below. 2. After selecting a piece of music, click the three dots on the right. 3. After entering, click the download button inside.
 What should I do if the system installation is too slow when reinstalling the system from USB disk in System Home?
Mar 01, 2024 pm 11:30 PM
What should I do if the system installation is too slow when reinstalling the system from USB disk in System Home?
Mar 01, 2024 pm 11:30 PM
When reinstalling the system, many users use the USB flash drive reinstallation system of System Home. However, when they reinstall the USB flash drive, they find that the loading speed is too slow. So how should we deal with it? What should I do if the system installation is too slow when reinstalling the system via USB flash drive in System Home? Reason introduction: 1. The transmission speed of the USB flash drive itself is slow, especially when processing large files, and the operation time is very long. 2. The USB interface of the computer and the extension cord will cause The signal is attenuated, making the USB disk reinstallation system installation too slow. Solution: 1. The U disk can only be used as a PE system disk. Just put the system GHO file into the U disk. 2. When the user starts the U disk and enters the PE system, he directly copies GHO to the D disk. 3. When restoring the system, you can directly quote the GHO file of the D drive
 How to delete USB disk files? What should I do if the USB disk files cannot be deleted?
Mar 14, 2024 pm 08:49 PM
How to delete USB disk files? What should I do if the USB disk files cannot be deleted?
Mar 14, 2024 pm 08:49 PM
There are many important files stored in the USB flash drive, and there are also some useless files. Cleaning the USB flash drive regularly can better manage the USB flash drive resources. However, some users found that some files in the USB disk cannot be deleted. What is going on? This tutorial will bring you the solution, come and take a look. 1. Check whether the file is occupied 1. Open the file explorer and find the path of the U disk. 2. Right-click the file you want to delete and select "Properties". 3. In the "Properties" window, switch to the "Security" tab. 4. Click the "Advanced" button to view the file permissions. 5. Ensure that the current user has
 When copying, the USB disk prompts that it is write-protected.
Feb 14, 2024 pm 05:36 PM
When copying, the USB disk prompts that it is write-protected.
Feb 14, 2024 pm 05:36 PM
As the current mainstream data storage auxiliary tool, USB flash drive can store various important data. Although the USB flash drive is small in size and easy to use, there will be various problems during use, such as prompts that the USB flash drive is write-protected. So what is the reason for this situation? How to solve the problem of write protection of USB flash drive and how to recover data from write-protected USB flash drive? Let’s follow the editor on the journey to understand the truth. 1. Why is the U disk write-protected? The write protection function of the U disk is similar to read-only, that is, the content can be modified but cannot be saved. This feature is designed to protect USB drives from viruses. When a USB flash drive has write protection issues, it is usually related to a virus infection. In addition, the reason why the USB flash drive is write-protected may also be that the USB flash drive has bad sectors, damaged firmware and other physical faults, or it may be accidentally touched.
