

How to configure Windows backup and restore
Aug 01, 2025 am 12:03 AM
To configure backup and restore in Windows, first use File History by connecting an external drive, going to Settings > Update & Security > Backup (or Settings > System > Backup in Windows 11), adding a drive, and customizing backup frequency, retention, and folders via More options. 2. Next, create a system image backup by navigating to Control Panel > System and Security > Backup and Restore (Windows 7), clicking Create a system image, selecting the destination (external drive, network location, or DVDs), choosing drives to include (typically C: and system reserved), and starting the backup, noting that it must be manually or automatically scheduled using third-party tools. 3. Then, enable system protection by opening System Properties via Control Panel > System and Security > System > System Protection, selecting the main drive (C:), clicking Configure, turning on system protection with 5–10% disk space allocation, and creating a manual restore point before major changes, knowing that Windows auto-creates them during updates if system protection is active and space is sufficient. 4. Finally, to restore, use File History to browse and recover files through Settings > Backup > More options > Restore files from a current backup, use System Image Recovery by booting from a Windows USB/DVD and selecting Repair your computer > Troubleshoot > Advanced Options > System Image Recovery, or initiate System Restore by searching for Create a restore point, selecting System Restore, choosing a point, and following the wizard. Always test backups regularly, keep backup drives disconnected when not in use to prevent ransomware attacks, and combine local backups with cloud services like OneDrive for redundancy, ensuring File History protects personal files daily, system images provide full snapshots, and System Restore enables quick recovery from issues.

Configuring backup and restore in Windows is essential for protecting your files and system settings. While the exact steps vary slightly depending on your version of Windows (Windows 10 and 11 are very similar), the process is straightforward. Here’s how to set it up properly.

1. Use File History to Back Up Your Files
File History is Windows’ built-in tool for automatically backing up personal files like documents, photos, and desktop items.
Steps:

- Connect an external drive or network location for backup.
- Open Settings > Update & Security > Backup (in Windows 10) or Settings > System > Backup (in Windows 11).
- Under “Back up using File History,” click Add a drive.
- Select your external drive from the list.
- Once selected, File History will start automatically.
Customize Backup Settings:
- Click More options to adjust:
- How often backups are saved (e.g., every 10 minutes, hourly, daily).
- How long to keep backups (e.g., until space is needed, or up to a year).
- Which folders to include or exclude.
? Tip: It’s a good idea to exclude large media files or downloads to save space.


2. Create a System Image Backup (Full System Backup)
A system image is a complete snapshot of your drive, including Windows, installed apps, and all files. This is useful for full system recovery.
Steps:
- Go to Control Panel > System and Security > Backup and Restore (Windows 7).
Yes, it says “Windows 7,” but this feature still works in Windows 10/11.
- Click Set up backup or Create a system image on the left.
- Choose where to save the image:
- External hard drive
- Network location
- DVDs (not practical for large backups)
- Select the drives to include (usually C: and system reserved).
- Click Start backup.
?? Note: System images are large and not updated automatically unless scheduled. You’ll need to manually run them or use third-party tools for automation.
3. Enable System Protection and Create Restore Points
System Restore lets you roll back your PC to an earlier state if something goes wrong.
Steps:
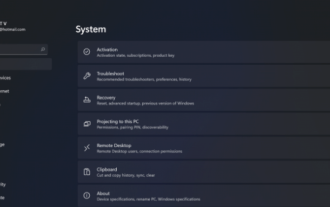
- Open Control Panel > System and Security > System > System Protection.
- Select your main drive (usually C:) and click Configure.
- Select Turn on system protection.
- Adjust the max disk space usage (recommended: 5–10%).
- Click Create to make a manual restore point with a descriptive name.
Automate Restore Points:
- Windows automatically creates restore points before major changes (like updates or app installations), but only if:
- System Protection is enabled.
- There’s enough disk space.
? Pro tip: Create a restore point manually before installing new software or drivers.
4. Restore Files or System When Needed
Restore Files:
- Go to Settings > Update & Security > Backup > More options > Restore files from a current backup.
- Use the File History interface to browse and restore previous versions.
Restore Using System Image:
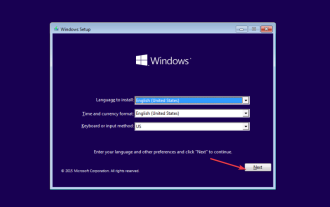
- Boot from a Windows installation USB/DVD.
- Choose Repair your computer > Troubleshoot > Advanced Options > System Image Recovery.
- Follow prompts to restore from your saved image.
Use System Restore:
- Search for Create a restore point in the Start menu.
- Click System Restore > choose a restore point > follow the wizard.
Final Notes
- Regularly test backups to ensure they work.
- Keep your backup drive disconnected when not in use to protect against ransomware.
- Consider using cloud services (like OneDrive) alongside local backups for redundancy.
Basically, set up File History for daily file protection, use System Image for full system snapshots, and enable System Restore for quick fixes. It’s not complex, but doing it once can save you hours later.
The above is the detailed content of How to configure Windows backup and restore. For more information, please follow other related articles on the PHP Chinese website!

Hot AI Tools

Undress AI Tool
Undress images for free

Undresser.AI Undress
AI-powered app for creating realistic nude photos

AI Clothes Remover
Online AI tool for removing clothes from photos.

Clothoff.io
AI clothes remover

Video Face Swap
Swap faces in any video effortlessly with our completely free AI face swap tool!

Hot Article
Hot Tools

Notepad++7.3.1
Easy-to-use and free code editor

SublimeText3 Chinese version
Chinese version, very easy to use

Zend Studio 13.0.1
Powerful PHP integrated development environment

Dreamweaver CS6
Visual web development tools

SublimeText3 Mac version
God-level code editing software (SublimeText3)
Hot Topics


 0xc0000218 BSoD error: How to fix it on Windows 10 and 11
Jul 11, 2023 pm 10:50 PM
0xc0000218 BSoD error: How to fix it on Windows 10 and 11
Jul 11, 2023 pm 10:50 PM
Some Windows 10 and 11 users have recently complained about 0xc0000218BSoD error, which prevents their systems from starting properly. Error code 0xc0000218 clearly indicates a registry file failure, which usually occurs due to misconfiguration of system settings. If you see this post or are experiencing similar issues, check out some potential fixes to resolve the issue seamlessly. What causes the 0xc0000218BSoD error? There may be several reasons behind the 0xc0000218BSoD error. Here are some potential factors: Incorrect registry editing – If incorrect changes are made using registry editing tools or manually modifying values, it can lead to registry corruption. Such misconfiguration may cause problems in the system
 Detailed guide on how to downgrade win10 to win8
Jan 04, 2024 pm 12:11 PM
Detailed guide on how to downgrade win10 to win8
Jan 04, 2024 pm 12:11 PM
Many friends feel uncomfortable after updating to the win10 version. They want to revert to the previous version but don't know how to do it. So today I will tell you how to return win10 to win8. Hope this helps you! How to roll back win10 to win8: ps: If there is a backup before the version update, you can roll back the version. If there is no backup, you cannot roll back~ 1. Use the shortcut key "win+i" to open the settings , find "Update & Security". 2. Then select the "Recover" option on the left. 3. Click "Return to Windows 8.1". ps: You can roll back to the original system one month after upgrading to win10. 4. Choose a reason why you want to roll back. 5. At this time, window
 How to perform system restore and recovery on Kirin OS?
Aug 06, 2023 pm 06:12 PM
How to perform system restore and recovery on Kirin OS?
Aug 06, 2023 pm 06:12 PM
How to perform system restore and recovery on Kirin OS? Kirin operating system is a safe and reliable operating system independently developed by China Huawei Technologies Co., Ltd. Kirin operating system has many excellent features, such as high security, powerful performance and stability. In the process of using Kirin operating system, we sometimes encounter system crashes or data loss. At this time, we need to perform system restore and recovery operations. 1. System Restore System restore refers to restoring the operating system to a previous state to eliminate system failures or
 How to restore system in win7 safe mode
Jul 11, 2023 pm 06:49 PM
How to restore system in win7 safe mode
Jul 11, 2023 pm 06:49 PM
Under normal circumstances, many win7 system users will back up the system in order to prevent computer problems and restore them in time. If they cannot enter the desktop after starting the computer and need to restore the system, we can enter safe mode to restore the system. Many users don’t know how to restore the system in win7 safe mode, so today I will teach you how to restore the system in win7 safe mode. Let’s take a look below! How to restore the system in win7 safe mode: 1. When restarting the computer and the startup logo screen appears, we press f8 to enter safe mode. 2. Click the win icon in the lower left corner or press the win key. 3. Click All Programs - Accessories - System Tools - System Restore. 4. Click to select Restore
 How does system restore and recovery in Kirin OS protect your data?
Aug 05, 2023 am 10:13 AM
How does system restore and recovery in Kirin OS protect your data?
Aug 05, 2023 am 10:13 AM
How does system restore and recovery in Kirin OS protect your data? [Introduction] When we use computers, we often encounter unexpected situations, such as system crashes, virus infections, hard drive damage, etc., which may lead to the loss of our important data. In order to protect the security of data, Kirin operating system provides system restore and recovery functions, which can effectively prevent data loss. [Principle of System Restore] System restore refers to restoring the system to a state at a previous point in time, so that it can be restored to an undamaged system. Kirin
 Will restoring Windows 10 system result in data loss?
Dec 31, 2023 am 09:40 AM
Will restoring Windows 10 system result in data loss?
Dec 31, 2023 am 09:40 AM
When we use Windows 10 system, we must have experienced restoring and reinstalling the system. So whether data will be lost after win10 system restore and whether file data will be lost after win10 system restore depends on your choice. Will win10 system restore lose data? Answer: Personal data and folders will not be lost. If your computer isn't functioning properly, resetting this computer may resolve the issue. When restoring, you can choose to keep personal files or delete personal files, and then reinstall Windows. Regarding this problem, it is actually simple. You can see the "Reset this PC" function in Win10's "Settings" → "Update and Security" - "Recovery". As you can see from the description, Win10 resets the computer.
 Detailed introduction to the tutorial of changing win11 to win10 system
Jul 08, 2023 pm 09:21 PM
Detailed introduction to the tutorial of changing win11 to win10 system
Jul 08, 2023 pm 09:21 PM
Microsoft officially announced the win11 system on June 24. You can see that the user interface, start menu, etc. are very similar to those found in Windows 10X. Some friends found that they were not used to using the preview version and wanted to change it to win10 system. So how do we do it? Let’s take a look at the tutorial on changing win11 to win10 system and learn it together. 1. The first step is to open new settings from Windows 11. Here you need to go to the system settings shown in the image. 2. Under System Settings, select the "Recovery" option. Here, you will be able to see the “Previous versions of windows” option. You will also see a "Back" button next to it, click this button. 3. You can specify to return
 How to restore the system in safe mode in win7 system
Jul 12, 2023 pm 10:49 PM
How to restore the system in safe mode in win7 system
Jul 12, 2023 pm 10:49 PM
Usually, many win7 system users can restore the system in time to prevent computer problems. If the computer cannot enter the desktop after starting and needs to restore the system, we can enter safe mode to restore the system. Many users don’t know how to restore the win7 safe mode system, so today I will teach you how to restore the win7 safe mode. Let’s take a look! When 1. Restart the computer and open the logo, we press F8 to enter safe mode. 2. Click the win icon in the lower left corner or press the win key. 3. Click All Programs-Accessories-System Tools-System Restore. 4. Click to select a restore point! The above is about how to restore the system in win7 safe mode! I hope to be helpful!
