


Run chkdsk C: /f /r in an admin Command Prompt to fix file system errors and clear the dirty bit, scheduling it on reboot if the drive is in use. 2. Optionally, run sfc /scannow and Disk Cleanup to repair system files and remove temporary data. 3. Check disk health using CrystalDiskInfo or wmic diskdrive get status to rule out hardware failure if the issue recurs. 4. Prevent future occurrences by ensuring proper shutdowns, avoiding forced reboots, using a UPS, and performing regular maintenance. Running chkdsk is the primary solution, and the dirty bit is cleared once the system verifies the drive's integrity, with persistent issues likely indicating underlying hardware problems.

If you're seeing a "dirty disk bit" error—especially on a Windows system—it usually means the file system wasn't properly unmounted the last time the drive was used. This can happen after an improper shutdown, forced restart, or sudden power loss. The OS sets a "dirty bit" as a flag to indicate the volume may need checking for errors.
Here’s how to fix it:
1. Run CHKDSK (Check Disk)
This is the most common and effective way to clear the dirty bit and fix potential file system issues.

Steps:
- Press
Windows Xand select Command Prompt (Admin) or Windows Terminal (Admin). - Type the following command (replace
C:with your drive letter if needed):
chkdsk C: /f /r
/f= fixes errors on the disk/r= locates bad sectors and recovers readable information
? You might see: "Chkdsk cannot run because the volume is in use..."
In that case, press Y to schedule the check on the next reboot, then restart your PC.

After reboot, the scan will run before Windows loads—this can take time depending on drive size and errors found.
2. Use Disk Cleanup and SFC (Optional but helpful)
Sometimes file corruption contributes to the issue.
- Open Command Prompt as admin again and run:
sfc /scannow
This scans and repairs system file integrity.
Also, run Disk Cleanup to remove temporary files that might interfere.
3. Check Disk Health (Especially for Recurring Issues)
If the dirty bit keeps returning, your drive might be failing.
Use tools like:
- CrystalDiskInfo (free) – shows SMART status
- Windows built-in tool: In Command Prompt:
wmic diskdrive get status
If it says "OK", hardware is likely fine. If not, consider backing up and replacing the drive.
4. Prevent Future Dirty Bits
- Always shut down properly.
- Avoid forced reboots.
- Use a UPS during power fluctuations.
- Keep your drives healthy with regular maintenance.
Basically, running
chkdsk /f /ris the go-to fix. The dirty bit is just a flag—it gets cleared once the system confirms the drive is clean. If problems persist, suspect underlying hardware issues.The above is the detailed content of How to fix a dirty disk bit. For more information, please follow other related articles on the PHP Chinese website!

Hot AI Tools

Undress AI Tool
Undress images for free

Undresser.AI Undress
AI-powered app for creating realistic nude photos

AI Clothes Remover
Online AI tool for removing clothes from photos.

Clothoff.io
AI clothes remover

Video Face Swap
Swap faces in any video effortlessly with our completely free AI face swap tool!

Hot Article
Hot Tools

Notepad++7.3.1
Easy-to-use and free code editor

SublimeText3 Chinese version
Chinese version, very easy to use

Zend Studio 13.0.1
Powerful PHP integrated development environment

Dreamweaver CS6
Visual web development tools

SublimeText3 Mac version
God-level code editing software (SublimeText3)


 This Apple ID is not yet in use in the iTunes Store: Fix
Jun 10, 2024 pm 05:42 PM
This Apple ID is not yet in use in the iTunes Store: Fix
Jun 10, 2024 pm 05:42 PM
When logging into iTunesStore using AppleID, this error saying "This AppleID has not been used in iTunesStore" may be thrown on the screen. There are no error messages to worry about, you can fix them by following these solution sets. Fix 1 – Change Shipping Address The main reason why this prompt appears in iTunes Store is that you don’t have the correct address in your AppleID profile. Step 1 – First, open iPhone Settings on your iPhone. Step 2 – AppleID should be on top of all other settings. So, open it. Step 3 – Once there, open the “Payment & Shipping” option. Step 4 – Verify your access using Face ID. step
 Comprehensive Guide to PHP 500 Errors: Causes, Diagnosis and Fixes
Mar 22, 2024 pm 12:45 PM
Comprehensive Guide to PHP 500 Errors: Causes, Diagnosis and Fixes
Mar 22, 2024 pm 12:45 PM
A Comprehensive Guide to PHP 500 Errors: Causes, Diagnosis, and Fixes During PHP development, we often encounter errors with HTTP status code 500. This error is usually called "500InternalServerError", which means that some unknown errors occurred while processing the request on the server side. In this article, we will explore the common causes of PHP500 errors, how to diagnose them, and how to fix them, and provide specific code examples for reference. Common causes of 1.500 errors 1.
 Convert VirtualBox fixed disk to dynamic disk and vice versa
Mar 25, 2024 am 09:36 AM
Convert VirtualBox fixed disk to dynamic disk and vice versa
Mar 25, 2024 am 09:36 AM
When creating a virtual machine, you will be asked to select a disk type, you can select fixed disk or dynamic disk. What if you choose fixed disks and later realize you need dynamic disks, or vice versa? Good! You can convert one to the other. In this post, we will see how to convert VirtualBox fixed disk to dynamic disk and vice versa. A dynamic disk is a virtual hard disk that initially has a small size and grows in size as you store data in the virtual machine. Dynamic disks are very efficient at saving storage space because they only take up as much host storage space as needed. However, as disk capacity expands, your computer's performance may be slightly affected. Fixed disks and dynamic disks are commonly used in virtual machines
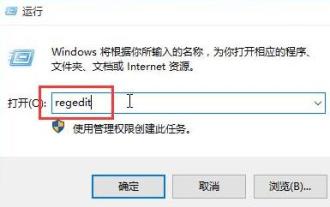 How to fix the volume cannot be adjusted in WIN10
Mar 27, 2024 pm 05:16 PM
How to fix the volume cannot be adjusted in WIN10
Mar 27, 2024 pm 05:16 PM
1. Press win+r to open the run window, enter [regedit] and press Enter to open the registry editor. 2. In the opened registry editor, click to expand [HKEY_LOCAL_MACHINESOFTWAREMicrosoftWindowsCurrentVersionRun]. In the blank space on the right, right-click and select [New - String Value], and rename it to [systray.exe]. 3. Double-click to open systray.exe, modify its numerical data to [C:WindowsSystem32systray.exe], and click [OK] to save the settings.
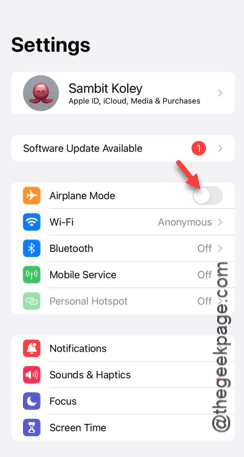 iPhone stuck in airplane mode: How to fix it
Jun 15, 2024 pm 02:16 PM
iPhone stuck in airplane mode: How to fix it
Jun 15, 2024 pm 02:16 PM
Airplane mode is very convenient in some situations. However, the same airplane mode may give you a headache if your iPhone suddenly gets stuck on it. In this article, we have designed this set of solutions to get your iPhone out of airplane mode. Quick fix – 1. Try disabling Airplane Mode directly from Control Center. 2. If you are unable to disable Airplane Mode from Control Center, you can disable Airplane Mode directly from the Settings tab – If these tips don’t work, follow the fixes below to resolve the issue. Fix 1 – Force Restart Your Device The process of force restarting your device is very simple. All you have to do is follow these step-by-step instructions. Step 1 – You can start the process by pressing and releasing the Volume Up button. step
![How to increase disk size in VirtualBox [Guide]](https://img.php.cn/upload/article/000/887/227/171064142025068.jpg?x-oss-process=image/resize,m_fill,h_207,w_330) How to increase disk size in VirtualBox [Guide]
Mar 17, 2024 am 10:10 AM
How to increase disk size in VirtualBox [Guide]
Mar 17, 2024 am 10:10 AM
We often encounter situations where the predefined disk size has no room for more data? If you need more virtual machine hard disk space at a later stage, you must expand the virtual hard disk and partitions. In this post, we will see how to increase disk size in VirtualBox. Increasing the disk size in VirtualBox It is important to note that you may want to back up your virtual hard disk files before performing these operations, as there is always the possibility of something going wrong. It is always a good practice to have backups. However, the process usually works fine, just make sure to shut down your machine before continuing. There are two ways to increase disk size in VirtualBox. Expand VirtualBox disk size using GUI using CL
 How to set a save disk for downloaded files in Windows 11
Apr 20, 2024 pm 06:32 PM
How to set a save disk for downloaded files in Windows 11
Apr 20, 2024 pm 06:32 PM
For users who are new to the Windows 11 system, usually the file download path will follow the system default settings, and the files are often saved in the system disk. In the long run, it may affect the overall performance of the computer by occupying too much system disk space. In order to manage and allocate storage space more rationally, it is important to learn how to customize the save disk for downloaded files in Windows 11 system. This article will explain in detail how to flexibly set the target disk for downloaded files in Windows 11 to meet users' personalized storage needs. If this is what you need, you may wish to continue reading and we will introduce you to the steps of this practical function in detail. Operation method 1. Double-click to open "This PC" on the desktop. 2. Then find the new interface in the left column
 How to set the disk as read-only with the partition tool diskgenius - How to set the disk as read-only with diskgenius
Mar 04, 2024 pm 03:00 PM
How to set the disk as read-only with the partition tool diskgenius - How to set the disk as read-only with diskgenius
Mar 04, 2024 pm 03:00 PM
Friends, do you know how to set the disk as read-only with the partition tool diskgenius? Today I will explain how to set the disk as read-only with the partition tool diskgenius. If you are interested, come and take a look with the editor. I hope it can help you. . Step 1: First, open the DiskGenius software and select the disk that needs to be set. Step 2: Secondly, in the DiskGenius software, open the disk menu. Step 3: Again, as shown in the figure, change the status of this disk to "read-only". Step 4: Finally, confirm this operation to make the disk read-only.