


Ensure you meet the requirements: an Apple ID, macOS Catalina or later, a payment method, family members with Apple IDs, and you as the organizer. 2. Turn on Family Sharing via System Settings under your Apple ID. 3. Choose what to share, including purchases, subscriptions, iCloud , Ask to Buy, Family Photos, location, and Siri requests. 4. Invite family members via message or email, or set them up in person, ensuring they accept the invitation on their Apple device. 5. Manage family settings by adding or removing members, changing sharing options, approving requests, and viewing subscriptions—all accessible from any Apple device, completing setup in about 10 minutes and enabling seamless sharing of digital content across the household.

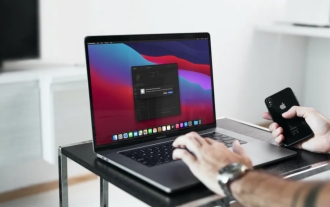
Setting up Family Sharing on a Mac is a straightforward way to share purchases, subscriptions, photos, and more with up to five family members. Here’s how to do it step by step.

1. Make Sure You Meet the Requirements
Before setting up Family Sharing, confirm the following:
- You have an Apple ID and are signed in on your Mac.
- You’re running macOS Catalina or later (though Family Sharing works on older versions too).
- You have a payment method set up on your Apple ID.
- Each family member has their own Apple ID (preferably with two-factor authentication enabled).
- You’re the organizer—the person who creates and manages the family group.
2. Turn On Family Sharing in System Settings
- Click the Apple menu (?) in the top-left corner and select System Settings (or System Preferences on older macOS versions).
- Click your name at the top of the sidebar to open your Apple ID settings.
- Select Family Sharing from the list on the left.
- Click Set Up Family Sharing (or Add Family Member if you’ve started before).
3. Choose What to Share
When prompted, you’ll be asked what you want to share with your family. You can enable:

- Apple Media & Purchases – Share apps, music, movies, books, and in-app purchases.
- Apple Subscriptions – Share services like Apple Music, Apple TV , Apple News , and iCloud .
- iCloud – Share your iCloud storage plan.
- Ask to Buy – Lets children request purchases from you.
- Family Photos – Automatically shares a photo album with the family.
- Location – Share your device’s location with family members.
- Siri Requests – Allow family to use your payment info via Siri (optional).
Select the features you want, then click Continue.
4. Invite Family Members
You can invite members in a few ways:

- Via Message or Email: Enter their name or email address. They’ll get an invitation to join.
- In Person: If someone is nearby, you can set them up directly using their device.
? The invited person must accept the invitation on their Apple device (iPhone, iPad, or Mac) to join.
If you’re adding a child under 13, you’ll need to enter their birth date, and Apple may ask for identification.
5. Manage Family Settings (Optional)
Once Family Sharing is active:
- Go back to Apple ID > Family Sharing in System Settings.
- You can:
- Add or remove members.
- Change sharing options.
- Approve “Ask to Buy” requests.
- View shared subscriptions.
You can also access Family Sharing settings from any Apple device your family uses.
That’s it—Family Sharing is now set up on your Mac. Everyone in the group can start sharing eligible purchases, subscriptions, and more. Just make sure all members are signed in with their Apple IDs and have Family Sharing turned on.
Basically, it takes about 10 minutes and makes managing digital life across a household much easier.
The above is the detailed content of How to set up Family Sharing on a Mac. For more information, please follow other related articles on the PHP Chinese website!

Hot AI Tools

Undress AI Tool
Undress images for free

Undresser.AI Undress
AI-powered app for creating realistic nude photos

AI Clothes Remover
Online AI tool for removing clothes from photos.

Clothoff.io
AI clothes remover

Video Face Swap
Swap faces in any video effortlessly with our completely free AI face swap tool!

Hot Article
Hot Tools

Notepad++7.3.1
Easy-to-use and free code editor

SublimeText3 Chinese version
Chinese version, very easy to use

Zend Studio 13.0.1
Powerful PHP integrated development environment

Dreamweaver CS6
Visual web development tools

SublimeText3 Mac version
God-level code editing software (SublimeText3)


 How to Remove Old Devices from Apple ID on Mac
Jul 07, 2025 am 09:08 AM
How to Remove Old Devices from Apple ID on Mac
Jul 07, 2025 am 09:08 AM
If you've owned multiple Apple devices over the years, you might find yourself in a situation where some of those older Macs, iPhones, iPads, or other Apple hardware have been sold, given away, or traded. No matter how they left your possession, it's
 Create a MacOS Tahoe 26 Beta VM with Three Commands in Terminal Using tart
Jul 06, 2025 am 09:28 AM
Create a MacOS Tahoe 26 Beta VM with Three Commands in Terminal Using tart
Jul 06, 2025 am 09:28 AM
Advanced Mac users familiar with the command line can swiftly set up a MacOS Tahoe 26 beta virtual machine by entering a few commands into Terminal, using tart. Tart is a command-line utility for managing virtual machines and offers one of the quicke
 iOS 15.3 Beta 2 & iPadOS 15.3 Beta 2 Released for Testing
Jul 06, 2025 am 09:25 AM
iOS 15.3 Beta 2 & iPadOS 15.3 Beta 2 Released for Testing
Jul 06, 2025 am 09:25 AM
While Apple has just made iOS 15.2.1 and iPadOS 15.2.1 available to all users, they have also rolled out the second beta of iOS 15.3 and iPadOS 15.3 for those participating in Apple's beta testing programs for mobile operating systems.In addition, ne
 How to Run MacOS Tahoe 26 Beta in a UTM Virtual Machine
Jul 06, 2025 am 09:21 AM
How to Run MacOS Tahoe 26 Beta in a UTM Virtual Machine
Jul 06, 2025 am 09:21 AM
There are a variety of different ways to run MacOS Tahoe 26 beta, including installing it as an upgrade to an existing MacOS installation (which is not recommended for most people, by the way), but by far the safest and perhaps simplest way is to use
 How to Install MacOS Tahoe 26 Beta Right Now
Jul 06, 2025 am 09:24 AM
How to Install MacOS Tahoe 26 Beta Right Now
Jul 06, 2025 am 09:24 AM
MacOS Tahoe 26 introduces the brand new Liquid Glass interface, adds the Phone app to Mac, enhances Spotlight with actions, includes new Apple Intelligence features, a dedicated Games app, Messages backgrounds for WhatsApp users, Live Activities from
 MacOS Tahoe 26 Compatible Mac List & System Requirements
Jul 06, 2025 am 09:20 AM
MacOS Tahoe 26 Compatible Mac List & System Requirements
Jul 06, 2025 am 09:20 AM
MacOS Tahoe 26 has officially arrived, and from the very first glance, you’ll notice a dramatic change with the brand-new Liquid Glass interface. This fresh design leans heavily on translucency, glossy icons and buttons, and an overall refreshed aest
 How to Create a Bootable macOS Tahoe 26 Beta USB Installer Drive
Jul 06, 2025 am 09:19 AM
How to Create a Bootable macOS Tahoe 26 Beta USB Installer Drive
Jul 06, 2025 am 09:19 AM
Creating a bootable macOS Tahoe installer USB is a useful method to perform clean installs, upgrade multiple Macs without redownloading, or maintain a reliable recovery disk. To create a bootable Tahoe installer, there are several prerequisites, but
 How to use a Windows keyboard on a Mac
Jul 08, 2025 am 12:12 AM
How to use a Windows keyboard on a Mac
Jul 08, 2025 am 12:12 AM
When typing on a Mac using a Windows keyboard, the Win key corresponds to the Command key and the Alt key corresponds to the Option key; 1. Understand the key mapping: The Win key replaces the Command key for commonly used shortcut keys such as Command C/V, the Alt key replaces the Option key for special symbol input, and the right Alt key may be mapped to Control or other functions; 2. Adjust the keyboard mapping can be customized through system settings or third-party tool Karabiner-Elements; 3. In terms of function keys and multimedia key support, the F key needs to be used with the Fn key, the default brightness and volume function can be adjusted, and some brand shortcut keys are incompatible and need to be customized; 4. Common shortcut key comparison includes copy and paste.
