


Mac screen recording can be realized through the system's own tools and third-party software. First, use "Shortcut Commands" to quickly record the screen. Open "Shortcut Commands" and search for "New Screen Recording". Click the red button to start recording. You can use the small arrow to select whether to record the microphone or system audio; after recording, the preview window will automatically pop up and save the file. Secondly, using QuickTime Player can obtain more stable audio and video effects. Open QuickTime Player, click "File" > "New Screen Recording", select the recording device and click anywhere on the screen to start recording. Finally, if you need more functions, you can choose third-party tools, such as OBS Studio is suitable for multi-scene switching and live broadcast, ScreenFlow is suitable for professional video tutorial production, and Loom is convenient for remote collaboration and communication.

Screen recording is actually quite simple on Mac, and the system comes with tools to meet most needs. If you just want to quickly record an operation process, make a tutorial or save video content, you don’t need to install third-party software at all.

Use "Shortcut Commands" to start recording
The screen recording function that comes with Mac is hidden in the "Shortcuts". You can find the "Shortcuts" in "Others" through Launchpad, and then search for "New Screen Recording". After clicking in, you will see an interface similar to a video recorder. Click the red button to start recording.
- Before starting, you can click the small arrow in the upper right corner to select whether to record microphone sound or system audio.
- If you don't want to record sounds, please uncheck "Microphone"
- After recording, a preview window will automatically pop up. You can select "Save as" to save the file
This method is suitable for daily use, such as recording a small operation demonstration or saving web videos.

Use QuickTime Player to record and draw more stable
If you need to record more clearly, especially with requirements for both picture and sound, QuickTime Player is a good choice. It is also built into the system, and the opening method is very simple:
- Open QuickTime Player (can be found in Launchpad or search)
- Click "File" > "New Screen Recording"
- Select the recording device (such as microphone or system audio) in the pop-up option
- After clicking the "Screen Recording" button, a red circle timer will appear. Click anywhere on the screen to start recording.
The advantage of this method is that it has better stability, especially suitable for recording teaching videos or product demonstrations.
Third-party tool recommendation (optional)
Although the system comes with its own functions, if you have more complex needs, such as editing, annotation, camera recording, etc., you can consider some third-party tools, such as:
- OBS Studio : Free and open source, supports multi-scene switching, live streaming
- ScreenFlow : Powerful, suitable for professional video tutorials
- Loom : One-click recording, fast upload speed, suitable for remote collaboration and communication
These tools have their own characteristics, and you can choose one that is easy to use according to your own purpose.
Basically these are the methods. The screen recording function of Mac is not complicated but is quite practical. The key is to choose the right tool according to your needs.
The above is the detailed content of How to record screen on Mac. For more information, please follow other related articles on the PHP Chinese website!

Hot AI Tools

Undress AI Tool
Undress images for free

Undresser.AI Undress
AI-powered app for creating realistic nude photos

AI Clothes Remover
Online AI tool for removing clothes from photos.

Clothoff.io
AI clothes remover

Video Face Swap
Swap faces in any video effortlessly with our completely free AI face swap tool!

Hot Article
Hot Tools

Notepad++7.3.1
Easy-to-use and free code editor

SublimeText3 Chinese version
Chinese version, very easy to use

Zend Studio 13.0.1
Powerful PHP integrated development environment

Dreamweaver CS6
Visual web development tools

SublimeText3 Mac version
God-level code editing software (SublimeText3)
Hot Topics


 Can I Show the Dock on All Screens on Mac? Using Dock on Different Displays in macOS
Jul 03, 2025 am 09:30 AM
Can I Show the Dock on All Screens on Mac? Using Dock on Different Displays in macOS
Jul 03, 2025 am 09:30 AM
If you're using a Mac with multiple monitors, you might be curious about how to display the Dock on all screens or whether it's possible to add a Dock to secondary displays.The good news is that you can configure the Dock to appear on any screen conn
 How to Remove Old Devices from Apple ID on Mac
Jul 07, 2025 am 09:08 AM
How to Remove Old Devices from Apple ID on Mac
Jul 07, 2025 am 09:08 AM
If you've owned multiple Apple devices over the years, you might find yourself in a situation where some of those older Macs, iPhones, iPads, or other Apple hardware have been sold, given away, or traded. No matter how they left your possession, it's
 How to Play Fortnite on Mac with FnMacAssistant & Sideloadly
Jul 05, 2025 am 09:21 AM
How to Play Fortnite on Mac with FnMacAssistant & Sideloadly
Jul 05, 2025 am 09:21 AM
Fortnite is once again available for iPhone and iPad users, bringing joy to many gamers. However, there's still no official version for Mac (at least not yet). Despite that, Apple Silicon Mac owners aren’t completely out of luck—you can run the iOS/i
 How to Enable iCloud Private Relay on Mac
Jul 05, 2025 am 09:36 AM
How to Enable iCloud Private Relay on Mac
Jul 05, 2025 am 09:36 AM
iCloud Private Relay is an excellent privacy feature included with the iCloud subscription, designed to safeguard your online activity and browsing by masking your IP address (using a temporary one) and encrypting DNS lookups. This prevents third pa
 How to Allow Apps During Downtime on Mac
Jul 04, 2025 am 09:03 AM
How to Allow Apps During Downtime on Mac
Jul 04, 2025 am 09:03 AM
Are you using Screen Time to manage your or your child’s Mac usage? If yes, you likely already know that it allows you to set app limits, schedule downtime on the Mac, and more. Additionally, you can also choose specific apps that remain accessible a
 How to Make MacOS Sequoia Feel Faster: Tips to Speed Up Slow MacOS
Jul 05, 2025 am 09:28 AM
How to Make MacOS Sequoia Feel Faster: Tips to Speed Up Slow MacOS
Jul 05, 2025 am 09:28 AM
macOS Sequoia is a solid operating system that brings some impressive features like iPhone Mirroring, and while performance is excellent for many users, not everyone experiences the same level of speed. If you're finding macOS Sequoia slower than pre
 How to See All Links Shared in Messages on iPhone & iPad
Jul 05, 2025 am 09:31 AM
How to See All Links Shared in Messages on iPhone & iPad
Jul 05, 2025 am 09:31 AM
If you frequently use iMessage, then you've likely shared numerous web links in your chats — maybe an article, a video, a tweet, a song, or anything else. Locating these links later can be quite frustrating, but thankfully there's a simpler method th
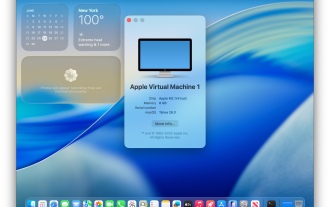 Create a MacOS Tahoe 26 Beta VM with Three Commands in Terminal Using tart
Jul 06, 2025 am 09:28 AM
Create a MacOS Tahoe 26 Beta VM with Three Commands in Terminal Using tart
Jul 06, 2025 am 09:28 AM
Advanced Mac users familiar with the command line can swiftly set up a MacOS Tahoe 26 beta virtual machine by entering a few commands into Terminal, using tart. Tart is a command-line utility for managing virtual machines and offers one of the quicke
