


To boot a Mac from an external hard disk, first make sure that the hard disk is equipped with a complete and correctly formatted macOS system, such as a boot disk made by "Migration Assistant", "Disk Utility", "Terminal" command or third-party tool; secondly, connect the hard disk to the USB-C or Thunderbolt interface of the Mac under shutdown; then immediately press and hold the Option (?) key when powering on; then use the mouse or keyboard to select the external hard disk to boot; if the recognition fails, check the cable and power supply; after successful startup, you can perform system repair, data migration, test new macOS or clean files, etc., but avoid unplugging the hard disk during operation to avoid system crash or data loss.

Booting a Mac from an external hard drive is actually easier than it sounds, but it does require a little preparation. This is useful if you need to use another system's macOS to repair the current system, migrate data, or try a new version of macOS without affecting the main system.

Make sure the external hard drive is bootable
It can't be used to boot a Mac by simply plugging in a mobile hard drive. First, you must confirm that the hard disk contains the complete macOS system and the format is correct (for example, using APFS or Mac OS extension format).
Common situations include:
- You have created a boot disk using Migration Assistant or Disk Utility
- Create a cloning system using the Terminal command or a third-party tool such as Carbon Copy Cloner
- Apple's official recovery partition or installer can also be used as a temporary boot disk
If you are not sure, you can plug it into your Mac first, and then go to the "Boot Disk" preferences to see if there is an optional system displayed.

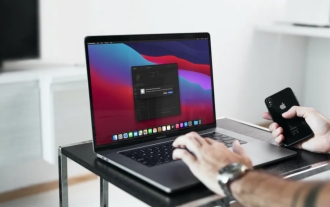
Restart the Mac after plugging in the device
Turn off your Mac and plug in the external hard drive (it is best to plug it directly into the USB-C or Thunderbolt interface of the computer itself to avoid using the docking station to increase success rate).
Then press the power button to turn on, and immediately start pressing and holding down the Option (?) key after hearing the "dong" sound. Some new M1/M2 chip Macs may not require buttons, but will automatically enter the startup management interface. However, for the sake of safety, manual operation is still recommended.
Select the external hard drive in the boot option
At this time you will see a boot management interface, which lists all available boot disks. You can see the built-in hard drive and the external hard drive icon that just plugged in.
Use the mouse to select the external hard drive item, or use the keyboard arrow keys to select it and press Enter.
If only one external hard drive is connected, it is usually selected by default. However, it is also possible to encounter unrecognized situations. At this time, you can check whether the cable supports data transmission and whether the hard disk is powered normally.
Things to note after entering the system
Once successfully booting into the external system, you will find that the system runs as usual, but the speed may be affected by the hard disk read and write performance. For example, if you use a boot disk installed with an ordinary USB disk, the response will be slower; while if you use a high-speed SSD, it will be much smoother.
At this time you can do the following:
- Check and fix problems with the main hard drive
- Use Migration Assistant to migrate old data to new machine
- Test whether the new version of macOS is compatible with your software
- Clean up files that are not accessible to the main system
It should be noted that: do not unplug the external hard drive at will , otherwise it may cause system crash or data loss.
Basically that's it. Although the steps seem a bit too many, the actual operation is not complicated. As long as you prepare a bootable external connector, there will basically be no problems.
The above is the detailed content of How to boot a Mac from an external drive. For more information, please follow other related articles on the PHP Chinese website!

Hot AI Tools

Undress AI Tool
Undress images for free

Undresser.AI Undress
AI-powered app for creating realistic nude photos

AI Clothes Remover
Online AI tool for removing clothes from photos.

Clothoff.io
AI clothes remover

Video Face Swap
Swap faces in any video effortlessly with our completely free AI face swap tool!

Hot Article
Hot Tools

Notepad++7.3.1
Easy-to-use and free code editor

SublimeText3 Chinese version
Chinese version, very easy to use

Zend Studio 13.0.1
Powerful PHP integrated development environment

Dreamweaver CS6
Visual web development tools

SublimeText3 Mac version
God-level code editing software (SublimeText3)


 How to Remove Old Devices from Apple ID on Mac
Jul 07, 2025 am 09:08 AM
How to Remove Old Devices from Apple ID on Mac
Jul 07, 2025 am 09:08 AM
If you've owned multiple Apple devices over the years, you might find yourself in a situation where some of those older Macs, iPhones, iPads, or other Apple hardware have been sold, given away, or traded. No matter how they left your possession, it's
 How to Play Fortnite on Mac with FnMacAssistant & Sideloadly
Jul 05, 2025 am 09:21 AM
How to Play Fortnite on Mac with FnMacAssistant & Sideloadly
Jul 05, 2025 am 09:21 AM
Fortnite is once again available for iPhone and iPad users, bringing joy to many gamers. However, there's still no official version for Mac (at least not yet). Despite that, Apple Silicon Mac owners aren’t completely out of luck—you can run the iOS/i
 How to Enable iCloud Private Relay on Mac
Jul 05, 2025 am 09:36 AM
How to Enable iCloud Private Relay on Mac
Jul 05, 2025 am 09:36 AM
iCloud Private Relay is an excellent privacy feature included with the iCloud subscription, designed to safeguard your online activity and browsing by masking your IP address (using a temporary one) and encrypting DNS lookups. This prevents third pa
 How to Make MacOS Sequoia Feel Faster: Tips to Speed Up Slow MacOS
Jul 05, 2025 am 09:28 AM
How to Make MacOS Sequoia Feel Faster: Tips to Speed Up Slow MacOS
Jul 05, 2025 am 09:28 AM
macOS Sequoia is a solid operating system that brings some impressive features like iPhone Mirroring, and while performance is excellent for many users, not everyone experiences the same level of speed. If you're finding macOS Sequoia slower than pre
 How to See All Links Shared in Messages on iPhone & iPad
Jul 05, 2025 am 09:31 AM
How to See All Links Shared in Messages on iPhone & iPad
Jul 05, 2025 am 09:31 AM
If you frequently use iMessage, then you've likely shared numerous web links in your chats — maybe an article, a video, a tweet, a song, or anything else. Locating these links later can be quite frustrating, but thankfully there's a simpler method th
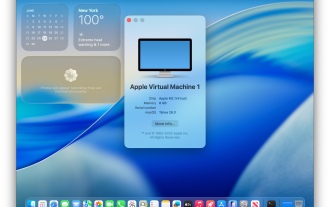 Create a MacOS Tahoe 26 Beta VM with Three Commands in Terminal Using tart
Jul 06, 2025 am 09:28 AM
Create a MacOS Tahoe 26 Beta VM with Three Commands in Terminal Using tart
Jul 06, 2025 am 09:28 AM
Advanced Mac users familiar with the command line can swiftly set up a MacOS Tahoe 26 beta virtual machine by entering a few commands into Terminal, using tart. Tart is a command-line utility for managing virtual machines and offers one of the quicke
 WindowServer Quit Unexpectedly: How to Fix It on Mac Air/Pro?
Jul 05, 2025 am 09:17 AM
WindowServer Quit Unexpectedly: How to Fix It on Mac Air/Pro?
Jul 05, 2025 am 09:17 AM
What is WindowServer and why is it importantWindowServer is a core macOS process that manages how apps and windows appear on screen. It handles GUI rendering, controls internal and external displays, and enables all vis
 iOS 15.3 Beta 2 & iPadOS 15.3 Beta 2 Released for Testing
Jul 06, 2025 am 09:25 AM
iOS 15.3 Beta 2 & iPadOS 15.3 Beta 2 Released for Testing
Jul 06, 2025 am 09:25 AM
While Apple has just made iOS 15.2.1 and iPadOS 15.2.1 available to all users, they have also rolled out the second beta of iOS 15.3 and iPadOS 15.3 for those participating in Apple's beta testing programs for mobile operating systems.In addition, ne
