


Activate Mission Control using trackpad gestures, the Mission Control key, keyboard shortcuts, or Dock icon. 2. Switch between apps and windows by clicking them directly in the overview, including grouped or hidden windows. 3. Manage desktops and Spaces by adding, reordering, assigning apps, or removing empty desktops via the Spaces bar. 4. Customize settings for shortcuts, app grouping, and Space arrangement in System Settings. Bonus tips include assigning apps to specific desktops and using keyboard shortcuts for quick navigation, enhancing multitasking efficiency across single or multiple monitors.

Using Mission Control on Mac is a great way to stay organized and quickly manage your open apps, windows, and desktops. It gives you an overview of everything running and lets you switch between tasks efficiently. Here’s how to use it effectively:

1. Activate Mission Control
There are several ways to open Mission Control:
- Swipe up with three or four fingers on your trackpad (depending on your settings).
-
Press the Mission Control key (usually
F3orF9, orfn F3on newer Macs with function keys). - Press Control Up Arrow on your keyboard.
- Click the Mission Control icon in the Dock (if added).
Once activated, all your open windows spread out at the top of the screen, full-screen apps appear on the right, and Spaces (virtual desktops) show up along the top.

2. Switch Between Apps and Windows
When Mission Control is active:
- Click any window to bring it forward.
- Grouped app windows appear together—click the app group to see all its open windows.
- Use Mission Control to find minimized or hidden windows that are hard to locate otherwise.
This is especially useful when you have many windows open and want to quickly jump to one without minimizing others manually.

3. Manage Desktops and Spaces
Mission Control lets you create and manage multiple desktops:
- Move your cursor to the top of the screen while in Mission Control to see the Spaces bar.
- Click the " " button on the far right to add a new desktop.
- Drag apps or windows upward from the main view to assign them to a specific desktop.
- Reorder desktops by dragging them left or right.
- Remove a desktop by hovering over it and clicking the "X" (only for empty ones).
You can use different desktops for different tasks—like one for work apps, one for web browsing, and another for communication tools.
4. Customize Mission Control Settings
Go to System Settings > Desktop & Screen Saver > Mission Control (or System Preferences > Mission Control on older macOS versions) to adjust:
- Trackpad and keyboard shortcuts
- Whether windows from the same app should group together
- How Spaces are arranged (automatically or manually)
- Options for Dashboard (if used)
For example, you can disable automatic rearrangement of Spaces based on most recent use if you prefer to keep them in a fixed order.
Bonus Tips
- Assign apps to specific desktops: Right-click an app in the Dock > Options > Assign To > This Desktop (or All Desktops).
- Use Control Left/Right Arrow to quickly switch between desktops without opening Mission Control.
- If you use multiple monitors, each can have its own set of Spaces—great for multitasking across screens.
Using Mission Control regularly can save time and reduce clutter. It’s not flashy, but once you get used to it, you’ll wonder how you worked without it.
The above is the detailed content of How to use Mission Control on Mac. For more information, please follow other related articles on the PHP Chinese website!

Hot AI Tools

Undress AI Tool
Undress images for free

Undresser.AI Undress
AI-powered app for creating realistic nude photos

AI Clothes Remover
Online AI tool for removing clothes from photos.

Clothoff.io
AI clothes remover

Video Face Swap
Swap faces in any video effortlessly with our completely free AI face swap tool!

Hot Article
Hot Tools

Notepad++7.3.1
Easy-to-use and free code editor

SublimeText3 Chinese version
Chinese version, very easy to use

Zend Studio 13.0.1
Powerful PHP integrated development environment

Dreamweaver CS6
Visual web development tools

SublimeText3 Mac version
God-level code editing software (SublimeText3)
Hot Topics


 How to set up WeChat Mac to automatically convert voice messages into text - How to set up voice to text conversion
Mar 19, 2024 am 08:28 AM
How to set up WeChat Mac to automatically convert voice messages into text - How to set up voice to text conversion
Mar 19, 2024 am 08:28 AM
Recently, some friends have consulted the editor about how to set up WeChat Mac to automatically convert voice messages into text. The following is a method for setting up WeChat Mac to automatically convert voice messages into text. Friends in need can come and learn more. Step 1: First, open the Mac version of WeChat. As shown in the picture: Step 2: Next, click "Settings". As shown in the picture: Step 3: Then, click "General". As shown in the picture: Step 4: Then check the option "Automatically convert voice messages in chat to text". As shown in the picture: Step 5: Finally, close the window. As shown in the picture:
 MacBook Pro, iMac to get the M4 upgrade later this year followed by MacBook Air in spring of 2025, claims reliable tipster
Jun 25, 2024 am 06:35 AM
MacBook Pro, iMac to get the M4 upgrade later this year followed by MacBook Air in spring of 2025, claims reliable tipster
Jun 25, 2024 am 06:35 AM
Ever since the Apple M4-powered OLED iPad Prolineuparrived, Apple Silicon aficionados have been eagerly awaiting the arrival of the M4 SoC on the Mac lineup. The M4 was undeniably a major leap forward in both compute and graphics performance - leapfr
 How to format a drive using GUID on Mac
Apr 12, 2024 am 09:13 AM
How to format a drive using GUID on Mac
Apr 12, 2024 am 09:13 AM
Formatting the drive of your Mac system is crucial for proper functioning. It helps prevent various system problems and makes your Mac more stable overall. While naturally Mac supports various partitioning schemes, GUID offers more modern and versatile features compared to other options. Also essential for newer Macs and supports larger drives, giving you the best compatibility and stability. This guide will take an in-depth look at how to format a drive using a GUID on macOS. That said, let's get started. Why GUID is important for macOS installation A GUID (full form of Globally Unique Identifier) ??is a partitioning scheme that helps install and run the macOS operating system. It is better than traditional MBR (main lead
 ChatGPT is now available for macOS with the release of a dedicated app
Jun 27, 2024 am 10:05 AM
ChatGPT is now available for macOS with the release of a dedicated app
Jun 27, 2024 am 10:05 AM
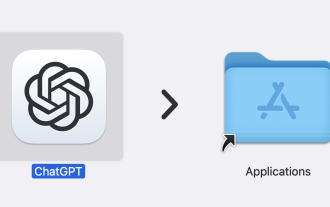
Open AI’s ChatGPT Mac application is now available to everyone, having been limited to only those with a ChatGPT Plus subscription for the last few months. The app installs just like any other native Mac app, as long as you have an up to date Apple S
 Apple iPhone 16 is no longer pre-installed with Apple Intelligence
Jul 30, 2024 pm 01:18 PM
Apple iPhone 16 is no longer pre-installed with Apple Intelligence
Jul 30, 2024 pm 01:18 PM
According to industry insider Mark Gurman, Apple’s Apple Intelligence will be postponed to October. In other words, it will be pushed first on iOS18.1. Apple iPhone 16 is expected to be released in September, so Apple Intelligence will not be pre-installed. 1. Apple Intelligence Apple Intelligence is a personal intelligence system that uses a powerful generative model to provide new functions for iPhone, iPad and Mac to assist users in communicating, working and expressing. 2. Natural language understanding The large model embedded in Apple Intelligence has a deep understanding of the meaning of language.
 How to post to Moments on WeChat Mac - How to post to Moments on WeChat Mac
Mar 18, 2024 pm 05:43 PM
How to post to Moments on WeChat Mac - How to post to Moments on WeChat Mac
Mar 18, 2024 pm 05:43 PM
Friends, do you know how to post Moments on WeChat Mac? Today I will explain how to post Moments on WeChat Mac. If you are interested, come and take a look with me. I hope it can help everyone. Step 1: After opening WeChat, click the Moments button on the left. Step 2: Next, click the camera button on the upper right side. Step 3: Enter the text content you want to send. Step 4: Next, click on who can watch. Step 5: In the pop-up box, select the viewable conditions and click OK. Step 6: Finally, click the Publish button.
 Where to view group announcements on WeChat Mac - How to view group announcements on WeChat Mac
Mar 18, 2024 pm 06:34 PM
Where to view group announcements on WeChat Mac - How to view group announcements on WeChat Mac
Mar 18, 2024 pm 06:34 PM
Recently, some friends asked the editor where to view group announcements on WeChat Mac? The following is a method for viewing group announcements on WeChat Mac. Friends who need it can come and learn more. Step 1: Let’s first click to open WeChat mac. Step 2: After opening WeChat, click on the list on the left to open a group. Step 3: After opening the group, you cannot directly see the group announcement. Step 4: We click on the group member icon on the upper right. Step 5: After clicking, a sidebar will open on the right. You can see that the group announcement is here, but only part of the content can be seen. Step 6: Click on the content of the group announcement, and a window will open, which displays the entire content of the announcement.
 How to open a specified web page when QQ Browser starts on mac - How to open a specified web page when it starts
Mar 18, 2024 pm 10:40 PM
How to open a specified web page when QQ Browser starts on mac - How to open a specified web page when it starts
Mar 18, 2024 pm 10:40 PM
Friends, do you know how to open the specified web page when QQ Browser starts on mac? Today I will explain how to open the specified web page when QQ Browser starts on mac. If you are interested, come and take a look with me. I hope it can help. to everyone. Step 1: First open the QQ browser and click the menu button. As shown in the picture: Step 2: Then, click Settings. As shown in the picture: Step 3: Next, click General Settings. As shown in the figure: Step 4: Then, click to open a specific web page or a group of web pages. As shown in the picture: Step 5: Click the settings page on the right. As shown in the picture: Step 6: Finally, after setting up the website, click the OK button. As shown in the picture:
