


When encountering display problems, resetting the Windows 11 display settings can be effectively solved; 1. Go to "Settings" → "System" → "Show" to view the current status; 2. Adjust separately for resolution, zoom, multi-display, direction and other issues; 3. Use "Restore Defaults" to reset the resolution and refresh rate; 4. Update or roll back the graphics card driver to troubleshoot driver problems. Follow the above steps and most display exceptions can be fixed.

Resetting Windows 11's display settings is not complicated, especially when encountering resolution abnormalities, miss zooming, or problems with multi-monitor settings. If you find that the screen display is abnormal, such as blurred fonts, deformation of the interface, and confusing taskbar position, you can try to restore the default display settings to solve the problem.
How to enter the display settings interface
To adjust or reset the display settings, you must first find the correct entry:
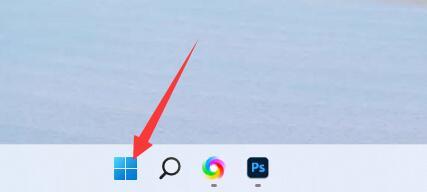
- Open Settings (can be opened via the Start Menu or Win I shortcut keys)
- Click System on the left and select Show
- Here you can see all the monitors currently connected, as well as related settings options: resolution, refresh rate, zoom ratio, direction, etc.
This interface is the starting point for most display problems. It is recommended not to change any settings first, just check whether the current status is normal.
Common situations and handling methods that require reset
Some display problems are not a system failure, but a accidentally changed certain parameters. Here are some common situations and corresponding solutions:
- The resolution is incorrect : On the "Show" page, click the drop-down menu to select the recommended resolution. If it is not the recommended value, please change it back.
- Text and apps look too big or too small : Check the "zoom" option, generally keep it at "100%" more stable unless you have special needs.
- Multi-monitor settings confusing : Drag the monitor icon to reorder it to make sure the main monitor is marked correctly. If a monitor does not display, you can click "Detection".
- The screen direction is tilted : for example, if it is rotated into a vertical screen, you can change it back to horizontal in the "direction".
These problems can be solved through simple settings and adjustments, without requiring complicated operations.
How to restore default display settings
If you want to restore all display settings to their initial state in one step, Windows 11 provides a "reset" feature:
- Open Settings → System → Display
- Scroll down to find Advanced Display Settings
- Click "Adapter Properties" in the "Related Settings" section
- Switch to the Monitor tab
- Click Restore Default Values under the Monitor Information area
However, it should be noted that this method is mainly to restore the default configuration related to resolution and refresh rate, and does not change the scaling or multi-display layout. If you have customized these contents before, you may need to manually reset them.
The display driver problem cannot be ignored
Sometimes the display exception is not a problem with the system settings, but a problem with the graphics card driver:
- You can try to update the driver: Right-click "This Computer" → "Management" → "Device Manager" → Expand "Show Adapter", right-click your graphics card and select "Update Driver"
- If you have recently updated the driver and there is a problem, you can also try "rollback the driver"
- Or go to the official website to download the latest official driver for installation
After the driver is updated, remember to restart it once to see the effect.
Basically that's it. Resetting the display settings itself is not difficult, but many people don’t know where to start at the beginning. As long as you take it step by step, most problems can be solved.
The above is the detailed content of How to reset Windows 11 display settings. For more information, please follow other related articles on the PHP Chinese website!

Hot AI Tools

Undress AI Tool
Undress images for free

Undresser.AI Undress
AI-powered app for creating realistic nude photos

AI Clothes Remover
Online AI tool for removing clothes from photos.

Clothoff.io
AI clothes remover

Video Face Swap
Swap faces in any video effortlessly with our completely free AI face swap tool!

Hot Article
Hot Tools

Notepad++7.3.1
Easy-to-use and free code editor

SublimeText3 Chinese version
Chinese version, very easy to use

Zend Studio 13.0.1
Powerful PHP integrated development environment

Dreamweaver CS6
Visual web development tools

SublimeText3 Mac version
God-level code editing software (SublimeText3)


 Causes and solutions to the screen offset problem in win11 operating system
Jan 02, 2024 pm 01:45 PM
Causes and solutions to the screen offset problem in win11 operating system
Jan 02, 2024 pm 01:45 PM
After using the win11 system, many friends have found that the win11 computer screen is not centered. It is very troublesome to use, and it will cause some functions and interfaces to be unable to display normally. At this time, we can solve the problem by setting the resolution or automatically adjusting the screen. Let’s take a look together below. Why is the win11 computer screen not centered? 1. Screen resolution 1. The computer screen is not centered. It may be because our resolution does not match the screen. 2. At this time, you need to open the start menu first, and then select "Settings" 3. After entering the settings interface, find "System" or "system" 4. Click "Display" in the left column and then adjust the screen rate , just adjust our resolution to be the same as the screen. Method Two:
 How to solve win11 font problem
Jan 13, 2024 pm 10:15 PM
How to solve win11 font problem
Jan 13, 2024 pm 10:15 PM
Some users find that their fonts are strange when using win11. This is actually a bug in win11. Microsoft has fixed it now, so we only need to update the system to solve it. Of course, if you don’t want to update, you can also try to change the font. to solve. Win11 fonts are weird: Method 1: Step 1, go to the system "Settings" through the start menu. Step 2, click "Windows Update" in the lower left corner. Step 3, install the latest win11 system update to solve the problem. Method 2: 1. Because this problem is a bug in Win11 for Song Dynasty. 2. So we only need to change other Chinese fonts. 3. There is no function to manually change the font in the system, so you can use "noMeiry"
 Win11 brightness adjustment position
Jan 14, 2024 am 08:24 AM
Win11 brightness adjustment position
Jan 14, 2024 am 08:24 AM
If we feel that the brightness of our screen is too bright or too dark and want to adjust the brightness, we may not be able to find the brightness adjustment in win11. In fact, we only need to enter the display settings in the settings to find it. Where is the brightness adjustment in win11: Answer: In the display settings. 1. We just need to click on the "Windows Logo" at the bottom, as shown in the picture. 2. Then open the "Settings" 3. Then enter the "Display" settings on the right. 4. Drag the brightness slider to adjust the brightness. 5. If it is a notebook, you can also try the "Fn" plus brightness button to adjust the brightness. 6. If it is a desktop computer, there will generally be buttons to adjust the brightness on the frame or bottom of the monitor.
 What's wrong with Win10 when I can't right-click to open the display settings?
Jun 29, 2023 pm 01:00 PM
What's wrong with Win10 when I can't right-click to open the display settings?
Jun 29, 2023 pm 01:00 PM
What’s wrong with the display settings that can’t be opened by right-clicking on Win10? Currently, there are still a lot of users using the Win10 system, and we will inevitably encounter various problems when using this system. For example, some users encounter the situation where the display settings cannot be opened by right-clicking, so how do we go about it? What's the solution? Let’s follow the editor to see the solution to the problem that the display settings cannot be opened by right-clicking. Solution steps for display settings that cannot be opened by right-clicking: 1. Open the Task Manager and press the Ctrl+Shift+ESC key combination on the keyboard to open the Task Manager; 2. Click [File] in the upper left corner of the Task Manager window and select the drop-down menu Click: Run new task, enter: Powershell, then click: Use system management
 How to solve the problem of incomplete screen in Win10
Jun 30, 2023 am 11:33 AM
How to solve the problem of incomplete screen in Win10
Jun 30, 2023 am 11:33 AM
What should I do if the screen display in Win10 is not full? Many friends often encounter various problems when using computers with Win10 system, such as incomplete display of the entire computer interface. How should we solve this problem when we encounter this situation? Let’s follow the editor to share the graphic and text tutorial on the incomplete display of the win10 system interface. Sharing of graphic tutorials on incomplete display of the win10 system interface 1. Right-click on a blank space on the computer desktop and select [Display Settings]. 2. In [Display], find [Advanced Display Settings] below. 3. Then select the recommended resolution in [Resolution] to set it. 4. After completing the selection, click [Apply] on the lower left. The above is what this site brings【
 Teach you how to adjust the computer resolution
Jul 23, 2023 am 10:33 AM
Teach you how to adjust the computer resolution
Jul 23, 2023 am 10:33 AM
I used the Win10 system as an example to practice how to adjust the computer resolution. In the previous XP system, you right-clicked on the desktop and selected Properties, and set the resolution in the properties. Win10 is a little different. 1. First, right-click the computer screen desktop, click Display Settings in the right-click menu, and click this option with the mouse. 2. Click in and click Display 3. Find the display resolution under Scale and Layout 4. In the display resolution setting options page, there is a resolution option. Click this option. The value displayed above is your current one. The resolution of the screen. After clicking, a series of setting options appear, select the required resolution parameters. 5. Click Save Changes. The above is the operation process of how to adjust the computer resolution. Let’s get started.
 How to adjust the display color of Windows 10 computer
Dec 22, 2023 pm 10:22 PM
How to adjust the display color of Windows 10 computer
Dec 22, 2023 pm 10:22 PM
Many friends who use the win10 system set up some colors to their liking after installing the system, but after a long time they don’t know how to restore them. Today I will teach you how to restore the default settings for win10 colors. Just change You can restore it by adjusting the options in the settings to the following. Let’s take a look at the details. How to adjust the abnormal color of win10 computer 1. Right-click a blank space on the desktop and click "Display Settings" 3. Click "Advanced Display Settings" 4. Select the display device properties of the incorrect color 5. Click the "Color Management" bar 6. Click "Color Management" 7. Click the "Advanced" column, click "Calibrate Monitor" 9. Then calibrate according to your actual situation Win10 color setting related issues>&
 How to set up hidden folder display in win7
Jan 02, 2024 pm 02:53 PM
How to set up hidden folder display in win7
Jan 02, 2024 pm 02:53 PM
The display setting of hidden folders is an important way to protect computer privacy, and can also avoid deleting some important files by mistake to a large extent. The method of displaying and setting hidden folders in win7 is also very simple. Let’s take a look at the specific steps. Win7 hidden folder display setting method 1. Hidden folder 1. First select the folder you want to hide. 2. Right-click to open the "Properties" menu. 3. In the "General" tab, check the "Hide" button and click OK. 4. We can find that the folder is hidden. 2. Show hidden folders 1. Find "Organization" in the upper left corner of your computer, and then select "Folder and Search Options". 2. Then in the "View" tab, check "Show hidden files,
