

Handle API authentication with Laravel Passport
Apr 03, 2024 pm 01:50 PM
php editor Xiaoxin will take you to explore using Laravel Passport to handle API authentication. Laravel Passport is a complete OAuth2 server implementation that can help developers easily implement API authentication and provides Many convenient features. Through this article, you will learn how to use Laravel Passport to manage API user authentication and ensure the security of the API interface.
Step 1. Install Laravel
We need to use the following command to create the latest Laravel application, so please open the terminal and execute:
laravel new auth
Step 2. Install Laravel Passport package
Laravel Passport can implement a complete OAuth2 server for your application in minutes.
composer require laravel/passport
Step 3. Run DatabaseMigration
Passport's migration will create the tables your application uses to store clients and Access Tokens.
PHP artisan migrate
Step 4. Generate a secret key
This command will create a secret key to generate a secure Access Token. In addition, it will also create personal access and passWord grant used to generate Access Token:
php artisan passport:install
After execution , add Laravel\Passport\HasApiTokens trait to your App\User model. This trait will add a series of helper functions to the model to verify the user's secret key and scope:
Step 5. Passport configuration
<?php

namespace App;

use Illuminate\Notifications\Notifiable;
use Illuminate\Foundation\Auth\User as Authenticatable;
use Laravel\Passport\HasApiTokens;

class User extends Authenticatable
{
    use Notifiable, HasApiTokens;
}
Next, you should AuthServiceProvider The Passport::routes method is called in the boot method in . This method will register the necessary routes to issue access tokens, revoke access tokens, client and personal tokens:
<?php
namespace App\Providers;
use Laravel\Passport\Passport;
use Illuminate\Support\Facades\Gate;
use Illuminate\Foundation\Support\Providers\AuthServiceProvider as ServiceProvider;
class AuthServiceProvider extends ServiceProvider
{
protected $policies = [
'App\Model' => 'App\Policies\ModelPolicy',
];
public function boot()
{
$this->reGISterPolicies();
Passport::routes();
}
}Finally, in the config/auth.php configuration file, You should set the api permission authentication guard's driver option to passport. When an API request that requires permission authentication comes in, your application will be told to use Passport's TokenGuard.
'guards' => [
    'WEB' => [
        'driver' => 'session',
        'provider' => 'users',
    ],
    'api' => [
        'driver' => 'passport',
        'provider' => 'users',
    ],
],
Step 6. Add API routing
Laravel provides the routes/api.php file for us to write web routes, so add a new route in this file That’s it.
<?php
use Illuminate\Http\Request;
Route::group([
'prefix' => 'auth'
], function () {
Route::post('login', 'AuthController@login');
Route::post('signup', 'AuthController@signup');
Route::group([
'middleware' => 'auth:api'
], function() {
Route::get('loGout', 'AuthController@logout');
Route::get('user', 'AuthController@user');
});
});Step 7: Create the controller
In the last step we must create a new controller and api method. So we first create AuthController and put the code in it:
<?php
namespace App\Http\Controllers;
use Illuminate\Http\Request;
use Illuminate\Support\Facades\Auth;
use Carbon\Carbon;
use App\User;
class AuthController extends Controller
{
public function signup(Request $request)
{
$request->validate([
'name' => 'required|string',
'email' => 'required|string|email|unique:users',
'password' => 'required|string|confirmed'
]);
$user = new User([
'name' => $request->name,
'email' => $request->email,
'password' => bcrypt($request->password)
]);
$user->save();
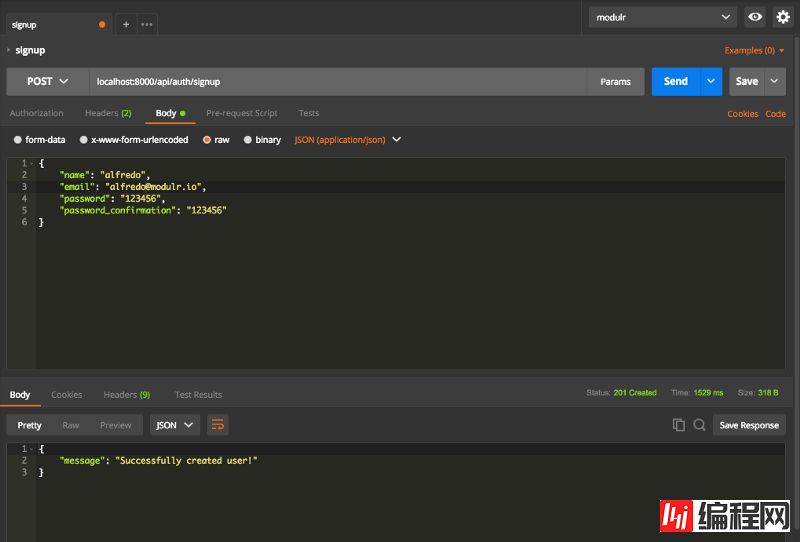
return response()->JSON([
'message' => 'Successfully created user!'
], 201);
}
public function login(Request $request)
{
$request->validate([
'email' => 'required|string|email',
'password' => 'required|string',
'remember_me' => 'boolean'
]);
$credentials = request(['email', 'password']);
if(!Auth::attempt($credentials))
return response()->json([
'message' => 'Unauthorized'
], 401);
$user = $request->user();
$tokenResult = $user->createToken('Personal Access Token');
$token = $tokenResult->token;
if ($request->remember_me)
$token->expires_at = Carbon::now()->addWeeks(1);
$token->save();
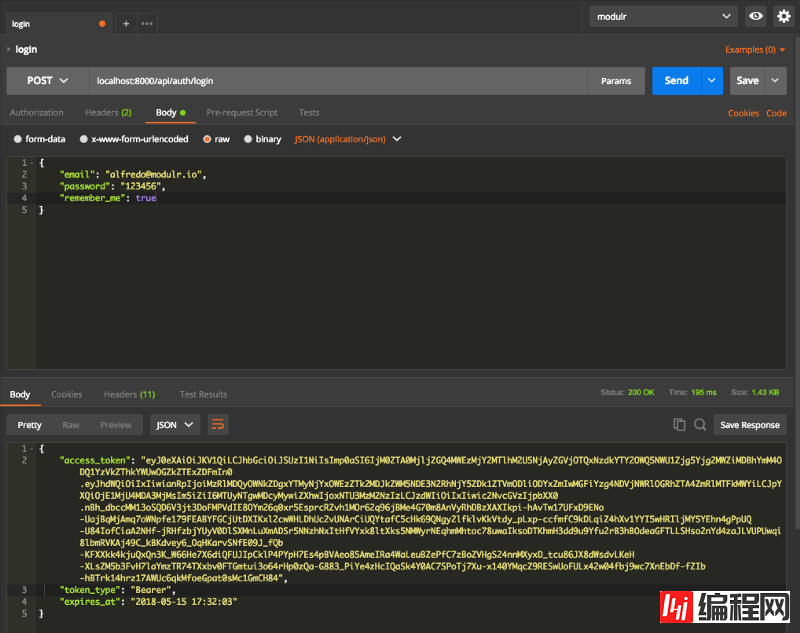
return response()->json([
'access_token' => $tokenResult->accessToken,
'token_type' => 'Bearer',
'expires_at' => Carbon::parse(
$tokenResult->token->expires_at
)->toDateTimeString()
]);
}
public function logout(Request $request)
{
$request->user()->token()->revoke();
return response()->json([
'message' => 'Successfully logged out'
]);
}
public function user(Request $request)
{
return response()->json($request->user());
}
}Now we are ready to run our example, run the following command to quickly run:
php artisan serve
Testing
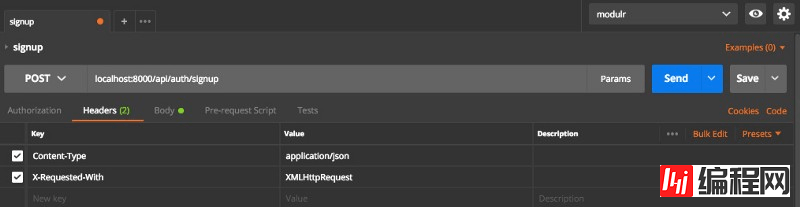
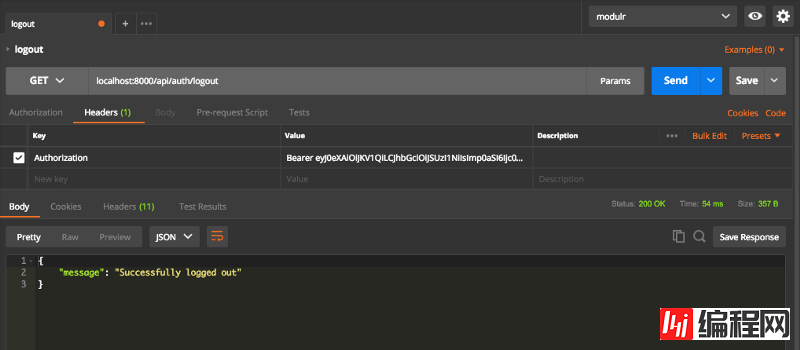
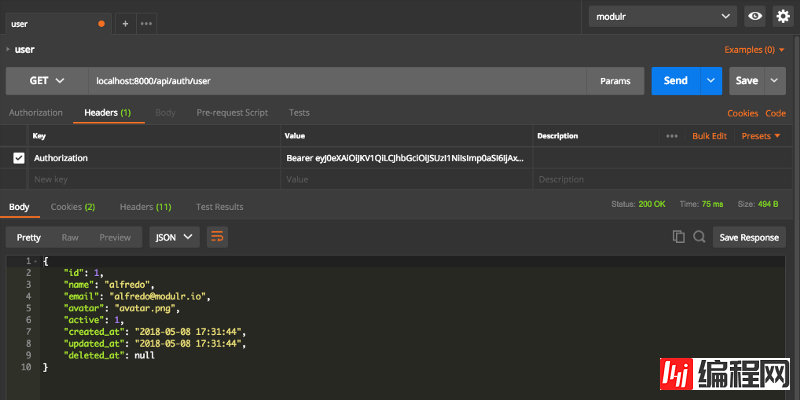
Now, we can use REST client tools to simplify testing, such as Postman. I ran the test and you can see the screenshot below.
You need to set the following two header information for this API:
Content-Type: application/json
X-Requested-With: XMLHttpRequest
Registration
Login
Logout
Thanks for reading!Resources
- GitHub ##Postman collections
The above is the detailed content of Handle API authentication with Laravel Passport. For more information, please follow other related articles on the PHP Chinese website!

Hot AI Tools

Undress AI Tool
Undress images for free

Undresser.AI Undress
AI-powered app for creating realistic nude photos

AI Clothes Remover
Online AI tool for removing clothes from photos.

ArtGPT
AI image generator for creative art from text prompts.

Stock Market GPT
AI powered investment research for smarter decisions

Hot Article
Hot Tools

Notepad++7.3.1
Easy-to-use and free code editor

SublimeText3 Chinese version
Chinese version, very easy to use

Zend Studio 13.0.1
Powerful PHP integrated development environment

Dreamweaver CS6
Visual web development tools

SublimeText3 Mac version
God-level code editing software (SublimeText3)

 How to correctly handle this pointing in a closure?
May 21, 2025 pm 09:15 PM
How to correctly handle this pointing in a closure?
May 21, 2025 pm 09:15 PM
The methods to correctly handle this pointing in JavaScript closures include: 1. Use arrow functions, 2. Use bind methods, 3. Use variables to save this. These methods ensure that this intrinsic function correctly points to the context of the external function.
 How to create a variable array in compact in PHP?
May 23, 2025 pm 07:57 PM
How to create a variable array in compact in PHP?
May 23, 2025 pm 07:57 PM
Using the compact function in PHP can create variable arrays concisely and efficiently, but pay attention to variable definitions, scopes and spelling errors. 1) Make sure the variable is defined before calling. 2) The variable name must be in the form of a string. 3) Combining the extract function can improve code readability and maintainability and avoid scope problems.
 How does using semantic HTML tags improve SEO (Search Engine Optimization)?
Jun 04, 2025 am 12:14 AM
How does using semantic HTML tags improve SEO (Search Engine Optimization)?
Jun 04, 2025 am 12:14 AM
Semantic HTML tags help search engines better understand and index content by improving web page structure and readability, thereby improving SEO. 1) Use labels with clear meaning (such as, , etc.) structured content to help search engines identify page roles and importance. 2) Improve index efficiency and keyword relevance and improve ranking. 3) Combining content quality and user experience, a comprehensive optimization strategy is formed.
 Usage of @ in mysql mysql variable declaration symbol analysis
May 23, 2025 am 06:03 AM
Usage of @ in mysql mysql variable declaration symbol analysis
May 23, 2025 am 06:03 AM
In MySQL, the @ symbol is used to declare and reference user-defined variables that are valid at the session level. 1. Declare and initialize the variable: SET@myVariable='Hello,MySQL!'; 2. Use variables in the query: SELECT@myVariableASmy_message; 3. Use variables to calculate: SET@number=10;SELECT@number*2ASresult.
 How to configure Windows 11 firewall to allow PHP services PHP port open and secure settings
Jul 23, 2025 pm 06:27 PM
How to configure Windows 11 firewall to allow PHP services PHP port open and secure settings
Jul 23, 2025 pm 06:27 PM
To allow PHP services to pass through the Windows 11 firewall, you need to create inbound rules to open the corresponding port or program. 1. Determine the port that PHP is actually listening. If the built-in server is started with php-Slocalhost:8000, the port is 8000. If using Apache or IIS, it is usually 80 or 443. 2. Open the advanced settings of "WindowsDefender Firewall", create a new inbound rule, select "Program" or "Port", fill in the PHP or Web server path or specify the port number. 3. Select Allow Connections, check the applicable network configuration file, name the rules and add a description. The IP addresses that are allowed to access, such as local network or specific IP, can be restricted through the scope. Safety
 Improving SEO with HTML5 semantic markup and Microdata.
Jul 03, 2025 am 01:16 AM
Improving SEO with HTML5 semantic markup and Microdata.
Jul 03, 2025 am 01:16 AM
Using HTML5 semantic tags and Microdata can improve SEO because it helps search engines better understand page structure and content meaning. 1. Use HTML5 semantic tags such as,,,, and to clarify the function of page blocks, which helps search engines establish a more accurate page model; 2. Add Microdata structured data to mark specific content, such as article author, release date, product price, etc., so that search engines can identify information types and use them for display of rich media summary; 3. Pay attention to the correct use of tags to avoid confusion, avoid duplicate tags, test the effectiveness of structured data, regularly update to adapt to changes in schema.org, and combine with other SEO means to optimize for long-term.
 Advanced JavaScript Scopes and Contexts
Jul 24, 2025 am 12:42 AM
Advanced JavaScript Scopes and Contexts
Jul 24, 2025 am 12:42 AM
The scope of JavaScript determines the accessibility scope of variables, which are divided into global, function and block-level scope; the context determines the direction of this and depends on the function call method. 1. Scopes include global scope (accessible anywhere), function scope (only valid within the function), and block-level scope (let and const are valid within {}). 2. The execution context contains the variable object, scope chain and the values of this. This points to global or undefined in the ordinary function, the method call points to the call object, the constructor points to the new object, and can also be explicitly specified by call/apply/bind. 3. Closure refers to functions accessing and remembering external scope variables. They are often used for encapsulation and cache, but may cause
 What is Somnia (SOMI) currency? Introduction to recent price trends and future outlook
Sep 17, 2025 am 06:18 AM
What is Somnia (SOMI) currency? Introduction to recent price trends and future outlook
Sep 17, 2025 am 06:18 AM
Directory What is Somnia (SOMI)? Price performance and market trends: Short-term volatility and long-term potential Technical advantages: Why can Somnia challenge the traditional Layer1? Future Outlook: 2025-2030 Price Forecast Conclusion: Somnia's Opportunities and SEO Content Opportunities Somnia (SOMI) is a high-performance Layer1 blockchain native token launched in September 2025. It has recently attracted much attention from the market due to its price fluctuations and technological innovation. As of September 12, 2025, Gate exchange data showed that SOMI price was temporarily at $1.28, although it had a pullback from the historical high of $1.90, it was still better than the main one.
