
 Computer Tutorials
Troubleshooting
how to fix win 10 blue screen 'kernel_security_check_failure'
Computer Tutorials
Troubleshooting
how to fix win 10 blue screen 'kernel_security_check_failure'
how to fix win 10 blue screen 'kernel_security_check_failure'
Jul 30, 2025 am 03:31 AM
Boot into Safe Mode by triggering Automatic Repair and selecting Startup Settings. 2. Update or roll back drivers in Device Manager, focusing on display, network, and storage adapters. 3. Run sfc /scannow in Command Prompt (Admin); if issues persist, run DISM /Online /Cleanup-Image /RestoreHealth followed by SFC again. 4. Test RAM using Windows Memory Diagnostic or MemTest86 to detect hardware faults. 5. Uninstall recent software or Windows updates that may be causing conflicts. 6. Run chkdsk C: /f /r to check and repair disk errors. 7. Disable overclocking in BIOS/UEFI to eliminate instability. 8. Scan for malware using Windows Defender or Malwarebytes. 9. Perform a clean boot via msconfig to isolate conflicting software. 10. As a last resort, reset Windows via Recovery with "Keep my files" option. The "KERNEL_SECURITY_CHECK_FAILURE" error is typically caused by driver issues, memory problems, or corrupted system files, and can usually be resolved step by step without data loss.

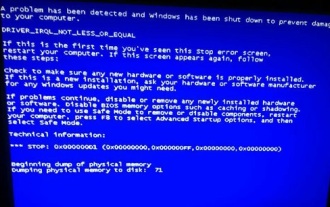
The "KERNEL_SECURITY_CHECK_FAILURE" blue screen error in Windows 10 usually indicates that the operating system detected a corruption or inconsistency in kernel-mode data structures—often related to drivers, memory, or system files. While it can be alarming, it’s often fixable with systematic troubleshooting. Here’s how to fix it:
1. Boot into Safe Mode
Before making changes, boot into Safe Mode to prevent problematic drivers or software from loading.
- Restart your PC and interrupt the boot process 3 times to trigger Automatic Repair.
- Go to Troubleshoot > Advanced Options > Startup Settings > Restart.
- Press F4 or 5 (for Safe Mode with Networking).
- Once in Safe Mode, proceed with the fixes below.
2. Update or Roll Back Drivers
Faulty or outdated drivers—especially for graphics, network, or storage—are common causes.
Steps:
- Press
Win X> Device Manager. - Look for devices with a yellow warning icon.
- Right-click and Update driver.
- Focus on:
- Display adapters
- Network adapters
- IDE/SATA controllers
- If the issue started recently, roll back the driver:
- Right-click device > Properties > Driver tab > Roll Back Driver (if available).
? Tip: Download the latest drivers from your PC or component manufacturer’s website (e.g., Intel, NVIDIA, AMD) instead of relying on Windows Update.
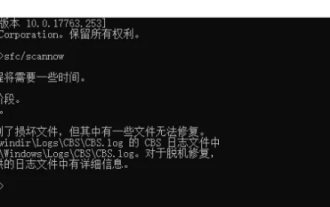
3. Run System File Checker (SFC) and DISM
Corrupted system files can trigger this error.

Run SFC:
- Open Command Prompt as Admin (search
cmd> right-click > Run as administrator). - Type:
sfc /scannow
- Wait for the scan to complete. If it finds and fixes issues, reboot and test.
Run DISM (if SFC fails):
- In the same Command Prompt:
DISM /Online /Cleanup-Image /RestoreHealth
- Wait for completion (may take 10–20 minutes), then run
sfc /scannowagain.
4. Check for Memory (RAM) Issues
Kernel corruption can stem from faulty RAM.
Use Windows Memory Diagnostic:
- Search for Windows Memory Diagnostic and run it.
- Choose Restart now and check for problems.
- After reboot, the test will run. If errors are found, test each RAM stick individually if possible.
? For more thorough testing, use MemTest86 (bootable USB tool).
5. Uninstall Recent Software or Updates
Recently installed software, especially antivirus, virtualization tools, or overclocking utilities, can interfere with kernel operations.
Uninstall suspicious software:
- Go to Settings > Apps > Installed apps.
- Remove anything installed just before the BSODs started.
Uninstall recent Windows Updates:
- Go to Settings > Windows Update > Update history > Uninstall updates.
- Remove the most recent quality or feature updates if the problem began after an update.
6. Check for Disk Errors
Hard drive or SSD issues can corrupt system data.
Run CHKDSK:
- Open Command Prompt (Admin).
- Type:
chkdsk C: /f /r
- Press Y to schedule on next reboot.
- Restart your PC and let the scan run (can take hours on large drives).
7. Disable Overclocking
If you’ve overclocked your CPU, GPU, or RAM, revert to default settings.
- Enter BIOS/UEFI and reset to default or optimized defaults.
- Save and exit.
Overclocking can cause instability that Windows interprets as a security check failure.
8. Scan for Malware
Rarely, malware can tamper with kernel operations.
- Run a full scan using Windows Defender or a trusted antivirus.
- Consider using Malwarebytes for a second opinion.
9. Perform a Clean Boot (Identify Conflicting Software)
Start Windows with minimal drivers and startup programs.
- Press
Win R, typemsconfig, hit Enter. - Under Services, check Hide all Microsoft services, then click Disable all.
- Go to Startup tab > Open Task Manager > disable all startup items.
- Restart. If the BSOD doesn’t occur, re-enable services/apps one by one to find the culprit.
10. Reset Windows (Last Resort)
If nothing works, consider resetting Windows.
- Go to Settings > System > Recovery > Reset this PC.
- Choose Keep my files and reinstall Windows.
- This preserves your data but removes apps and settings that might be causing issues.
Bottom line:
"KERNEL_SECURITY_CHECK_FAILURE" is often caused by drivers, memory issues, or corrupted system files. Start with SFC/DISM, driver updates, and Safe Mode testing. Rule out hardware (RAM, disk) early. Avoid third-party "driver fixer" tools—they often make things worse.
Basically, go step by step. Most cases are fixable without losing your data.
The above is the detailed content of how to fix win 10 blue screen 'kernel_security_check_failure'. For more information, please follow other related articles on the PHP Chinese website!

Hot AI Tools

Undress AI Tool
Undress images for free

Undresser.AI Undress
AI-powered app for creating realistic nude photos

AI Clothes Remover
Online AI tool for removing clothes from photos.

Clothoff.io
AI clothes remover

Video Face Swap
Swap faces in any video effortlessly with our completely free AI face swap tool!

Hot Article
Hot Tools

Notepad++7.3.1
Easy-to-use and free code editor

SublimeText3 Chinese version
Chinese version, very easy to use

Zend Studio 13.0.1
Powerful PHP integrated development environment

Dreamweaver CS6
Visual web development tools

SublimeText3 Mac version
God-level code editing software (SublimeText3)
Hot Topics


 How to solve the computer blue screen system thread exception not handled?
Mar 13, 2024 pm 02:46 PM
How to solve the computer blue screen system thread exception not handled?
Mar 13, 2024 pm 02:46 PM
When the computer is running, it is inevitable that the computer will have a blue screen, a black screen, unresponsive operations, etc. Recently, some users have reported to the editor that their computers have a blue screen code systemthreadexceptionnothandled. What does this mean? How do we solve this problem? Let’s take a look at the detailed solutions below. What does systemthreadexceptionnothandled mean? Answer: The systemthreadexceptionnothandled blue screen is usually caused by soft faults such as driver conflicts and virtual memory configuration errors. Incompatible hardware and software, drivers or updated patches cause damage to system files. Solution:
 How to solve the problem of Win11 blue screen stuck at 100%
Jan 03, 2024 pm 08:50 PM
How to solve the problem of Win11 blue screen stuck at 100%
Jan 03, 2024 pm 08:50 PM
When we install or update win11 system, we may encounter the situation where the progress bar is stuck at 100%. First, we need to wait for a period of time to confirm whether there is a real problem. After confirming the problem, we can solve it by repairing the mechanical failure. , let’s take a look below. What to do if win11 blue screen is stuck at 100%. Method 1. First, we wait in this interface for a while to confirm whether it is really stuck. 2. After waiting for more than 10 minutes to confirm the problem, first use the power button to restart the computer. 3. If you can enter the system normally, hold down the "shift" key on the keyboard, then click the start menu with the mouse, select "Power" - "Restart" 4. After restarting the system, you will automatically enter the advanced repair options, select "Startup and Failure"
 How to restart the computer without blue screen when playing League of Legends
Feb 13, 2024 pm 07:12 PM
How to restart the computer without blue screen when playing League of Legends
Feb 13, 2024 pm 07:12 PM
As one of the most popular and influential online games, LOL has a huge user base. However, many friends have recently reported to the editor that a blue screen appears when playing LOL. This is really terrible. How should I deal with it? Don’t panic when encountering anything. Here, the editor will share with you some tips on solving LOL blue screen. lol blue screen solution: Reason 1, the computer's own memory is insufficient, resulting in a blue screen solution: In order to solve the problem of insufficient hard disk space, we can take some measures. First, make sure not to store too many files and data on your hard drive, and try to delete some files you no longer need. Secondly, to regularly clean up temporary files generated by the system, you can use the system's own cleaning tool or third-party cleaning software. Furthermore, if there are
 What to do if the blue screen error code 0x00000124 appears in Win7 system? The editor will teach you how to solve it
Mar 21, 2024 pm 10:10 PM
What to do if the blue screen error code 0x00000124 appears in Win7 system? The editor will teach you how to solve it
Mar 21, 2024 pm 10:10 PM
Computers are now the most commonly used. Whether it is work, study, or life, they are everywhere. However, computers also have their problems. People are overwhelmed with all kinds of problems, such as the blue screen 0x00000124 error in the Win7 system of the computer. Code is one of the more common problems for win7 users. What should you do if you encounter this problem? For this reason, the editor has brought a method to solve the blue screen 0x00000124. In the process of using the win7 system, it is inevitable to encounter problems of one kind or another, especially problems such as blue screen or black screen, which are often encountered by users. Some users of the win7 ultimate system reported that a blue screen appeared when the computer was turned on. And prompts 0x00000124 error code, how to deal with this
 What to do if the blue screen code 0x0000001 occurs
Feb 23, 2024 am 08:09 AM
What to do if the blue screen code 0x0000001 occurs
Feb 23, 2024 am 08:09 AM
What to do with blue screen code 0x0000001? The blue screen error is a warning mechanism when there is a problem with the computer system or hardware. Code 0x0000001 usually indicates a hardware or driver failure. When users suddenly encounter a blue screen error while using their computer, they may feel panicked and at a loss. Fortunately, most blue screen errors can be troubleshooted and dealt with with a few simple steps. This article will introduce readers to some methods to solve the blue screen error code 0x0000001. First, when encountering a blue screen error, we can try to restart
 Revealing the root causes of win11 blue screen
Jan 04, 2024 pm 05:32 PM
Revealing the root causes of win11 blue screen
Jan 04, 2024 pm 05:32 PM
I believe many friends have encountered the problem of system blue screen, but I don’t know what is the cause of win11 blue screen. In fact, there are many reasons for system blue screen, and we can investigate and solve them in order. Reasons for win11 blue screen: 1. Insufficient memory 1. It may occur when running too many software or the game consumes too much memory. 2. Especially now there is a memory overflow bug in win11, so it is very likely to be encountered. 3. At this time, you can try to set up virtual memory to solve the problem, but the best way is to upgrade the memory module. 2. CPU overclocking and overheating 1. The causes of CPU problems are actually similar to those of memory. 2. It usually occurs when using post-processing, modeling and other software, or when playing large-scale games. 3. If the CPU consumption is too high, a blue screen will appear.
 An easy guide to fixing Windows 11 blue screen issues
Dec 27, 2023 pm 02:26 PM
An easy guide to fixing Windows 11 blue screen issues
Dec 27, 2023 pm 02:26 PM
Many friends always encounter blue screens when using computer operating systems. Even the latest win11 system cannot escape the fate of blue screens. Therefore, today I have brought you a tutorial on how to repair win11 blue screens. No matter whether you have encountered a blue screen or not, you can learn it first in case you need it. How to fix win11 blue screen method 1. If we encounter a blue screen, first restart the system and check whether it can start normally. 2. If it can start normally, right-click "Computer" on the desktop and select "Manage" 3. Then expand "System Tools" on the left side of the pop-up window and select "Event Viewer" 4. In the event viewer, we will You can see what specific problem caused the blue screen. 5. Then just follow the blue screen situation and events
 An effective method to solve the problem of win11 blue screen not restarting
Jan 04, 2024 pm 08:18 PM
An effective method to solve the problem of win11 blue screen not restarting
Jan 04, 2024 pm 08:18 PM
Sometimes when installing win11, there will be a blue screen showing 100% but not restarting. This may be because the system is stuck. We can try to restart manually. If it does not work after manual restart, there may be a problem with the system installed. Other system files need to be selected for installation. What to do if win11 blue screen is stuck at 100%. Method 1. Wait patiently for a while, because installing the system itself requires waiting. 2. If you still can't restart after a while, use the power button to restart manually. 3. If you enter the system directly after manual restart, it means that the installation has been completed and you can use it normally. Method 2 1. If we restart and re-enter the installation, and it is still stuck at 100%, it means that the system version is installed.
