


First, check physical connections by reconnecting the drive, trying a different USB port or computer, listening for unusual sounds, and swapping cables or enclosures. 2. Next, open Disk Management to see if the drive appears without a letter, as unallocated, or offline—if so, assign a drive letter, create a new volume (caution: this erases data), or bring it online. 3. Then, update or reinstall drivers via Device Manager by updating or uninstalling the disk drive and USB controllers. 4. Run the built-in Hardware and Devices troubleshooter in Settings to detect and fix issues. 5. For internal drives, check BIOS/UEFI during boot to confirm the drive is detected and SATA mode is correct. 6. Test with a Linux live USB or bootable tool like Hiren’s BootCD PE to determine if the drive is recognized outside Windows. 7. If the drive is visible but inaccessible, use data recovery software such as Recuva or TestDisk to retrieve files before formatting. A missing hard drive is often recoverable through these steps, and complete failure is rare if the drive is detected at any level, so always attempt recovery before assuming hardware loss.

If your hard drive isn’t showing up in Windows, it can be frustrating—especially if you need access to important files. The good news is, this issue is often fixable without replacing the drive. Here’s a step-by-step guide to help you get your hard drive recognized again.

1. Check Physical Connections and Hardware
Before diving into software fixes, rule out basic hardware issues.
- Unplug and reconnect the drive: If it’s an external drive, disconnect the USB cable, wait 10 seconds, and plug it back in. Try a different USB port—preferably one directly on the motherboard (not a hub).
- Try another computer: Connect the drive to a different PC or laptop. If it still doesn’t show up, the issue might be with the drive itself.
- Listen for sounds: A clicking or grinding noise could indicate physical damage. In that case, stop using the drive and consider professional data recovery.
- Swap cables or enclosures: For external drives, try a known-working cable or put the drive in a different enclosure.
2. Check Disk Management
Windows might not assign a drive letter, making it invisible in File Explorer.

- Press
Windows Xand select Disk Management. - Look for your drive in the list. It may appear as:
- "Unallocated" space
- Without a drive letter
- Labeled as "RAW" or "Unknown"
- If the drive is listed but has no letter:
- Right-click the partition and choose "Change Drive Letter and Paths"
- Click Add, assign a letter (e.g., E:), and click OK.
- If it says "Unallocated":
- Right-click the unallocated space and select New Simple Volume
- Follow the wizard to format it (?? this erases data—only do this if data isn’t important)
?? If the drive shows up in Disk Management but is labeled as "Offline," right-click it and choose "Online."
3. Update or Reinstall Drivers
Outdated or corrupted drivers can prevent detection.

- Press
Windows X> Device Manager - Expand Disk drives
- Find your drive (might show as generic USB device or with a yellow warning)
- Right-click it and select Update driver
- Choose "Search automatically for updated driver software"
- If that doesn’t work, right-click and Uninstall device, then unplug and replug the drive to reinstall the driver.
Also, check "Universal Serial Bus controllers" for any issues—update USB drivers if needed.
4. Run Hardware and Troubleshooters
Windows has built-in tools to detect hardware problems.
- Go to Settings > Update & Security > Troubleshoot > Additional troubleshooters
- Run the Hardware and Devices troubleshooter
- Follow the prompts and apply any recommended fixes
5. Check BIOS/UEFI (for Internal Drives)
If it’s an internal hard drive not showing up:
- Restart your computer and enter BIOS/UEFI (usually by pressing F2, Del, or Esc during boot)
- Navigate to the Storage or Main section
- Check if the drive appears in the list
- If not, the drive may not be properly connected or is dead
- If yes, ensure SATA mode (AHCI vs IDE) is correct
6. Test with Another OS or Bootable Tool
If Windows still doesn’t see it:
- Try booting from a Linux USB (like Ubuntu Live)—if the drive shows up there, the issue is likely Windows-related.
- Use a bootable tool like Hiren’s BootCD PE or Ultimate Boot CD to check if the drive is detected at the system level.
7. Data Recovery (If Drive Is Detected But Not Accessible)
If the drive appears in Disk Management but you can’t open it:
- Use data recovery software like Recuva, EaseUS Data Recovery, or TestDisk to retrieve files before formatting.
- Avoid writing new data to the drive until recovery is complete.
Final Notes
- A drive that’s completely undetected in BIOS, Disk Management, and other PCs likely has hardware failure.
- Regular backups are the best protection—use cloud storage or external drives.
- Don’t open the drive casing yourself—this can destroy data permanently.
Fixing a missing hard drive often comes down to checking connections, assigning a drive letter, or updating drivers. Most cases aren’t as serious as they first seem.
The above is the detailed content of How to fix hard drive not showing up. For more information, please follow other related articles on the PHP Chinese website!

Hot AI Tools

Undress AI Tool
Undress images for free

Undresser.AI Undress
AI-powered app for creating realistic nude photos

AI Clothes Remover
Online AI tool for removing clothes from photos.

Clothoff.io
AI clothes remover

Video Face Swap
Swap faces in any video effortlessly with our completely free AI face swap tool!

Hot Article
Hot Tools

Notepad++7.3.1
Easy-to-use and free code editor

SublimeText3 Chinese version
Chinese version, very easy to use

Zend Studio 13.0.1
Powerful PHP integrated development environment

Dreamweaver CS6
Visual web development tools

SublimeText3 Mac version
God-level code editing software (SublimeText3)
Hot Topics


 This Apple ID is not yet in use in the iTunes Store: Fix
Jun 10, 2024 pm 05:42 PM
This Apple ID is not yet in use in the iTunes Store: Fix
Jun 10, 2024 pm 05:42 PM
When logging into iTunesStore using AppleID, this error saying "This AppleID has not been used in iTunesStore" may be thrown on the screen. There are no error messages to worry about, you can fix them by following these solution sets. Fix 1 – Change Shipping Address The main reason why this prompt appears in iTunes Store is that you don’t have the correct address in your AppleID profile. Step 1 – First, open iPhone Settings on your iPhone. Step 2 – AppleID should be on top of all other settings. So, open it. Step 3 – Once there, open the “Payment & Shipping” option. Step 4 – Verify your access using Face ID. step
 VBOX_E_OBJECT_NOT_FOUND(0x80bb0001)VirtualBox error
Mar 24, 2024 am 09:51 AM
VBOX_E_OBJECT_NOT_FOUND(0x80bb0001)VirtualBox error
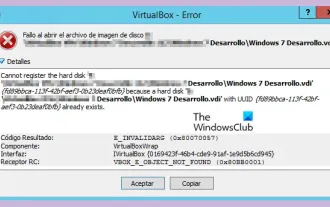
Mar 24, 2024 am 09:51 AM
When trying to open a disk image in VirtualBox, you may encounter an error indicating that the hard drive cannot be registered. This usually happens when the VM disk image file you are trying to open has the same UUID as another virtual disk image file. In this case, VirtualBox displays error code VBOX_E_OBJECT_NOT_FOUND(0x80bb0001). If you encounter this error, don’t worry, there are some solutions you can try. First, you can try using VirtualBox's command line tools to change the UUID of the disk image file, which will avoid conflicts. You can run the command `VBoxManageinternal
 Comprehensive Guide to PHP 500 Errors: Causes, Diagnosis and Fixes
Mar 22, 2024 pm 12:45 PM
Comprehensive Guide to PHP 500 Errors: Causes, Diagnosis and Fixes
Mar 22, 2024 pm 12:45 PM
A Comprehensive Guide to PHP 500 Errors: Causes, Diagnosis, and Fixes During PHP development, we often encounter errors with HTTP status code 500. This error is usually called "500InternalServerError", which means that some unknown errors occurred while processing the request on the server side. In this article, we will explore the common causes of PHP500 errors, how to diagnose them, and how to fix them, and provide specific code examples for reference. Common causes of 1.500 errors 1.
 How to fix the volume cannot be adjusted in WIN10
Mar 27, 2024 pm 05:16 PM
How to fix the volume cannot be adjusted in WIN10
Mar 27, 2024 pm 05:16 PM
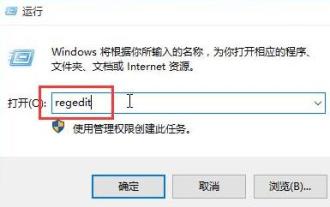
1. Press win+r to open the run window, enter [regedit] and press Enter to open the registry editor. 2. In the opened registry editor, click to expand [HKEY_LOCAL_MACHINESOFTWAREMicrosoftWindowsCurrentVersionRun]. In the blank space on the right, right-click and select [New - String Value], and rename it to [systray.exe]. 3. Double-click to open systray.exe, modify its numerical data to [C:WindowsSystem32systray.exe], and click [OK] to save the settings.
 iPhone stuck in airplane mode: How to fix it
Jun 15, 2024 pm 02:16 PM
iPhone stuck in airplane mode: How to fix it
Jun 15, 2024 pm 02:16 PM
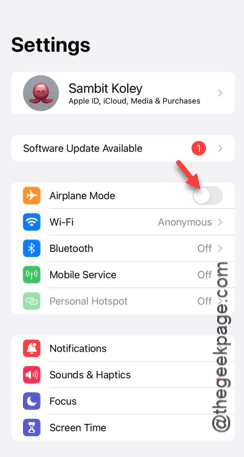
Airplane mode is very convenient in some situations. However, the same airplane mode may give you a headache if your iPhone suddenly gets stuck on it. In this article, we have designed this set of solutions to get your iPhone out of airplane mode. Quick fix – 1. Try disabling Airplane Mode directly from Control Center. 2. If you are unable to disable Airplane Mode from Control Center, you can disable Airplane Mode directly from the Settings tab – If these tips don’t work, follow the fixes below to resolve the issue. Fix 1 – Force Restart Your Device The process of force restarting your device is very simple. All you have to do is follow these step-by-step instructions. Step 1 – You can start the process by pressing and releasing the Volume Up button. step
 Kingston NV3 M.2 SSD is on sale in China: optional 512G-2TB, reading speed 5000 MB/s, starting from 319 yuan
Aug 12, 2024 pm 01:36 PM
Kingston NV3 M.2 SSD is on sale in China: optional 512G-2TB, reading speed 5000 MB/s, starting from 319 yuan
Aug 12, 2024 pm 01:36 PM
According to news from this site on August 12, Kingston NV3M.2 SSD is currently on sale on JD.com. The SSD is available in 512GB (500GB)/1TB/2TB versions (the 4TB version is not on the shelves). Its main reading speed is 5000MB/s. The price information compiled by the website is as follows: 512GB: 319 yuan 1TB: 449 yuan 2TB: 929 yuan Kingston NV3 adopts single-sided M.22280 size, suitable for laptops, equipped with PCIe4.0x4 controller, the read and write speeds of this website are as follows: 512GB: 5000 /3000MB/s1TB: 6000/4000MB/s2TB: 6000/5000MB/s Kingston will provide a 3-year limited warranty for NV3 SSDs
 How to disable the hard drive from entering hibernation in Mac system - How to disable the hard drive from entering hibernation in Mac system
Mar 18, 2024 pm 12:30 PM
How to disable the hard drive from entering hibernation in Mac system - How to disable the hard drive from entering hibernation in Mac system
Mar 18, 2024 pm 12:30 PM
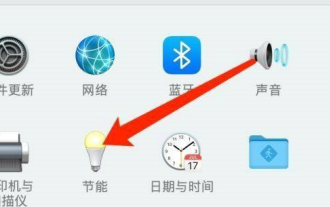
Friends, do you know how to prevent the hard drive from entering hibernation in the Mac system? Today I will explain how to prevent the hard drive from entering hibernation in the Mac system. If you are interested, please come and take a look with me. I hope it can help you. Step 1: After opening the computer system preferences, click Energy Saving (as shown in the picture). Step 2: After opening the energy saving page, click Power (as shown in the picture). Step 3: On the power settings page, uncheck the option "Put the hard drive into hibernation if possible" (as shown in the picture).
 How does the partition tool diskgenius partition the computer hard drive - How does the partition tool diskgenius partition the computer hard drive
Mar 05, 2024 am 09:34 AM
How does the partition tool diskgenius partition the computer hard drive - How does the partition tool diskgenius partition the computer hard drive
Mar 05, 2024 am 09:34 AM
The article brought to you in this issue is about the partition tool diskgenius. Do you know how the partition tool diskgenius partitions the computer hard drive? Below, the editor will bring you the method of partitioning the computer hard drive with the partition tool diskgenius. If you are interested Let’s take a look below. Select the partitioned hard drive and click the "Quick Partition" button above. Select the number of partitions on the left, resize each partition in the middle, and select the default partitions on the right. Note that the primary partition remains unchanged by default to avoid errors. After completing the changes, click OK to start the partitioning process. Wait for a few minutes to view the partition results.
