

How to install macOS on a Parallels virtual machine?
Jul 27, 2025 am 02:48 AM
Yes, installing macOS on a Parallels virtual machine is straightforward if you follow the correct steps. 1. Ensure your system meets the requirements: use Parallels Desktop 16 or newer, have sufficient RAM (minimum 8GB, recommended 16GB), at least 20–30GB of free disk space, and comply with Apple’s EULA by using Apple hardware. 2. Create the virtual machine by launching Parallels, selecting “Install macOS from Recovery Partition or Image,” allowing Parallels to detect or download the macOS installer, and allocating resources like CPU and RAM. 3. After installation, install Parallels Tools for better performance and integration, enable shared clipboard and drag-and-drop functionality, optionally set up snapshots for easy rollback, check for macOS updates, and adjust display settings if needed. 4. For advanced users, run multiple macOS versions by downloading separate installers and creating individual VMs, each customizable for specific purposes such as development testing or legacy app support.

Installing macOS on a Parallels virtual machine is actually one of the more straightforward ways to run macOS alongside your current OS, especially if you're on a Mac already. The process is smoother than many people expect, as long as you follow the right steps.

1. Make Sure You Meet the Requirements
Before jumping into installation, double-check that your system and software are up to the task:

- Parallels Desktop: You’ll need at least Parallels Desktop 16 or newer (earlier versions may not support newer macOS releases).
- macOS Version: You can only install macOS versions supported by Parallels — usually the latest few releases.
- Hardware Compatibility: Your Mac should have enough RAM (8GB minimum, 16GB recommended), and some free disk space (at least 20–30GB for the VM).
- License Compliance: Apple’s EULA allows macOS to be installed in a virtual machine only on Apple hardware. Don’t try this on non-Mac systems — it's against the rules.
If all that checks out, you’re good to go.
2. Create the Virtual Machine
Parallels makes this part pretty painless because it has built-in support for macOS installations:

- Open Parallels Desktop.
- Click File > New > Install macOS from Recovery Partition or Image.
- If you’ve already downloaded a macOS installer from the App Store, Parallels will detect it automatically. If not, it will guide you through downloading the correct version from Apple.
- Choose where to store the virtual machine (you can leave it as default unless you have a specific reason to change it).
- Allocate resources like CPU cores and RAM — the defaults are okay for most users, but if you're doing heavier tasks, bump them up a bit.
Once everything is set, click “Continue” and let Parallels do its thing. It’ll create the virtual machine and start installing macOS automatically.
3. Post-Installation Setup Tips
After macOS finishes installing, there are a few things you should take care of to make the experience smooth:
- Install Parallels Tools: This is crucial for better performance and integration. It enables features like shared folders, clipboard sharing, and better graphics support. Just go to the Actions menu inside Parallels and select Install Parallels Tools.
- Enable Shared Clipboard and Drag-and-Drop: These options are under the virtual machine settings. They make moving content between macOS and your host OS much easier.
- Set Up Snapshots (Optional): If you want to preserve the clean state of your VM, create a snapshot after installation. That way, you can roll back easily later if something goes wrong.
- Check for Updates: Once macOS is running, open System Settings and ensure your virtual macOS is up to date.
One common issue is display resolution — sometimes the VM doesn’t auto-scale properly. If that happens, just adjust the resolution manually in macOS Display Settings or enable "Full Screen" mode in Parallels for automatic resizing.
4. Running Multiple macOS Versions (Advanced)
If you want to test different macOS versions side-by-side (like Ventura and Sonoma), you can create multiple VMs:
- Download each macOS installer separately from the App Store.
- Hold Option (Alt) when launching the installer so Parallels knows you want to use a custom image.
- Point it to the correct installer app for the version you want.
Each VM will act independently, so you can customize them for different use cases — development testing, old apps, etc.
That’s basically it. Installing macOS in Parallels isn’t complicated once you know what to look for — just make sure your setup is compatible and don’t skip the post-install steps like Parallels Tools.
The above is the detailed content of How to install macOS on a Parallels virtual machine?. For more information, please follow other related articles on the PHP Chinese website!

Hot AI Tools

Undress AI Tool
Undress images for free

Undresser.AI Undress
AI-powered app for creating realistic nude photos

AI Clothes Remover
Online AI tool for removing clothes from photos.

Clothoff.io
AI clothes remover

Video Face Swap
Swap faces in any video effortlessly with our completely free AI face swap tool!

Hot Article
Hot Tools

Notepad++7.3.1
Easy-to-use and free code editor

SublimeText3 Chinese version
Chinese version, very easy to use

Zend Studio 13.0.1
Powerful PHP integrated development environment

Dreamweaver CS6
Visual web development tools

SublimeText3 Mac version
God-level code editing software (SublimeText3)
Hot Topics


 Where is the pycharm interpreter?
May 23, 2025 pm 10:09 PM
Where is the pycharm interpreter?
May 23, 2025 pm 10:09 PM
Setting the location of the interpreter in PyCharm can be achieved through the following steps: 1. Open PyCharm, click the "File" menu, and select "Settings" or "Preferences". 2. Find and click "Project:[Your Project Name]" and select "PythonInterpreter". 3. Click "AddInterpreter", select "SystemInterpreter", browse to the Python installation directory, select the Python executable file, and click "OK". When setting up the interpreter, you need to pay attention to path correctness, version compatibility and the use of the virtual environment to ensure the smooth operation of the project.
 The difference between programming in Java and other languages ??Analysis of the advantages of cross-platform features of Java
May 20, 2025 pm 08:21 PM
The difference between programming in Java and other languages ??Analysis of the advantages of cross-platform features of Java
May 20, 2025 pm 08:21 PM
The main difference between Java and other programming languages ??is its cross-platform feature of "writing at once, running everywhere". 1. The syntax of Java is close to C, but it removes pointer operations that are prone to errors, making it suitable for large enterprise applications. 2. Compared with Python, Java has more advantages in performance and large-scale data processing. The cross-platform advantage of Java stems from the Java virtual machine (JVM), which can run the same bytecode on different platforms, simplifying development and deployment, but be careful to avoid using platform-specific APIs to maintain cross-platformity.
 Commands and configurations for starting Apache service in macOS system
May 16, 2025 pm 10:00 PM
Commands and configurations for starting Apache service in macOS system
May 16, 2025 pm 10:00 PM
The command to start the Apache service on macOS is sudoapachectlstart, and the configuration file is located in /etc/apache2/. The main steps include: 1. Edit the httpd.conf file, modify the Listen port such as Listen8080; 2. Adjust the DocumentRoot path to the personal directory such as /Users/your_username/Sites, and update the corresponding permission settings; 3. Use the sudoapachectlgraceful command to restart Apache to ensure that the configuration takes effect; 4. Enable the mod_deflate module to compress data to improve page loading speed.
 How to stop Microsoft Edge automatic updates
May 21, 2025 am 10:12 AM
How to stop Microsoft Edge automatic updates
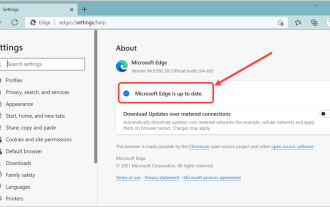
May 21, 2025 am 10:12 AM
How to stop Microsoft Edge Automatically Update Microsoft Edge is the default browser that comes with Windows 11. Earlier, the Edge browser received updates as the Windows operating system was updated. However, the Edge browser based on Chromium has changed that. The browser will now automatically update in the background without your knowledge. In this article, we will explain how to stop automatic Microsoft Edge updates in Windows 11 and macOS. Related: How to disable automatic updates in Google Chrome? Check for automatic edge updates Chromium-based Edge vs. Goo based on Chromium backend code
 MySQL installation tutorial teach you step by step the detailed steps for installing and configuration of mySQL step by step
May 23, 2025 am 06:09 AM
MySQL installation tutorial teach you step by step the detailed steps for installing and configuration of mySQL step by step
May 23, 2025 am 06:09 AM
The installation and configuration of MySQL can be completed through the following steps: 1. Download the installation package suitable for the operating system from the official website. 2. Run the installer, select the "Developer Default" option and set the root user password. 3. After installation, configure environment variables to ensure that the bin directory of MySQL is in PATH. 4. When creating a user, follow the principle of minimum permissions and set a strong password. 5. Adjust the innodb_buffer_pool_size and max_connections parameters when optimizing performance. 6. Back up the database regularly and optimize query statements to improve performance.
 Which is better, uc browser or qq browser? In-depth comparison and evaluation of uc and qq browsers
May 22, 2025 pm 08:33 PM
Which is better, uc browser or qq browser? In-depth comparison and evaluation of uc and qq browsers
May 22, 2025 pm 08:33 PM
Choosing UC browser or QQ browser depends on your needs: 1. UC browser is suitable for users who pursue fast loading and rich entertainment functions; 2. QQ browser is suitable for users who need stability and seamless connection with Tencent products.
 How to update the system's own software
May 19, 2025 pm 06:48 PM
How to update the system's own software
May 19, 2025 pm 06:48 PM
Updating the software that comes with macOS is simple and important because it can fix bugs, improve performance, bring new features and security improvements. You can update through the "Software Update" option in "System Settings" or "System Preferences" and follow the prompts. If you encounter problems, try restarting your Mac or checking your network connection, and the Apple Support page also provides a solution. It is recommended to keep the system up to date, back up data before update, and ensure Wi-Fi and sufficient storage space. Update details can be viewed on Apple's official website.
 How to adjust screen brightness on macOS
May 16, 2025 pm 08:39 PM
How to adjust screen brightness on macOS
May 16, 2025 pm 08:39 PM
Adjusting screen brightness on macOS can be fine-tuned using the brightness adjustment keys on the keyboard or through system preferences. 1. Press the Sun icon keys on the F1 and F2 keys to quickly adjust the brightness. 2. Drag the slider in the "Display" option in "System Preferences" to make minor adjustments. 3. Enable the "Auto-adjust brightness" function to make the brightness change with the ambient light. 4. Use the "Night View" mode to reduce blue light to protect your eyes. 5. Developers can use AppleScript to automate brightness adjustments.
