how to apply a transition to multiple clips at once in Premiere Pro
Jul 25, 2025 am 01:59 AMThere are three ways to apply transitions for multiple clips at once in Premiere Pro: First, after selecting all clips, select transitions in the effect panel and drag them to one clip point, right-click and select "Apply default transitions for all clips"; secondly, hold Shift to select multiple clip points, double-click or drag the desired transition to any selected position to apply in batches; finally, set the default transitions to speed up the workflow, the path is "Sequence>Apply default transitions to all clips", and select and set as default in the pop-up window. In addition, the duration of all transitions can be adjusted through the Preferences > Timeline or the right-click menu.

Applying a transition to multiple clips at once in Premiere Pro can save you a lot of time, especially when working on fast-paced edits. The key is knowing where to use the right tools and shortcuts — not every method is obvious if you're still getting comfortable with the software.
Use the Sequence Panel to Apply Transitions to Multiple Clips
If your clips are lined up end-to-end in the timeline (like in a standard cut sequence), you can apply transitions to all gaps at once:
- Select all the clips you want to add transitions to
- Go to the Effects panel, find your preferred transition under "Video Transitions"
- Drag it onto one of the edit points between two clips
- Right-click that transition and choose Apply Default Transition to All Cuts
This applies the same default transition (like a cross-dissolve) across all cuts in the sequence. It's super handy for interviews or photo montages where consistent transitions matter.
Batch Apply Custom Transitions Using Keyboard Shortcuts
If you need more control or only want to apply transitions to selected clips (not all cuts), here's how to do it:

- Hold Shift and click each clip boundary where you want a transition
- With all desired edit points selected, go to the Effects panel
- Choose your transition and double-click it — or drag it directly to one of the highlighted edit points
Premiere will automatically apply the transition to all selected edit points at once. This method gives you flexibility without needing to manually drag and drop dozens of transitions.
Set a New Default Transition for Faster Workflow
If you always use the same type of transition (say, a dip to black or a fade), setting a default saves clicks:
- Go to Sequence > Apply Default Transition to All Cuts
- If you haven't set a default yet, this action will trigger a prompt asking which transition you want to use
- Choose your preferred one from the list and check “Set as default transition”
Now, whenever you use the batch apply method above, Premiere will know exactly what transition to use.
One thing people often miss: You can adjust the duration of all transitions after applying them. Just change the default duration under Preferences > Timeline , or right-click any transition and choose Change Duration — that value will update globally if you've applied it to multiple clips.
Basically that's it.
The above is the detailed content of how to apply a transition to multiple clips at once in Premiere Pro. For more information, please follow other related articles on the PHP Chinese website!

Hot AI Tools

Undress AI Tool
Undress images for free

Undresser.AI Undress
AI-powered app for creating realistic nude photos

AI Clothes Remover
Online AI tool for removing clothes from photos.

Clothoff.io
AI clothes remover

Video Face Swap
Swap faces in any video effortlessly with our completely free AI face swap tool!

Hot Article

Hot Tools

Notepad++7.3.1
Easy-to-use and free code editor

SublimeText3 Chinese version
Chinese version, very easy to use

Zend Studio 13.0.1
Powerful PHP integrated development environment

Dreamweaver CS6
Visual web development tools

SublimeText3 Mac version
God-level code editing software (SublimeText3)

Hot Topics
 What are the fcpx shortcut keys?
Mar 17, 2023 am 10:21 AM
The fcpx shortcut keys are: 1. "Command-H" shortcut key, used to hide applications; 2. "Option-Command-H" shortcut key, used to hide other applications; 3. "Option-Command-K" shortcut key key for keyboard customization; 4. "Command-M" shortcut key for minimizing; 5. "Command-O" shortcut key for opening resource library, etc.
 Tips for editing video clips using Golang and FFmpeg
Sep 27, 2023 pm 06:33 PM
Tips for implementing video clip editing using Golang and FFmpeg Introduction: In the era of modern social networks and multimedia platforms, the demand for video editing is increasing. Whether you are making short videos, movie clips or video tutorials, you need to edit video clips. This article will introduce how to implement video clip editing techniques by using the Golang programming language and the FFmpeg tool, with specific code examples. 1. Install FFmpeg Before starting, we need to install the FFmpeg tool first.
 How to merge videos on iPhone
Jun 03, 2023 am 11:06 AM
How to combine videos on iPhone with iMovie If you have multiple videos on your iPhone that you want to merge into one, you don't need any third-party apps or software. You can combine videos easily and quickly using the built-in iMovie app. iMovie is a free video editing application that comes preinstalled on most iPhones. This is a great choice for combining videos because it's easy to use and has a variety of features. To merge videos using iMovie, follow these steps: Open iMovie. Click the New button. Choose a movie. Click the Import Media button. Select the videos you want to merge. Click the Add button. The video will be added to the timeline. Drag videos to desired order
 Teach you how to use Python to connect to Huawei Cloud interface to implement video editing and transcoding functions
Jul 05, 2023 pm 11:33 PM
Teach you how to use Python to connect to the Huawei Cloud interface to implement video editing and transcoding functions. Huawei Cloud is a world-leading cloud service provider that provides a wealth of cloud computing products and services. In terms of cloud video processing, Huawei Cloud provides powerful video editing and transcoding functions, providing developers with a very convenient interface. This article will introduce how to use Python to connect to Huawei Cloud interface to implement video editing and transcoding functions. First, we need to create a video editing and transcoding task on Huawei Cloud. In the Huawei Cloud console, select
 Is the full name of am Alight Motion?
Aug 18, 2022 pm 04:46 PM
The full name of am is Alight Motion, which is a comprehensive video editing and processing application software; this software has functions such as taking photos and videos, as well as video editing, video splicing, video editing and other functions. Users can edit video length and content, and can also perform simple processing on videos. A variety of exquisite materials are provided to everyone for free to help users create more perfect videos.
 China Unicom releases large image and text AI model that can generate images and video clips from text
Jun 29, 2023 am 09:26 AM
Driving China News on June 28, 2023, today during the Mobile World Congress in Shanghai, China Unicom released the graphic model "Honghu Graphic Model 1.0". China Unicom said that the Honghu graphic model is the first large model for operators' value-added services. China Business News reporter learned that Honghu’s graphic model currently has two versions of 800 million training parameters and 2 billion training parameters, which can realize functions such as text-based pictures, video editing, and pictures-based pictures. In addition, China Unicom Chairman Liu Liehong also said in today's keynote speech that generative AI is ushering in a singularity of development, and 50% of jobs will be profoundly affected by artificial intelligence in the next two years.
 How to edit videos on iQiyi_Notes on iQiyi video interception
Jan 11, 2024 pm 11:27 PM
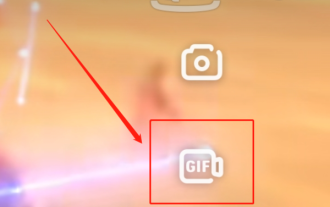
When it comes to iQiyi videos, everyone should be familiar with it. As one of the most popular video playback software in China, it is an essential tool for many friends to watch TV series. What should you do if you see some interesting clips while watching a movie or TV series using iQiyi Video and want to edit them? Next, I will introduce to you how to edit videos on iQiyi Video. I hope it can be helpful to friends in need. How to edit videos on iQiyi? Open the iQiyi video app on your phone and log in to your account. After logging in, find the video you want to edit and click play. After entering the video playback interface, click on the screen, and the options icon will appear on the left. Select the video interception icon in the middle and you will enter the video interception interface. In the video interception interface, you can
 How to edit videos in VideoStudio x10 - How to edit videos in VideoStudio x10
Mar 04, 2024 pm 05:50 PM
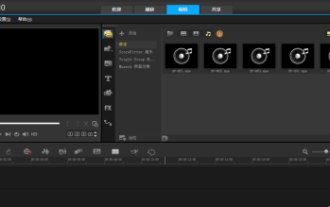
Many people are using VideoStudio x10 software in the office, but do you know how to edit videos with VideoStudio x10? Below, the editor will bring you how to edit videos with VideoStudio x10. Interested users can take a look below. Click to enter VideoStudio. As shown in the page below, you can see several tracks. There is the operation interface. From top to bottom, they are the video track, overlay track, title track, sound track, and music track. On the left side above is the video display, and on the right is the material adding area. In the middle is a column of option bars, which are media, including projects, animations, graphics, filters, and paths. So how do we export the video we have finished? You can see that there is a share above option, click it to see the video export format and path, so you can import


