
 Mobile Game Tutorial
Mobile Game Guide
Revenge Of The Savage Planet: All Zenithian Rift Printer Slurry Locations
Mobile Game Tutorial
Mobile Game Guide
Revenge Of The Savage Planet: All Zenithian Rift Printer Slurry Locations
Revenge Of The Savage Planet: All Zenithian Rift Printer Slurry Locations
Jun 03, 2025 pm 06:04 PM
Finding all the Printer Slurries on Zenithian Rift in Revenge of the Savage Planet is essential now that you're midway through the game. Upgrades are starting to cost more, and crafting specific gear is necessary to progress smoothly.

Zenithian Rift is one of the more intricate planets in the game, making the search for the Slurries more challenging. This guide will help you locate each one effortlessly.
All Printer Slurries On Zenithian Rift

Collecting Printer Slurries is vital for Zenithian Rift. They enable you to craft superior gear, aiding in your escape from the planet. However, similar to the hidden crates, the Slurries are well-concealed.
Before we begin, note that some Slurries require specific equipment to retrieve. This guide will explain their locations and how to unlock them.
Bilodeau's Floating Isles

Printer Slurry 1
This Slurry lies underwater, directly in front of the teleporter in the area. A barrier blocks it, which can only be lowered by charging the electric mushrooms surrounding the pool using the Ferro Goo Tank.
Charge each mushroom, then follow the veins leading to the pool's deepest part. Use your Survey tool to pinpoint the Slurry's exact location.

Printer Slurry 2 Head to the northern section of Bilodeau's Floating Isle. Climb to the main floating rock's top platform. At the base of this rock, on the northern side, you'll find a small platform with dehydrated mushrooms nearby.
Jump onto the platform and extract lava from the lava tree using the Lava Tank. Hydrate the mushrooms with the Power Hose to create a jumping point.
A barrier may block the entrance at the top; shoot it down and climb the mushrooms.

Proceed along the path to discover a frozen Printer Slurry. Melt the ice with the Lava Tank and wash away the lava with the Power Hose to uncover the Slurry.
Printer Slurry 3 Access this Slurry by crossing the floating platforms toward the main floating rock. At the base of the large rock, look downward to your left. You'll notice another Slurry on a platform reachable via a rocket jump.
After landing, eliminate the explosive enemies first. The Slurry is covered in ice and requires melting with the Lava Tank. Alternatively, shoot the explosive creatures; their explosions will break the ice.

There are multiple methods to unlock this Slurry.
Brrrts Frozen Grotto

Printer Slurry 4
Enter Frip's Big Chill to access this area. Proceed to the teleporter in the southern part of the region. Behind the teleporter, there's a tunnel to descend.
Go down the tunnel. Avoid jumping out upon reaching the other side. Instead, look left for a grapple point to use your Whip on. Leap to the ledge across the tunnel.
Use a Bombergranate or Blight Bomb to destroy the wall with red coloring in the center.

This action will collapse the wall, revealing a Printer Slurry.

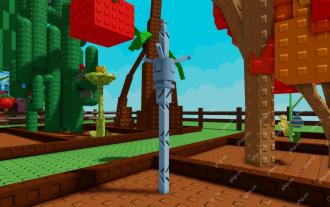
Plyxor's Shaft

Printer Slurry 5
This Slurry is tricky to spot due to its location. At the base of the shaft, two trees back a wall. One tree has its roots obscuring the Slurry.
Remove the roots to access the Slurry. Spot the tiny pink alien creatures scattered on the ground. When the tree opens its mouth, throw the pink creature inside.
This removes at least one root; you'll need to find two or three more to clear all roots.

Behind the teleporter in front of the tree, take the short path upward to reach behind the tree and collect the Slurry.
Printer Slurry 6
Retrieve this Slurry with the Magnetic Fork and the Hawx Rail Grinder. Alternatively, the Proton Whip Tether suffices, or upgraded Zoot Jump Thrusters will work.
At the base of Plyxor's Shaft, use the Hawx Rail Grinder and Whip to reach the top of Bilodeau's Floating Isles. However, don't exit the shaft just yet.
Above the exit on the right, there's a small ledge with a magnetic barrier. Jump to the ledge, then turn around and jump to another platform in front of the barrier.
Here, you'll find a magnetic throwable object to use with your Magnetic Fork.
Control the object and throw it at the barrier to lower it.

The Printer Slurry is on the other side. Simply jump down to claim it.
The Depths Of Trrn 
Printer Slurry 7
Upon entering The Depths of Trrn, head to the right side of the cave. Look for rock formations to climb. Near the teleporter by the lava, you'll find these rocks.
Climb the first rock and look right to spot a ledge. Use your Proton Whip Tether to cross the gap.
Chikit's Pool 
Printer Slurry 8 & 9
Both Slurries are grouped together and collected similarly. Access to Chickit's Pool requires defeating the Clawbarella boss and completing story missions on Zenithian Rift. Additionally, you'll need the Franx Underwater Scooter.
Fortunately, after meeting these prerequisites, you'll find a crate behind the boss, granting you the scooter.
Once equipped, follow the path to Chikit's Pool.
The first Slurry is at the base of the pool, close to the entrance. The second Slurry is under the exit point on the other side of the pool.

Exiting leads you near the teleporter in the Frip's Big Chill region.

The above is the detailed content of Revenge Of The Savage Planet: All Zenithian Rift Printer Slurry Locations. For more information, please follow other related articles on the PHP Chinese website!

Hot AI Tools

Undress AI Tool
Undress images for free

Undresser.AI Undress
AI-powered app for creating realistic nude photos

AI Clothes Remover
Online AI tool for removing clothes from photos.

Clothoff.io
AI clothes remover

Video Face Swap
Swap faces in any video effortlessly with our completely free AI face swap tool!

Hot Article
Hot Tools

Notepad++7.3.1
Easy-to-use and free code editor

SublimeText3 Chinese version
Chinese version, very easy to use

Zend Studio 13.0.1
Powerful PHP integrated development environment

Dreamweaver CS6
Visual web development tools

SublimeText3 Mac version
God-level code editing software (SublimeText3)
Hot Topics


 Roblox: Grow A Garden - All Animals And How To Get Them
May 07, 2025 am 12:56 AM
Roblox: Grow A Garden - All Animals And How To Get Them
May 07, 2025 am 12:56 AM
Roblox Grow A Garden's 1.04.0 update introduced a captivating pet system! Acquire and hatch various animal eggs to enhance your garden beyond mere aesthetics. These pets offer valuable boosts, including crop mutation, seed generation, and growth acc
 How to Remove & Clean Ink in Cash Cleaner Simulator
May 12, 2025 am 10:55 AM
How to Remove & Clean Ink in Cash Cleaner Simulator
May 12, 2025 am 10:55 AM
Dealing with ink-stained bills in Cash Cleaner Simulator? This guide shows you how to effectively remove ink and avoid costly mistakes. Ink-covered bills are a major challenge, instantly failing orders requiring clean bills and spreading mess if mis
 Revenge Of The Savage Planet: Every Outfit And How To Unlock It
May 09, 2025 am 04:04 AM
Revenge Of The Savage Planet: Every Outfit And How To Unlock It
May 09, 2025 am 04:04 AM
Stranded on an uncharted planet, recently laid off, with a chatty robot companion and lost gear? At least you've got your fashion sense! In Revenge of the Savage Planet, looking good while surviving is paramount. Death is just a minor setback; style
 Revenge Of The Savage Planet: All Stellaris Prime Scannables
May 08, 2025 pm 10:10 PM
Revenge Of The Savage Planet: All Stellaris Prime Scannables
May 08, 2025 pm 10:10 PM
Explore the diverse world of Stellaris Prime in Revenge of the Savage Planet! This guide details every scannable item found on this initial planet, categorized for easy reference. Get ready to fill your Kindex! Stellaris Prime offers a wealth of sc
 Grow a Garden codes for May 2025
May 12, 2025 pm 10:02 PM
Grow a Garden codes for May 2025
May 12, 2025 pm 10:02 PM
A popular simulated farm game, "Grow a Garden" has finally appeared on the Roblox platform! This is really a surprise, after all, farm simulation games seem to be an obvious gap on the Roblox platform. This game will bring players a real plant cultivation experience. Like many Roblox games, Grow a Garden allows players to enter redemption codes to get free in-game props, which speeds up the game. All available Grow a Garden redemption codes and redemption methods are listed below. Available redemption codes Failed redemption code How to exchange redemption codes in Grow a Garden Grow a Gar
 Infinite Lumina Farm Guide — Clair Expedition Expedition 33
May 08, 2025 am 11:01 AM
Infinite Lumina Farm Guide — Clair Expedition Expedition 33
May 08, 2025 am 11:01 AM
This guide details the fastest and easiest method to farm infinite Lumina in Expedition 33: the Renoir's Drafts strategy. Optimal Lumina Farming Location: Location: Renoir's Drafts Target: The Gestro merchant near the entrance. Repeatedly defeating
 Who to Kill Galahad or One Eye | Tainted Grail: The Fall of Avalon
May 26, 2025 am 03:05 AM
Who to Kill Galahad or One Eye | Tainted Grail: The Fall of Avalon
May 26, 2025 am 03:05 AM
At the end of the Horns of the South region, you’ll get locked into one of the biggest story decisions in Tainted Grail: The Fall of Avalon.The quest is called Shadow of the Horns, and it all comes down to this: do you side with Captain Brendan and O
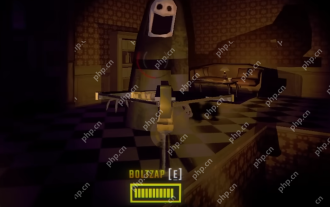 REPO Boltzap Weapon Guide
May 08, 2025 am 09:27 AM
REPO Boltzap Weapon Guide
May 08, 2025 am 09:27 AM
REPO's latest update has added three new weapons, one of which is Boltzap. It is cheap and easy to use, but it is not very lethal. This article will explain in detail how to use it and tell you when it is worth buying. How to use Boltzap Ammunition: 12 rounds Ammunition consumption: 1 crystal energy is consumed for every 4 bullets Damage: 2 points per shot Additional effects: Make enemies briefly stun Boltzap's original intention is to stun the enemy, not to kill directly. You can use it to stun the enemy and throw it into a trap. That's what it's all for. Applicable occasions for Boltzap Best Scene: There are traps nearby Not applicable scenarios: No traps, or enemies can escape the trap (for example:
